
Cheap curtain ideas run from under $20 drop cloths to $17 tea towel sets, and the right pick depends on whether you own a sewing machine or flatly refuse to.
Most of the methods below are no-sew by design: clip rings carry drop cloths without hemming, IKEA ships hem tape with the Lenda panels, and a tension rod plus pins holds a faux Roman shade together.
The catch is usually weight. A tension rod will pop loose under a vintage quilt, burlap sheds until you finish the edges, and a 70-inch shower curtain hits mid-calf on a standard window unless you plan around the shortfall.
1. Drop Cloth Curtains
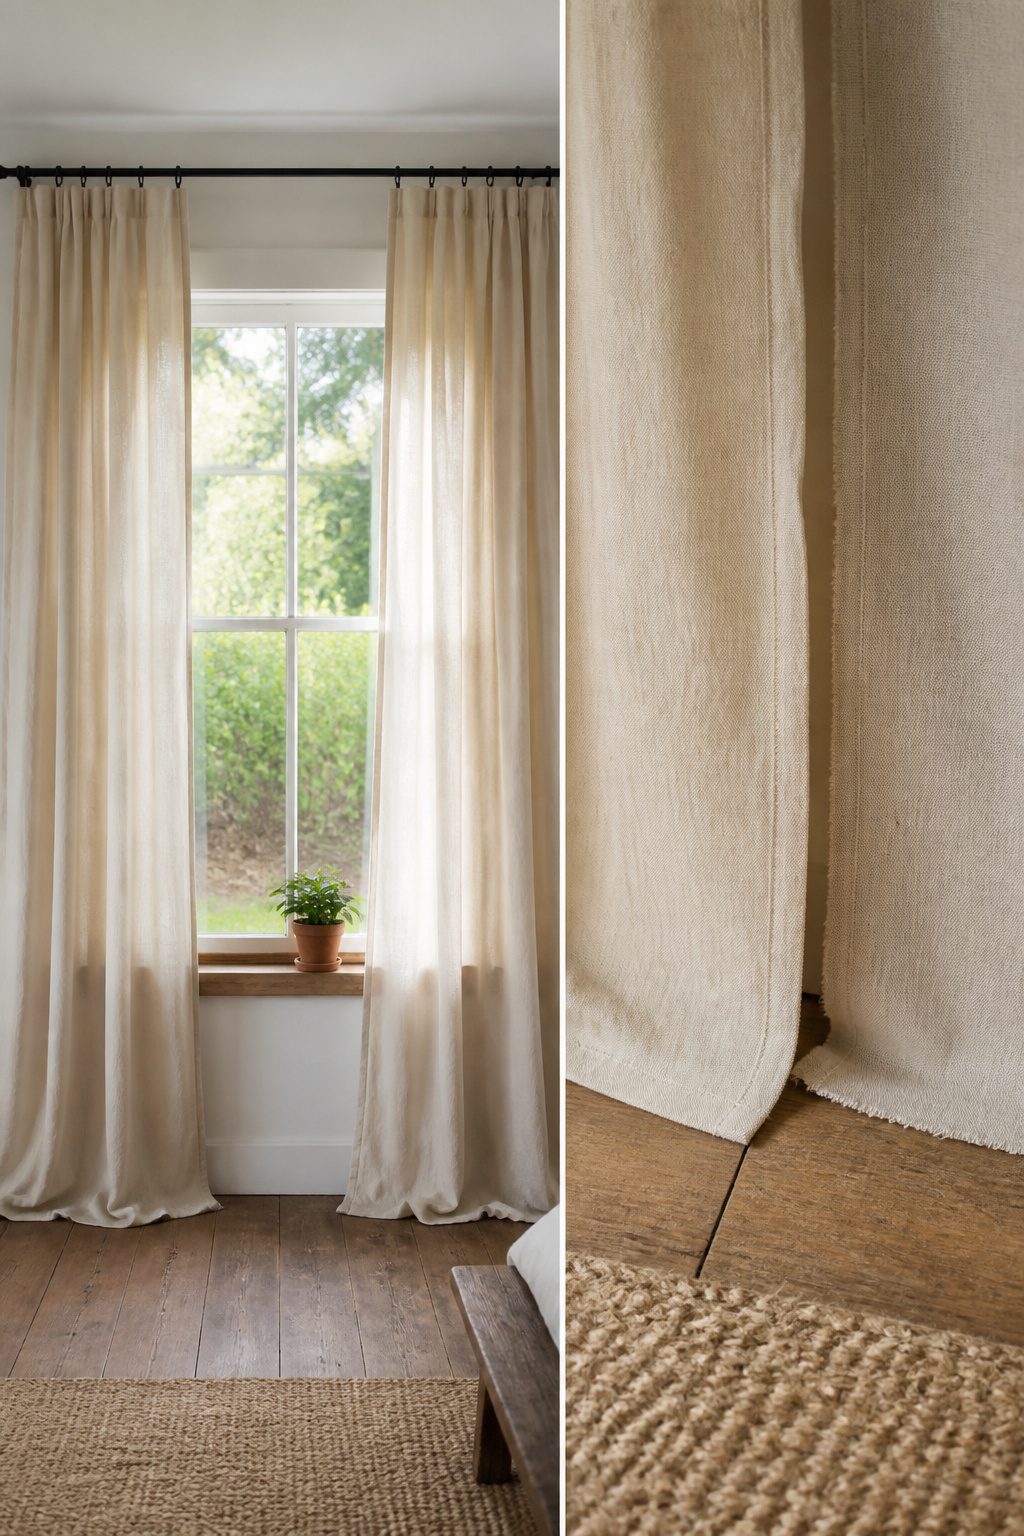
Canvas drop cloths run about $10 to under $20 for a standard 6-by-9-foot piece, which happens to be close to a single curtain panel once you split it.
The fabric is stiff and papery right off the shelf, so you will want to wash it first. After a cycle or two the drape softens into something that actually looks intentional rather than like you hung a work tarp.
The no-sew route is where this idea earns its keep.
Clip rings loop straight through the canvas weave and carry the weight fine. For the hem, iron-on tape does the job if you want a cleaner edge without borrowing a machine.
Some people paint the drop cloths before hanging them; others leave the raw canvas as-is. Painting first is the smarter order, since the cloth will lie flat and you can work outdoors without worrying about seepage.
Flat paint and a roller work, though you will want to put down a surface you do not mind staining.
The blackout versions exist too, if you need the room dark. Either way, one drop cloth per panel gives a slimmer line; double up if you want fullness.

Premium Cotton Canvas Material : Salt Earth drop cloths are made with premium quality thick cotton canvas material which provides excellent protection against paint spills, dust and can absorb any liquid on your furniture, walls, floors making your life easier. It consists of double stitched hems and seams on the sides to prevent it from ripping and tearing.
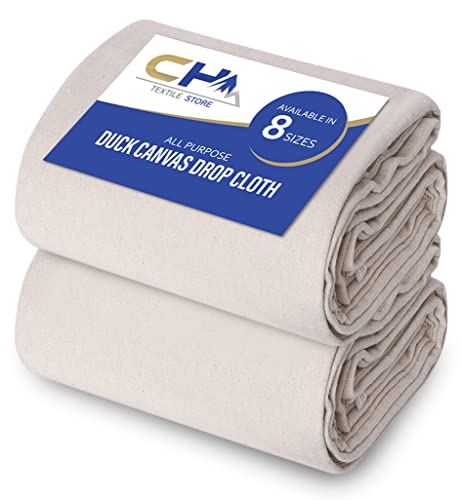
Heavy Duty Canvas Drop Cloth: Our professional grade canvas drop cloths are made of premium cotton canvas fabric that has double stitched seams. The pack offers 2 packs of 9’ x 12’ feet, of paint drop cloth that is ideal for protecting furniture paint, floor covering, or being used as drop cloth curtains. It Provides you With a stress-free experience for both indoor and outdoor use.
Heavy Duty Canvas Drop Cloth: Our professional grade canvas drop cloths are made of premium cotton canvas fabric that has double stitched seams. The pack offers 2 packs of 6’ x 9’ feet, of paint drop cloth that is ideal for protecting furniture paint, floor covering, or being used as drop cloth curtains. It Provides you With a stress-free experience for both indoor and outdoor use.
2. IKEA Curtain Hacks
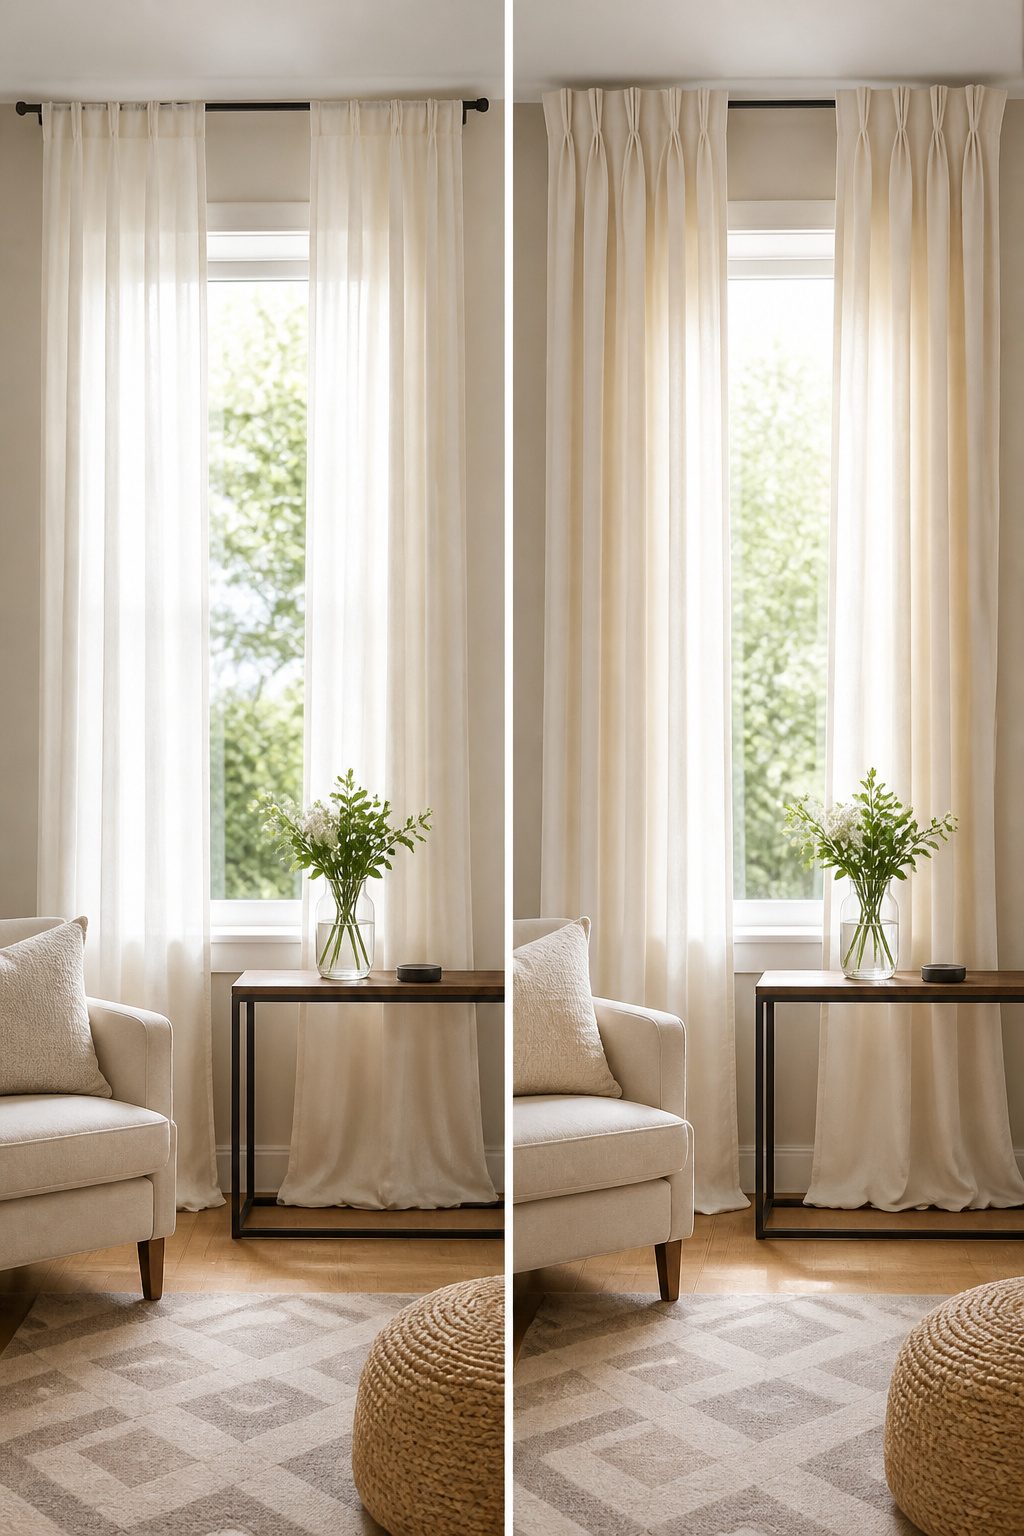
IKEA’s curtain lineup is where cheap curtain ideas stop looking cheap. The Lenda panels run long, 96 inches before hemming, which matters more than it sounds.
Extra length lets you hang the rod at ceiling height and still have fabric pooling at the floor, or hem to exact window length without ending up with a awkward high-water gap.
Hem tape ships in the package, so the no-sew route is built in, not an afterthought.
For the upgrade that reads custom, pleating tape is the move.
Tibast curtains come with it stitched to the header already. Buy the matching hooks, pinch the pleats, and the same polyester-cotton panel that hung flat suddenly carries the weight and shadow lines of something priced three times higher.
Two panels per side fills out the stackback when the curtains are open; one panel reads rental, two read intentional.
I have seen the blush-to-pinch-pleat hack enough times to trust the method.
Basic IKEA curtain, pleating tape, an hour with the hooks. The result passes for tailored in photos and in person, as long as the math on the width is right.
Order too narrow and the pleats pull open; the 96-inch length gives you room to correct, but width is harder to fix after the fact.

NOT WASHABLE: Temporary hold only — hand wash gently in warm soapy water and peel off slowly without forcing, then just reapply a fresh strip (no tools or ironing needed); avoid machine washing or drying, and do not use on heavy or delicate fabrics.


Iron required, requires heat to activate!
3. Tea Towel Curtains
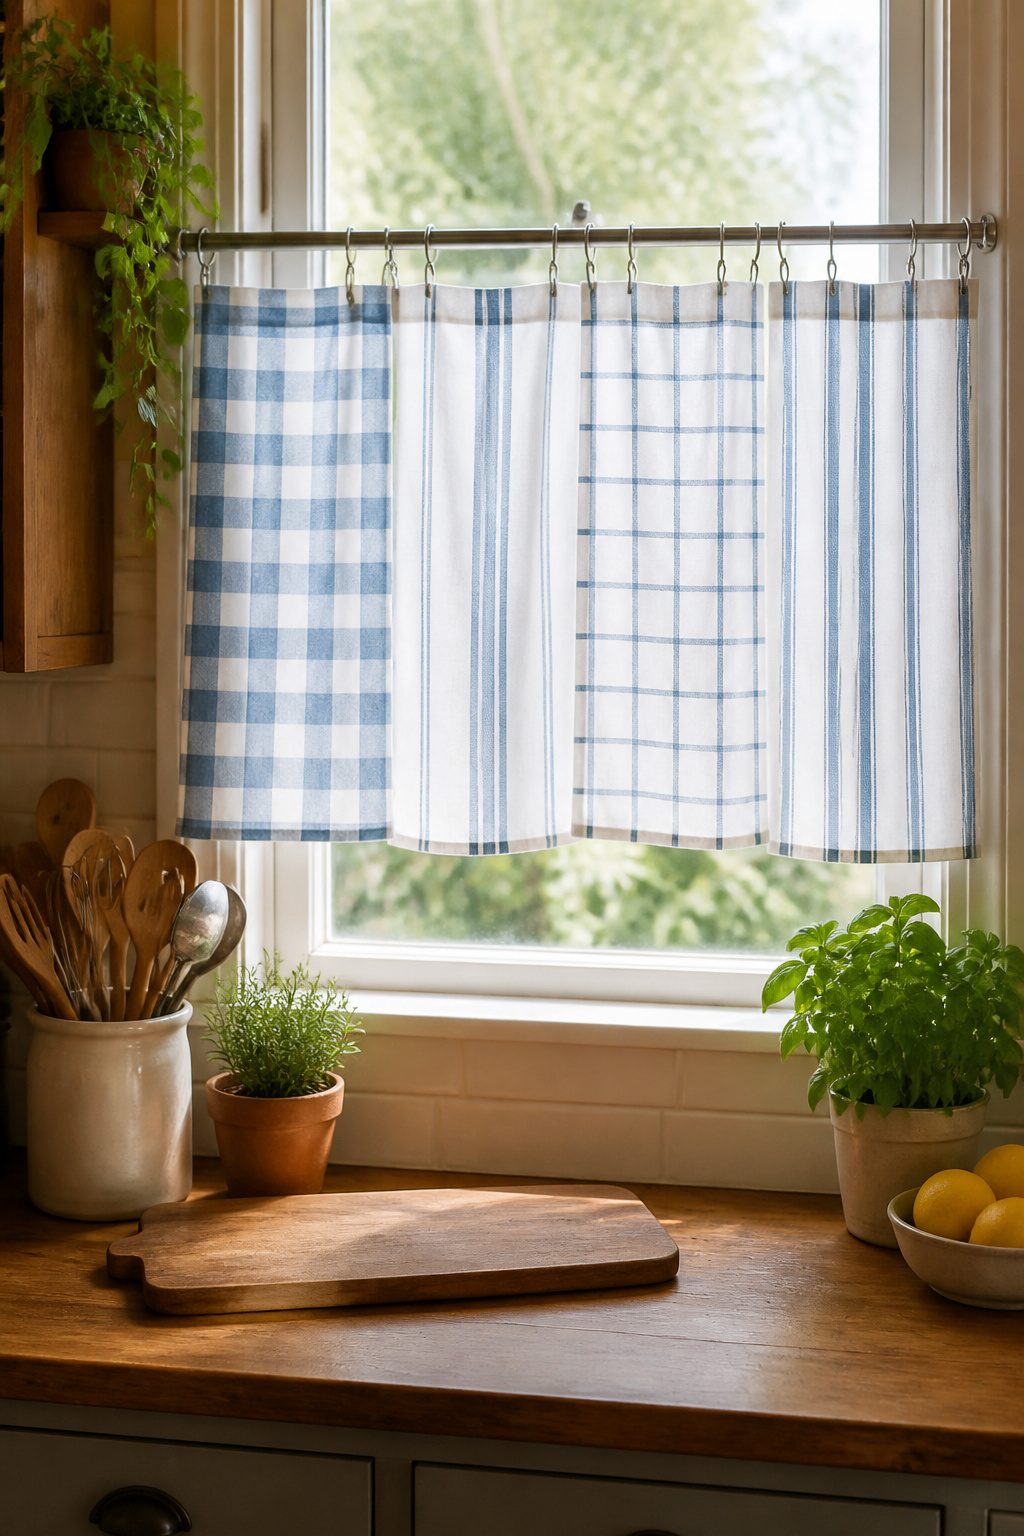
A 12-pack of basic cotton tea towels runs about $17, which is enough fabric to dress two or three small windows if you plan the folds right.
The trick is treating them as cafe curtains: hung flat across the lower half of a window with clip rings, they read as intentional rather than improvised.
The scale works best in kitchens and bathrooms, where a 16-by-28-inch towel looks proportional to the glass and the hardware stays visible above the frame.
Two towels side by side cover a standard 24-inch window with a slight overlap in the middle; three across a 36-inch window sit almost flat.
Pattern choice matters more than with larger panels because the repeat is small and the eye is close. A set of twelve matching towels keeps the look quiet; mixing two prints from the same palette reads busier but still coherent.
The finished curtain stops well above the sill, which is what you want in a room where counters and sinks sit below.
Water splashes wipe off cotton easier than linen blends, and at this price point replacement costs less than dry cleaning.
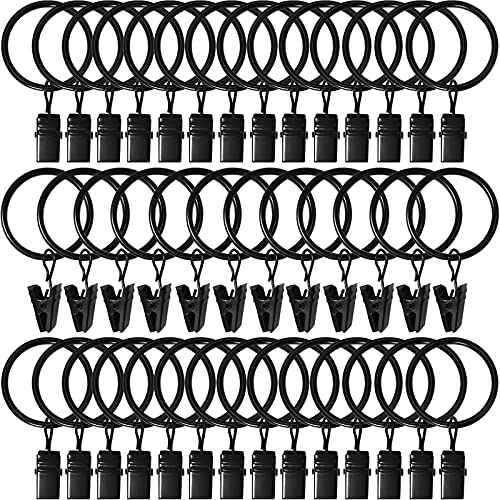
CURTAIN RINGS CLIPS PACKAGE: Set of 40 strong curtain rings with clips. Clip rings for curtains decorative drapery window.

CURTAIN RINGS CLIPS PACKAGE: Set of 40 gold color curtain rings with clips. Clip rings for curtains decorative drapery window.

This set includes 14 small drapery eyelet curtain rings with loop eyelet for panel pin hooks.
4. Shower Curtain Windows
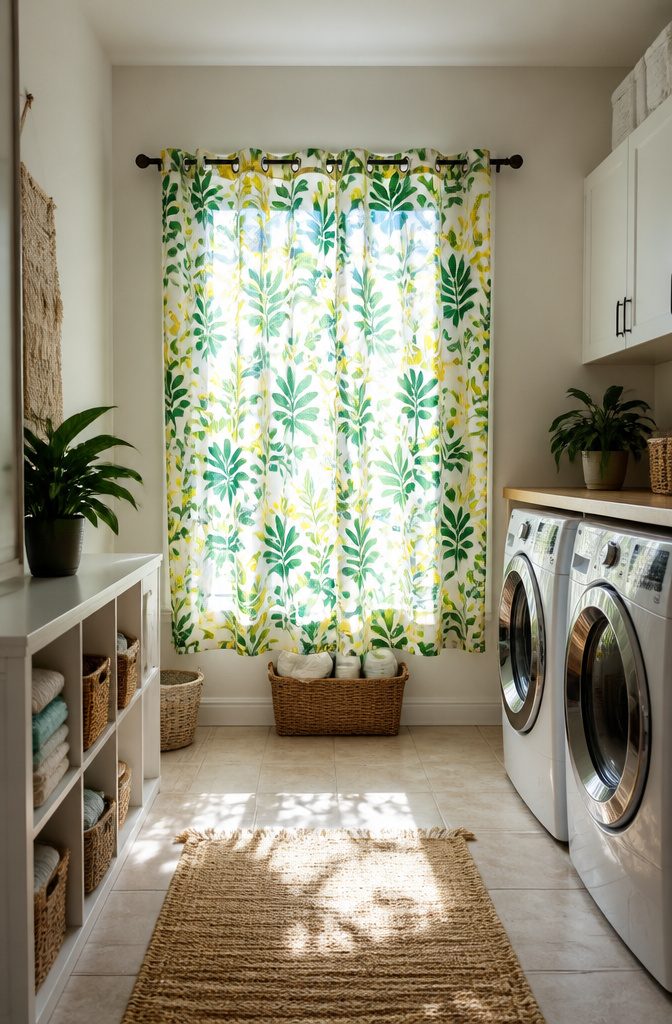
A standard shower curtain runs about 70 inches square, which is wider than most fabric sold off the bolt.
That width matters when you are trying to cover a large window without sewing panels together, and the price per yard usually beats anything in the drapery section.
The built-in hardware changes the math too: grommets or rod pockets are already finished, so you can often skip rings entirely and clip or thread ribbon straight through.
The length is where this hack shows its limits. Seventy inches hits somewhere around mid-calf on a typical window rather than skimming the floor, which is the look most people picture when they hang curtains.
You can add a plain fabric extender panel to the bottom if the pattern allows, but that starts to erode the savings that made the shower curtain appealing.
Fabric shower curtains work; plastic ones read as exactly what they are and collect dust like a staticky magnet.
Where this pays off is accent windows, laundry rooms, or any space where you want a bold pattern without the bold price.
The whimsical prints that show up in shower aisles, stripes and botanicals you rarely see in drapery, work best as a single statement rather than repeating across a whole house.
I rotate the panel 90 degrees when the pattern direction allows it, using the length as the width to span a window without a center seam.
The existing hems on all four sides mean less finishing work, provided you plan your cuts to keep as many factory edges intact as possible.

Material: 100% Polyester

COLOR and SIZE: White pleater tape 1 roll of 6 yards lenght 2.8 Inch width

COLOR and SIZE: White pleater tape 1 roll of 10 yards lenght 2.8 Inch width
5. Burlap Curtains
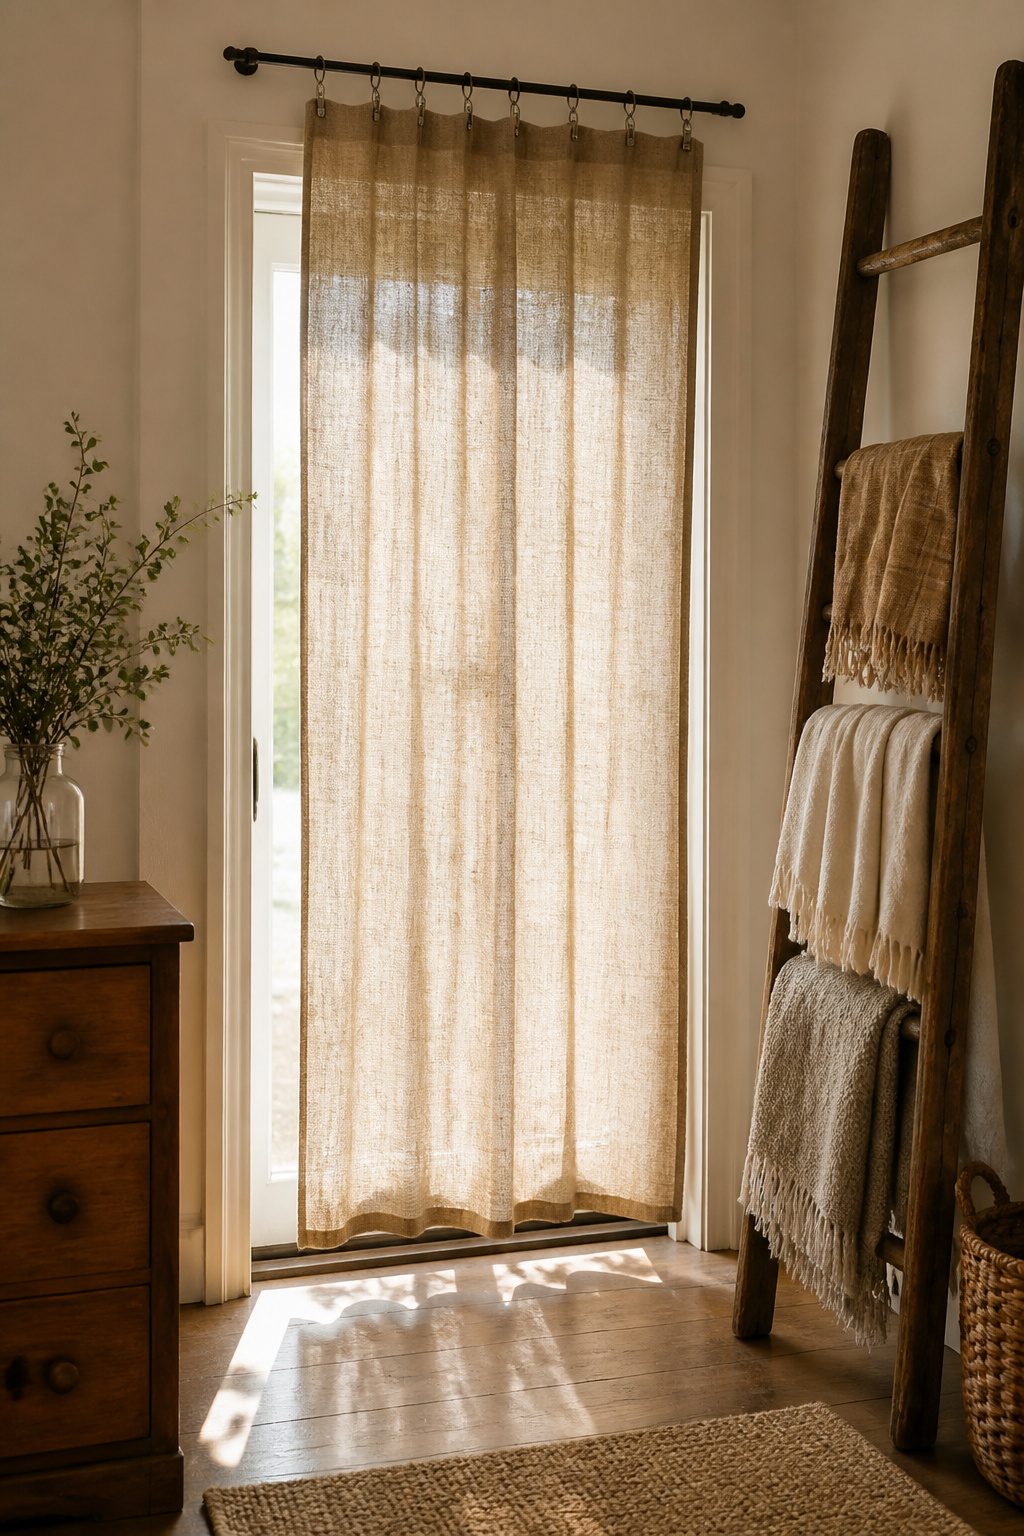
Burlap lands in every cheap curtain search for a reason.
Craft stores sell it by the yard for a few dollars, and the loose, open weave gives windows a rough farmhouse texture that heavier fabrics can’t fake. The catch is the shedding.
Unfinished edges release fibers until the whole room looks like a hayloft, so clip rings beat a rod pocket here: they grip the top without requiring a hem, and the weight hangs straight enough to read as intentional rather than unfinished.
If you want sides that look cleaner, fabric glue and a hot iron do the work.
Fold the edge a quarter inch, press it flat, fold again closer to a half inch, and run a thin line of glue inside the second fold.
Paper clips hold it every four to six inches while it dries. The glue line matters more than you’d think: too much and it bleeds through the weave, too little and the burlap keeps fraying.
A single panel takes an afternoon to set, and the result holds up fine as long as no one yanks the fabric hard.

Sufficient for replacement: you will get totally 4 pieces (2 sets) roman shade wall l brackets in one package, enough quantity for meeting your daily demands; They can surprisingly work well

Packaging: You can receive 8sets of blinds cord holder.

Packaging: You can receive 4 sets of blinds cord holder.
6. Tablecloth Curtains
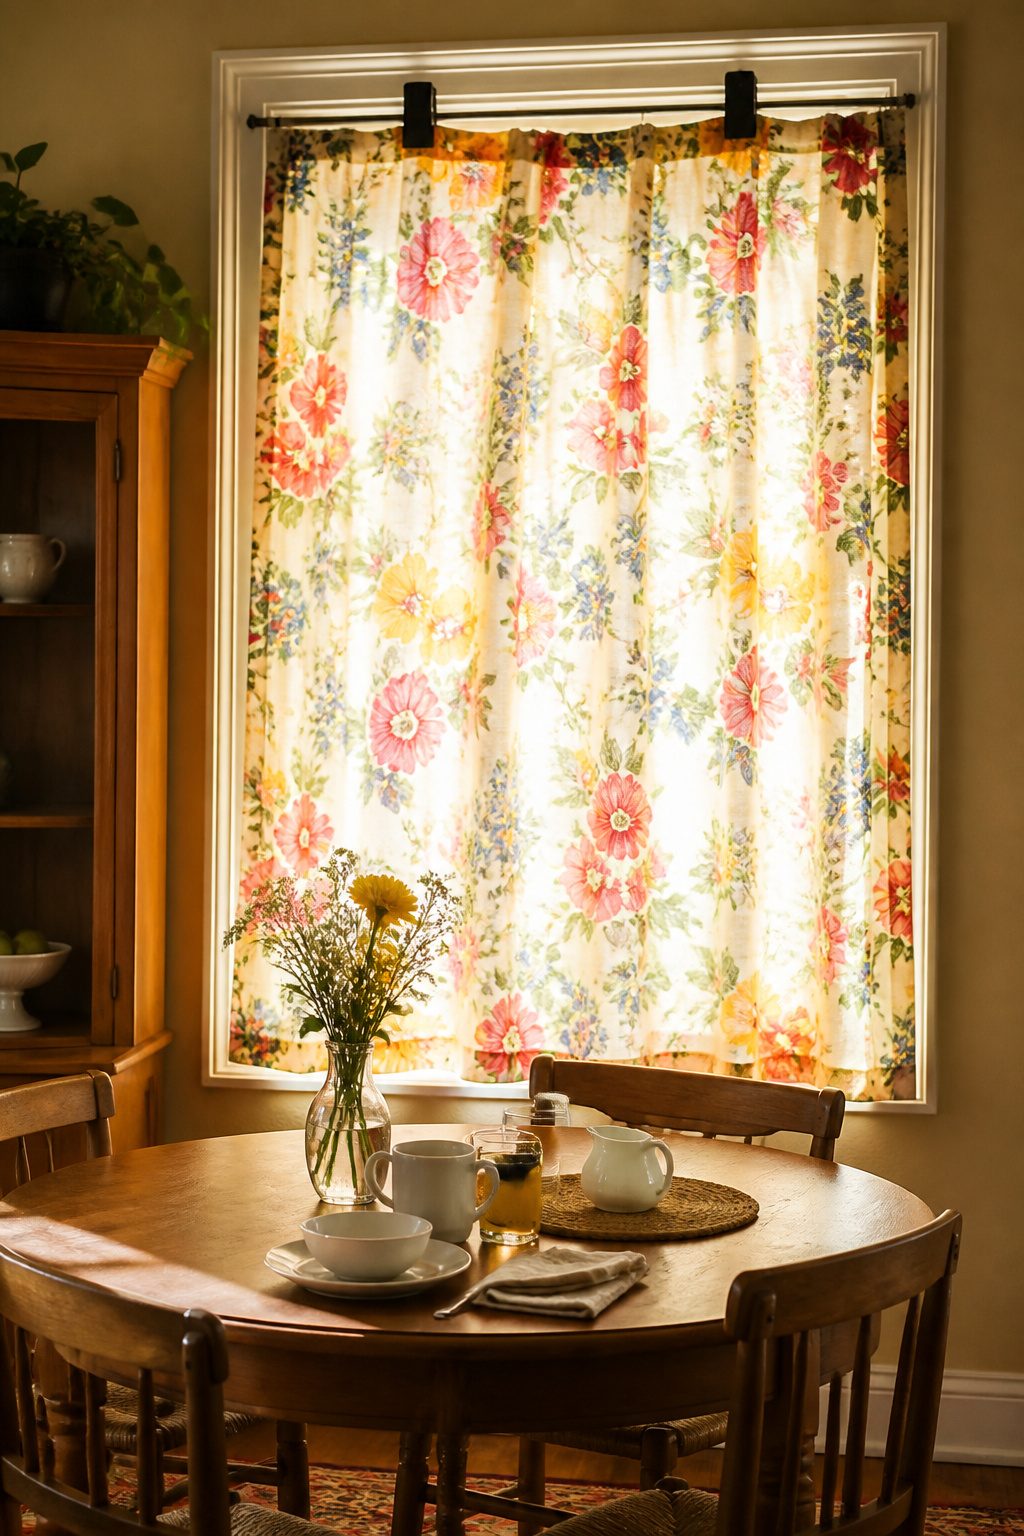
Tablecloths carry patterns that curtain fabric rarely touches at the same price point. A 60-by-84 inch oblong cloth maps cleanly to a standard 30-by-48 inch window hung high and wide, rod to floor, with width to spare.
Look for hemmed edges and a weight that falls straight without lining; a flimsy cloth balloons on a breezy sill and reads as exactly what it is.
The catch is proportion. A 52-by-70 inch cloth, common at discount retailers, leaves you short for anything but a narrow bathroom window or a café curtain.
I browse the clearance rack after holiday weekends, when the seasonal prints nobody bought hit seventy percent off. The pumpkin tablecloth I passed on last October still haunts me; the burnt orange would have read as intentional against gray walls.
Rod pocket or clip rings, either works. Clip rings save you from sewing if the cloth has no sleeve, and they let you adjust the break at the floor.
Puddling adds two to three inches past the rod-to-floor measurement, though I skip it in rooms where the vacuum runs weekly.

Heavy Duty Canvas Drop Cloth: Our professional grade canvas drop cloths are made of premium cotton canvas fabric that has double stitched seams. The pack offers 1 pack of 6' x 9’ feet of paint drop cloth that is ideal for protecting furniture paint, floor covering, or being used as drop cloth curtains. It Provides you With a stress-free experience for both indoor and outdoor use.
Heavy Duty Canvas Drop Cloth: Our professional grade canvas drop cloths are made of premium cotton canvas fabric that has double stitched seams. The pack offers 1 pack of 9’ x 12’ feet, of paint drop cloth that is ideal for protecting furniture paint, floor covering, or being used as drop cloth curtains. It Provides you With a stress-free experience for both indoor and outdoor use.

Multipurpose: Avalon Home painting tarps are ideal for protecting your Home & Office Valuables from dust, paint spills, crafting, and many other indoor & outdoor projects. These paint drop cloth canvases are made from 60% Cotton and 40% Polyester.
7. Vintage Quilt Curtains
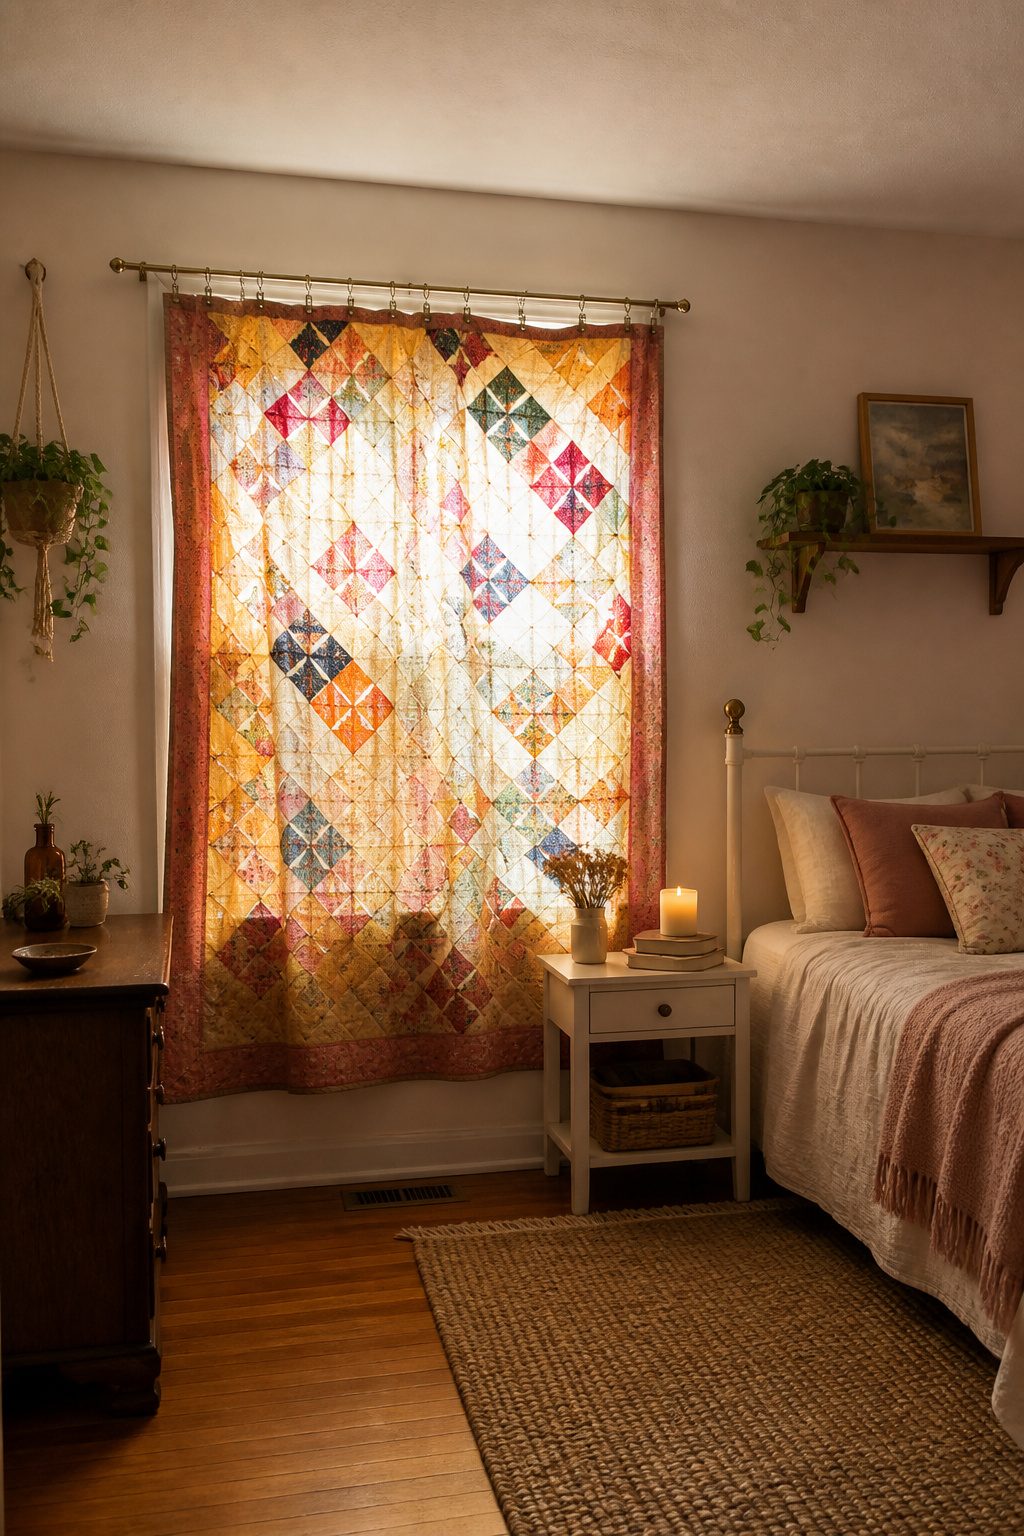
A vintage quilt hung as a curtain carries a warmth that printed fabric from a bolt rarely matches.
The patchwork and age-softened batting block drafts better than standard lined panels, which matters in older rentals with single-pane windows. Indian block prints and American patchwork quilts both work for this, though the weight difference between them is significant.
The real limit is the rod. Standard hardware meant for two pounds of voile will bow or pull from the wall under a full-size quilt.
Brass cup hooks driven into a stud can take more load than a tension rod, and bamboo poles or even a repurposed fishing rod spread the weight across more wall contact than a narrow curtain rail.
Curtain rings with clips let the quilt hang without piercing the fabric, so you can fold it back into bedding when the season turns.
For a renter, this is a weekend project with an exit strategy. The quilt goes back to the chest, the hooks fill with spackle, and the window is bare again by Monday.

No Sew Hemming Tape: Iron required, requires heat to activate. Transform your garments effortlessly with our hem tape for pants and dress

【Quantity & Packaging Notice】 2 Rolls Included in 1 Pack: Contains 1 roll of 1/4" x 49ft and 1 roll of 1/2" x 49ft (Total 98FT). Note: Both rolls are securely packed together in a single package—please check the inner layer if you think any roll is missing. Specifically designed for clothing repair, folding, and crafting. Whether used for temporary or daily repairs, these sizes ensure efficient and convenient use.

CREATE CLEAN, PROFESSIONAL HEMS WITHOUT SEWING – Whether you're tailoring pants, adjusting curtains, or finishing a dress, this hem tape iron on design offers a quick, no-sew solution that saves time and delivers lasting results. Perfect for anyone seeking a stress-free hemming method with a polished finish.
8. DIY Valances
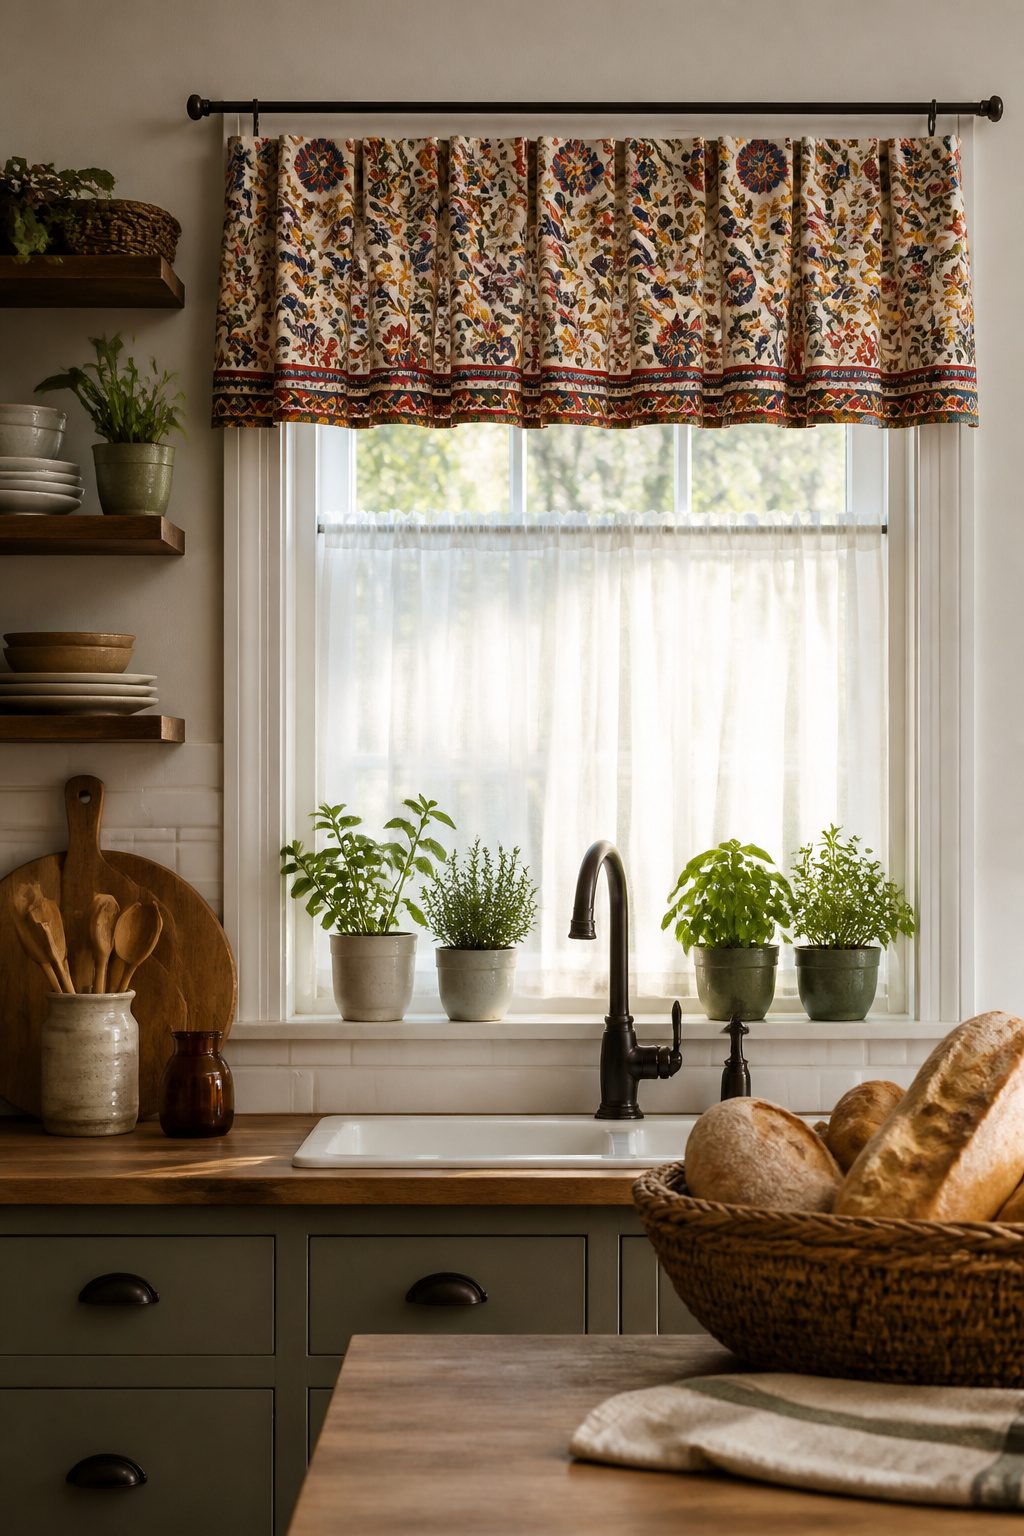
A valance eats up less fabric than full panels, which is why scraps and table runners suddenly look useful.
The board for the window was 36″ long, and the runner plus six extra inches of fabric for each pleat brought the total to 48″. That is a short afternoon’s work for a window that only needs a little softness up top.
The length that reads right sits about a quarter of the way down the glass, maybe fourteen to sixteen inches on a standard window.
Shorter than that and the treatment looks like an afterthought; longer and you start fighting for light without gaining any privacy.
A table runner turned valance works especially well in a bathroom or over a kitchen sink, where full curtains would tangle in the work zone.
Pleats take the extra fabric and give the runner some weight so it does not hover like a strip of tape.
Staple them to a 1 x 2 cut to fit inside the molding, then screw the board in place. No sewing, no hemming, and the whole thing lifts off when the lease ends or the mood changes.

PACKAGING INCLUDES: Set of 20 black drapery hooks. They matched perfect with the curtain rod, these curtain ring clips the clips are very tight so the curtain will not slip out, they were also a great value for the money.

This set includes 14 drapery curtain clip rings for fabric panels, curtains or draperies.

CURTAIN RINGS CLIPS PACKAGE: Set of 40 strong curtain rings with clips. Clip rings for curtains decorative drapery window.
9. Mismatched Curtain Panels
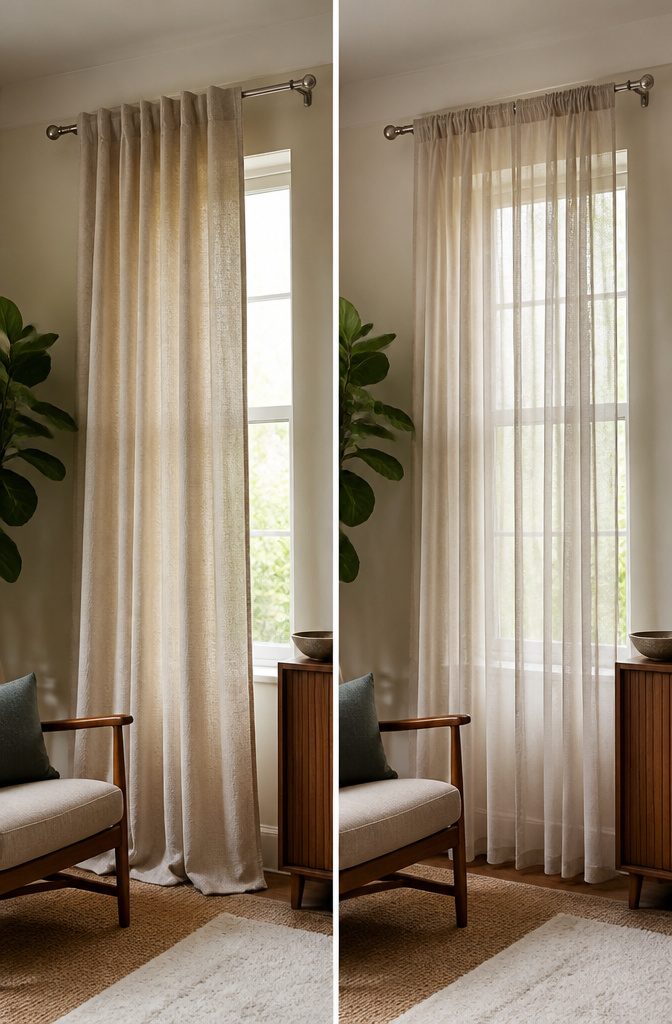
Mismatched curtain panels read as intentional only when something ties them together.
I learned this the hard way in a rental where I hung a heavy linen panel next to a sheer cotton one, same length, same rod, and the room still looked like I’d run out of fabric halfway through.
Color is the simplest unifier: two completely different textures in the same warm white, or two patterns that share one ground color, will look collected rather than accidental.
Weight matters almost as much. A stiff canvas panel beside something that billows at the same air vent just looks broken; similar drape and thickness let the eye accept variation in the surface.
Rod style does more work than people expect. Matching hardware across every panel, even mismatched fabric, signals that the arrangement was considered.
I’d skip finials that compete, though. Plain caps or simple rings keep the focus on the fabric story.
This approach works best in rooms that already have some eclectic energy: a collected-over-time living room, a bedroom with mixed wood tones. In a space that leans modern and minimal, mismatched panels tend to read as error.
The cost advantage is real if you’re pulling from remnants, sample sales, or curtains left behind by previous tenants, but the savings disappear if you buy full-price yardage and still have to edit for cohesion.

PACKAGE CONTENTS: 11 yards (10 meters) of white curtain pleating tape and 30 pieces of stainless steel 4-prong pleater hooks for complete curtain transformation

Premium Material: The pleating tape for curtains is made of premium quality polyester fiber encryption, which is resistant to abrasion and wrinkle; Curtain pleat hooks are made of premium stainless steel has excellent rust, wear and corrosion resistance

Our Curtain tape is made of full cotton, Anti-aging, anti-ultraviolet, can be repeatedly cleaned, service life of more than 20 years.
10. No-Sew Roman Shades
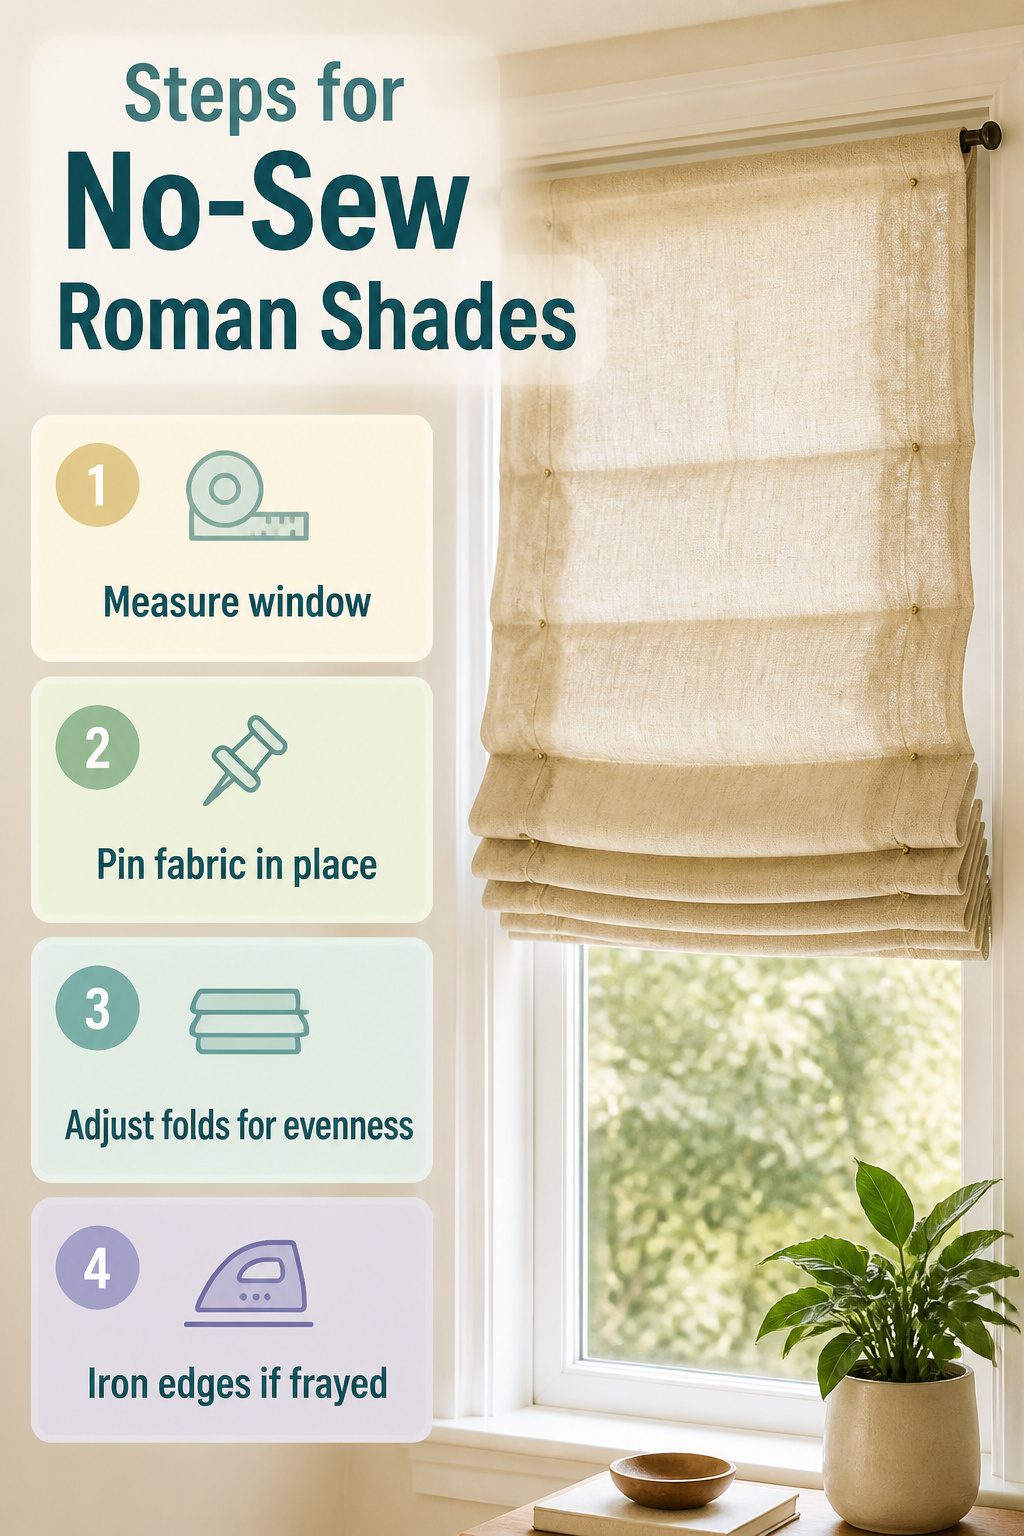
A rectangle of fabric pinned into folds is the whole trick here. Thistlewood Farms built a faux Roman shade exactly this way: no needle, just pins holding the pleats against the glass.
The lift still works because the fabric stacks on itself as you raise it; gravity does the lowering, and your hand does the rest. No cord lock, no pulleys, no hardware beyond a tension rod or a few cup hooks.
The place this stalls is usually the measuring. Beginners want the folds even before the shade is mounted, but the pin method only looks right once the fabric hangs and settles.
Pin while it is on the window, not on the floor. Drop cloths or medium-weight poly-cotton blends hold the crease without sagging; burlap will not, and washed drop cloths need pre-shrinking or the folds shift after the first laundry day.
Iron-on hem tape can finish the raw edges if the fabric frays, though a clean factory edge on a drop cloth skips that step entirely.

Package: You will receive 8 transparent blind clips, with 8 screws, and 8 expansion screw tubes

Product:The whole body of the trolley is made of new ABS material, which is firm and durable, not easy to break or deform, and can be used for a long time. Tip: This link is only a rod, does not include roller blinds

VERSATILE CORD COMPATIBILITY: Accommodates up to three professional lift cords, suitable for 1.4mm, 1.6mm, 1.8mm, 2.0mm, and 2.2mm string sizes.
No-Sew Methods That Hold Up
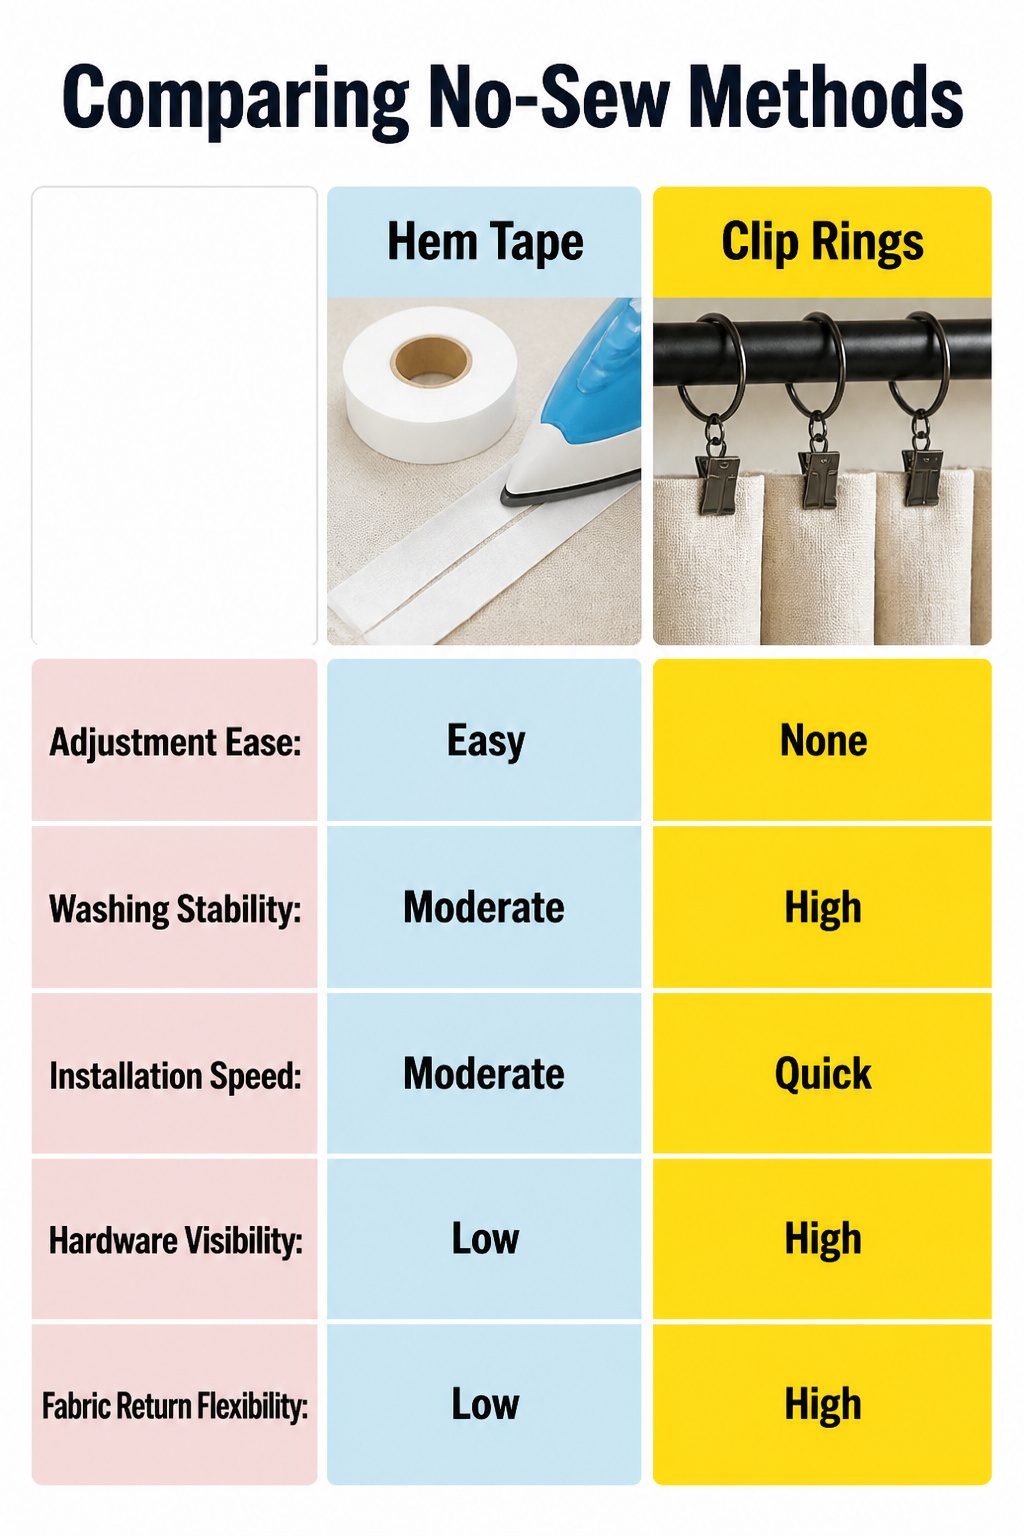
Iron-on hem tape, clip rings, and fabric glue each solve a different no-sew problem, and the wrong match is what turns a Saturday project into a redo.
Hem tape wins for length adjustments. IKEA includes it with curtains like the Lenda for good reason: fold, press with a hot iron, and the panel hits your floor exactly where you want.
The catch is washing. Hem tape softens in warm water, and after a few cycles the bond creeps.
One source noted it "worked perfectly" on a first pass, but the same bond failed later when the panel shifted in the dryer and the hem released in sections.
Cold water and line drying buy time, but this is not the method for curtains that will see regular laundering.
Clip rings skip the hem question entirely.
Pinch the fabric top, hang, done. They work on drop cloths, burlap, bedsheets, anything with enough weight to drape straight.
The trade is visible hardware and a slight gap at the rod, which reads casual whether you want it to or not. For renters who might need the fabric back as a sheet later, clip rings leave zero trace.
Fabric glue demands the most patience and rewards it least.
The process is specific: quarter-inch fold, steam press, half-inch fold, press again, thin glue line, paper clips every four to six inches, then flat drying undisturbed. Skip the steam step or overload the glue and the seam ridges or seeps.
Even done right, the bond stiffens where it lands, so the drape dies at every hem. I would use it only where no other method reaches, like a side hem on a panel already hung.
Hanging High and Wide
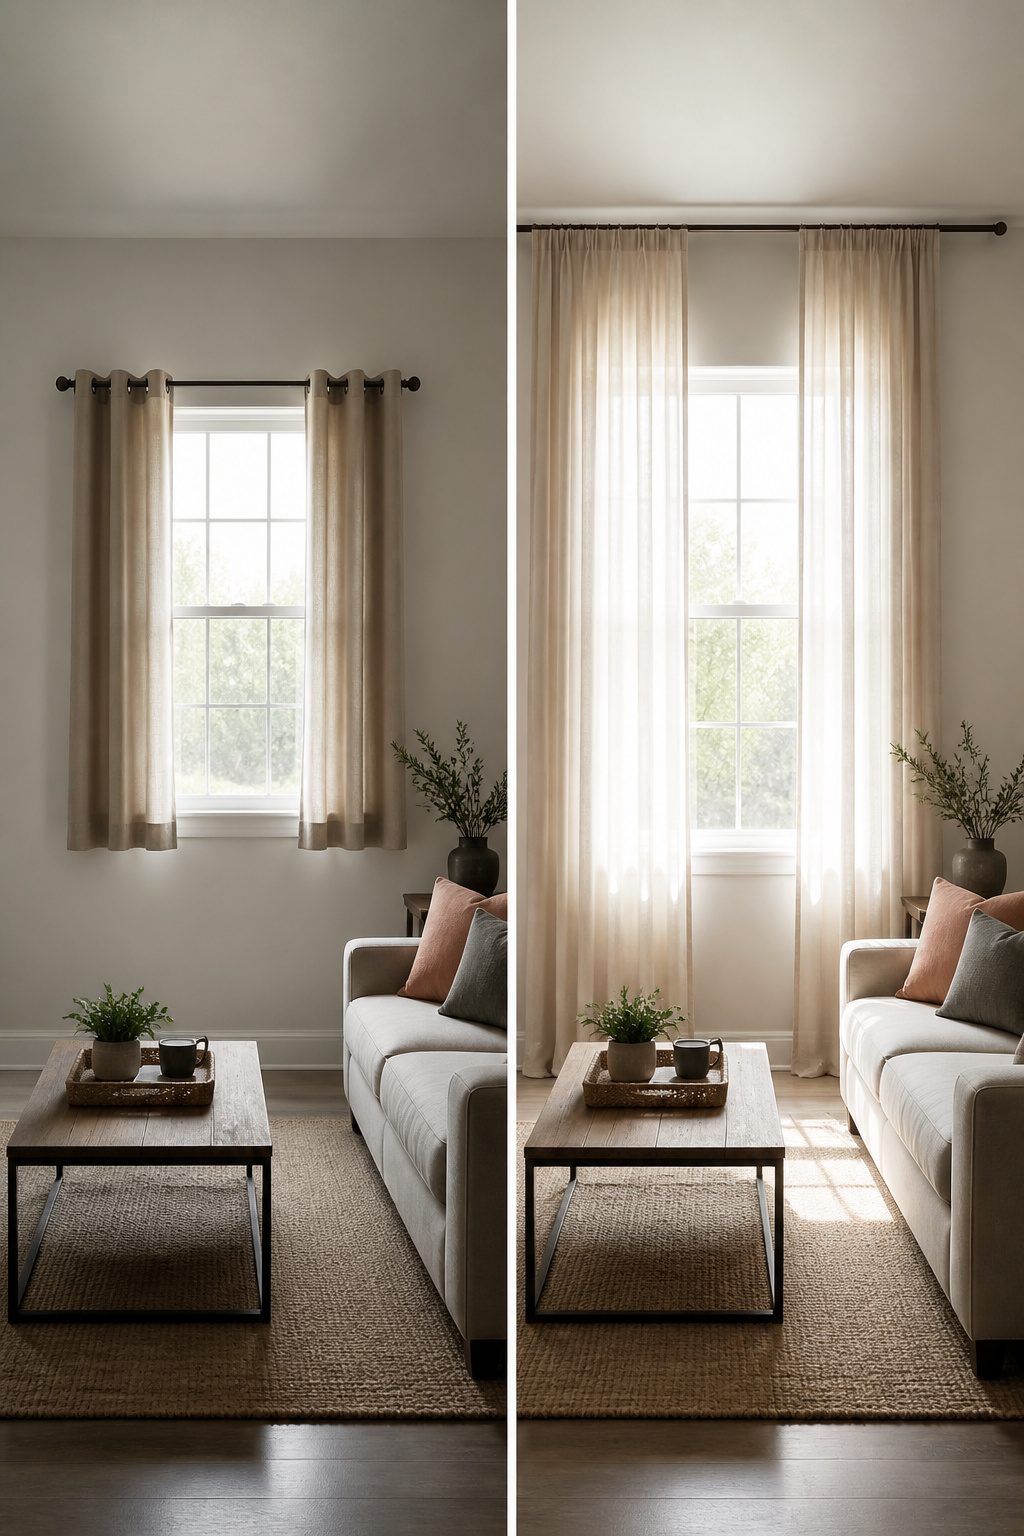
The internet says to hang rods 4 to 6 inches above the window frame, but that measurement shifts with what the room actually gives you.
In my place, the living room window sits about fourteen inches below a plain drywall ceiling with no crown moulding to work around.
Six inches up looked stingy there, almost apologetic. I pushed to ten and the window finally felt like it belonged on that wall.
Width mattered more than I expected.
One source suggests extending the rod at least 8 inches past the frame so open panels stack on the wall, not the glass. I tried 8 inches in a narrow bedroom and the curtains still ate light.
Bumping to twelve solved it. The tradeoff is real: the wider you go, the more panel width you need to cover the span without looking stretched.
For a small window stranded on a big wall, hanging really wide changes the whole proportion. The drapery fills visual space and the window reads larger than it is.
The panels should overlap the casing by just a few inches when closed, aligning the inside edge with the frame when open. That part I got wrong first, hanging too narrow and centering the window instead of expanding it.
Fabric Weight and What Works
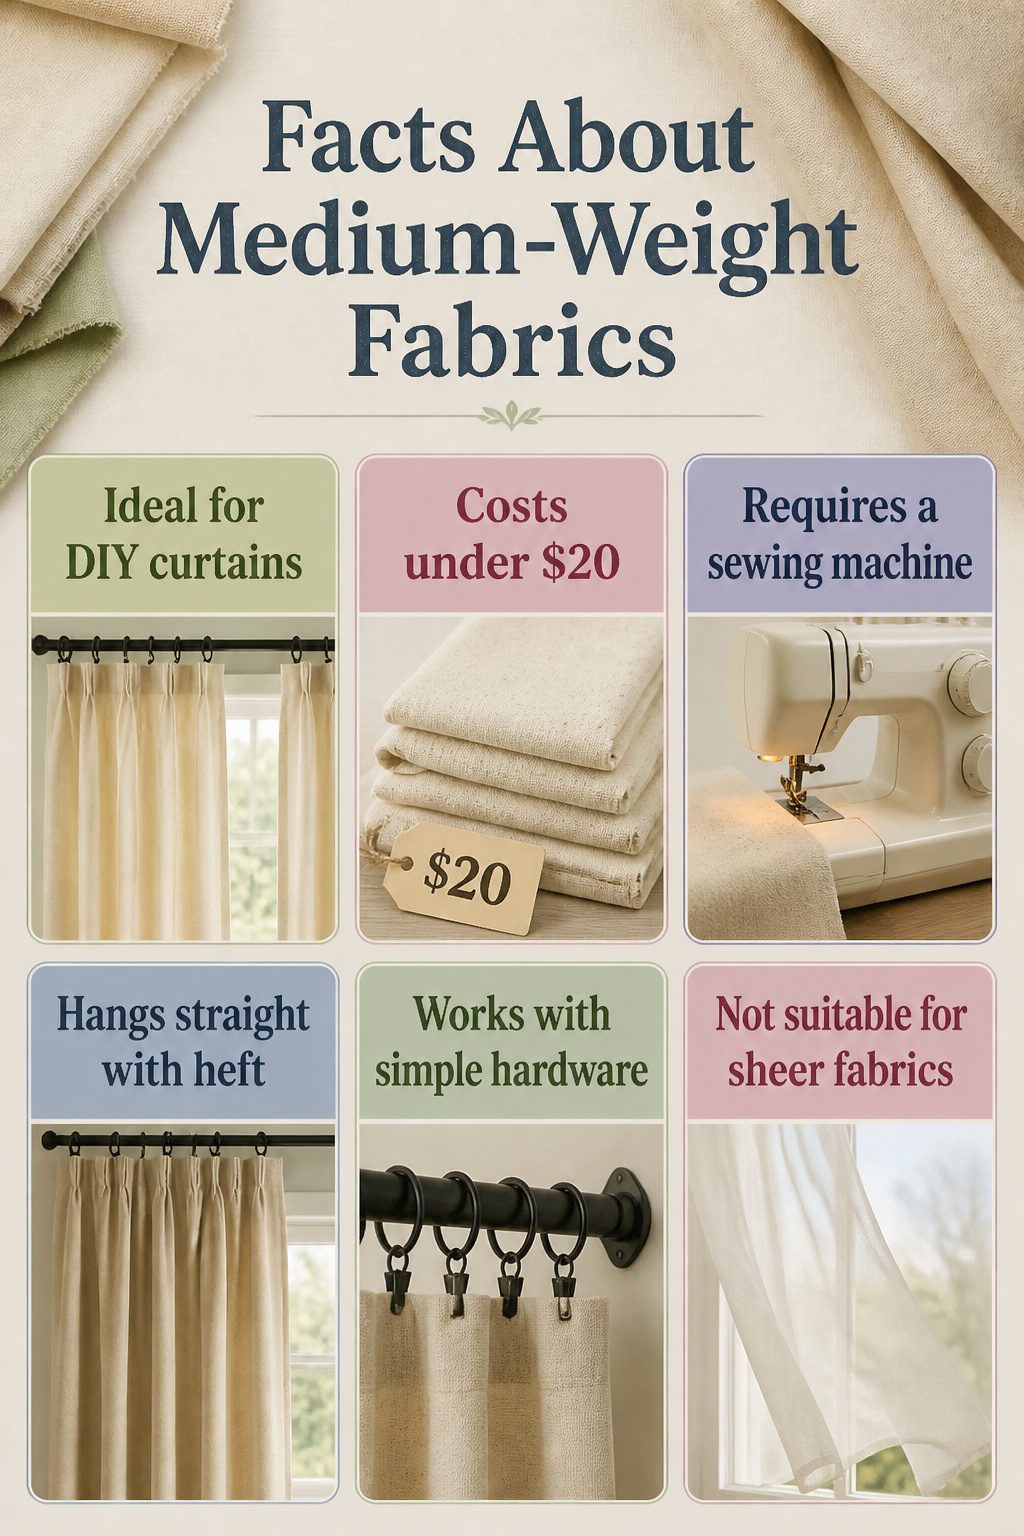
Medium-weight fabrics sit in the sweet spot for DIY curtains. Poly-cotton blends and washed drop cloths carry enough heft to hang straight without fighting you, and they feed through a sewing machine without complaint if you are hemming edges.
I have seen drop cloths go for under $20 at the hardware store, which leaves room in the budget for mistakes.
Too light, and a breeze sends everything sailing.
Sheers and thin cottons billow, tangle, and offer about as much privacy as a screen door. The fabric weight that works for a summer scarf will betray you at the window.
Too heavy, and you are asking more of your hardware than it was built for. A tension rod in a rental window will sag, slip, or pop loose entirely under the load of canvas or upholstery-weight yardage.
The rod is not the place to test your luck. Clip rings and simple rods work better with fabric that knows its own limits, and medium-weight cloth knows exactly where those are.
DIY Curtain Rods From the Hardware Store
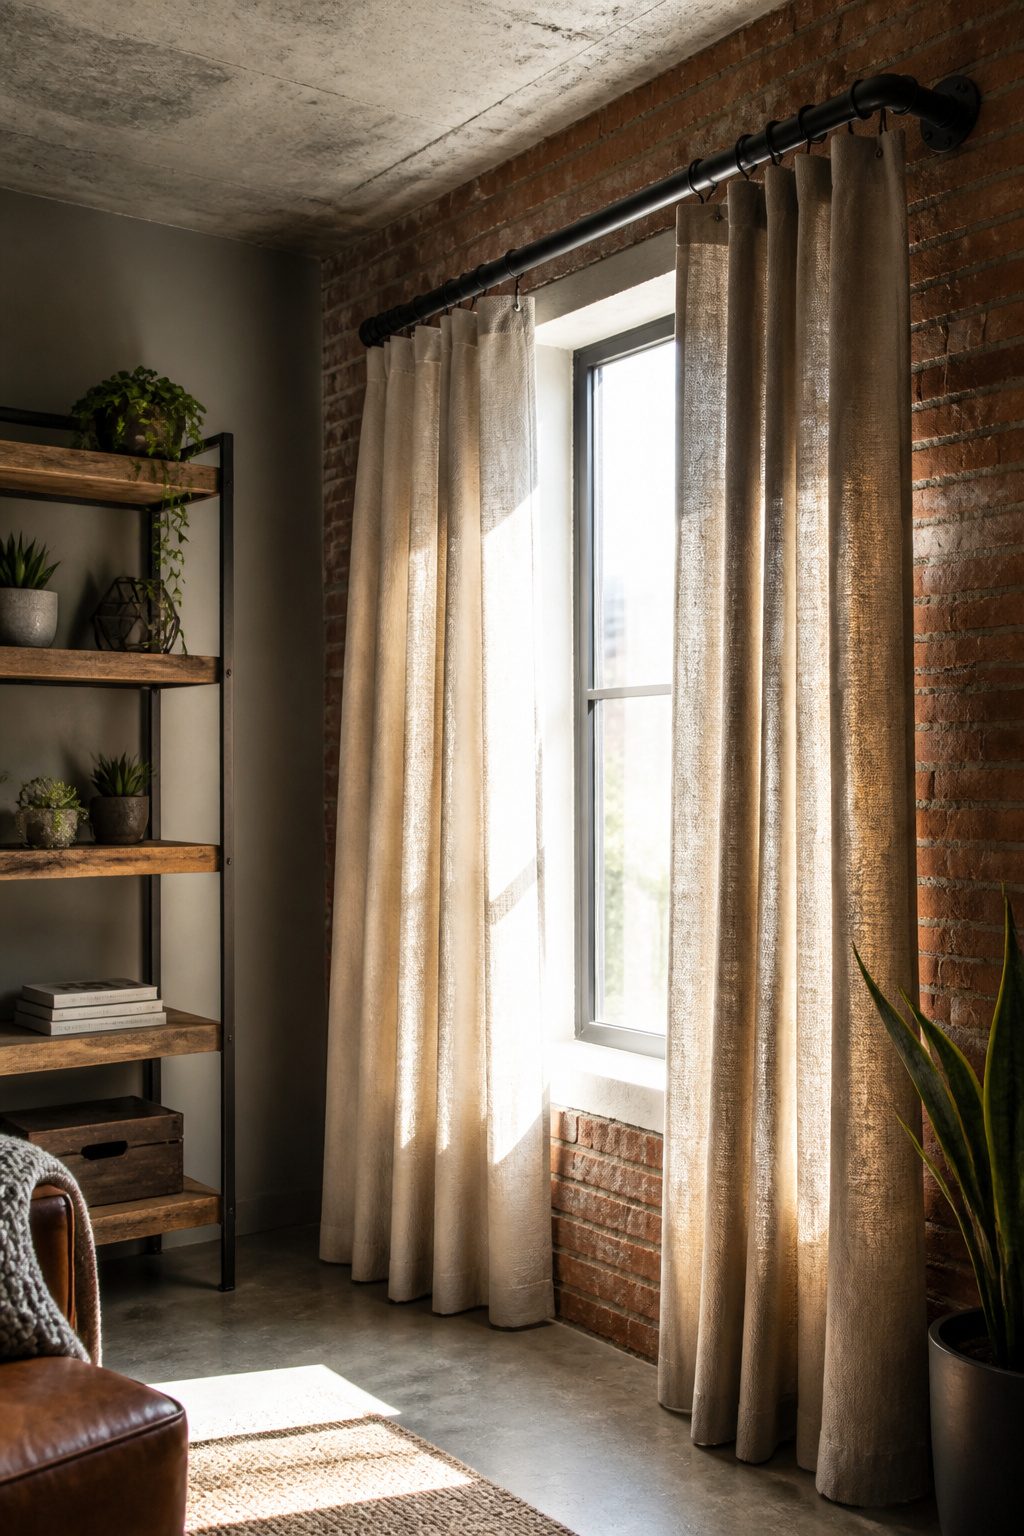
Wooden dowels, plumbing pipe, and even branches can all carry a curtain if you pick the right diameter.
A 1¼-inch rod needs rings ¼ to ½ inch larger, so 1½-inch rings fit without catching. I learned that sizing the hard way on a galvanized pipe I ran across a 72-inch window.
The pipe itself was cheap, but the raw metal looked like a construction site, so I sanded the surface, wiped it with vinegar to cut the grease, and brushed on two coats of matte black spray paint meant for metal.
It dried to a finish that passed for store-bought from ten feet away.
A branch I tried did not pass at all. I cut it to length, stripped the bark, and sealed it with polyurethane, but six weeks later it had sagged enough that the curtains pooled on the floor.
Wood that grew curved wanted to return to that curve once the weight pulled on it.
Plumbing pipe and dowels stay straight because the grain runs lengthwise in a manufactured cylinder; a branch fights gravity with its own history. For a weekend project, the hardware store wins.
Customizing Store-Bought Curtains
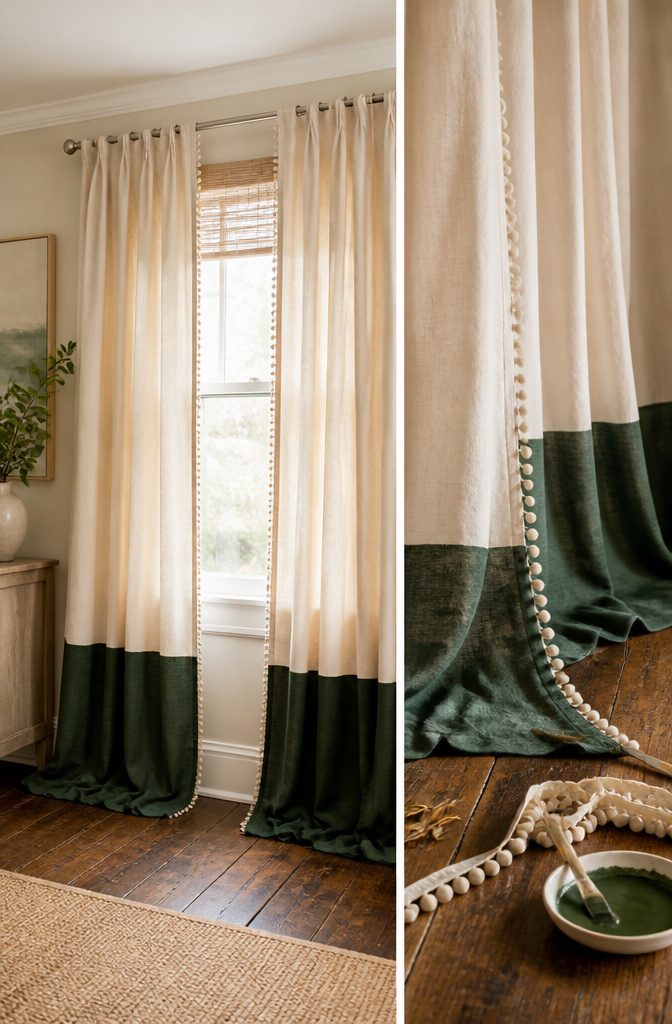
Store-bought panels hang flat and obvious, but a $14.99 pair from Target has enough fabric to work with. I bought the cheapest cotton-poly blend they had, which turned out to be medium-weight and took paint without bleeding through.
The first thing I tried was a border of pom-pom trim along the leading edge, sewn on with a straight stitch in about twenty minutes.
It changed the whole look from dorm room to something intentional, though the pom-poms catch in the vacuum if the panel sweeps the floor.
Painting came next. I used regular latex wall paint, thinned slightly, and a 2-inch brush to add a 6-inch band of deep green at the bottom.
The trick is keeping the line level while the panel hangs, which I did by taping against a yardstick suspended from the rod.
One coat was enough because the base fabric was already dark beige. The paint stiffened the hem slightly, so the panel now holds its shape better than the untreated one.
The upgrade that actually mattered was pleating. I ordered 4-prong pleating hooks online, the kind that create three pleats per hook, and spent forty minutes spacing them across the header.
The result reads as custom from across the room. The whole hour of trims, paint, and pleating took the Target pair to a place that would cost $60–80 pre-made, and the difference is in the drape, not the fabric quality.
The trade-off is the header now only works with a traverse rod or rings; the original pocket is gone, cut away to make room for the hooks.
If you need blackout, add a second set behind rather than lining these, which would fight the pleats.
Frequently Asked Questions
How can I make stylish curtains at home without sewing?
Clip rings, iron-on hem tape, and fabric glue let you finish curtains without a machine.
Clip rings loop straight through drop cloth canvas or grip burlap tops; hem tape folds and presses to length; fabric glue works for side edges if you fold, press, and let it dry flat with paper clips holding the bond.
Each method trades some durability for speed, so match the shortcut to how often the curtain will move or wash.
What fabric works best for homemade curtains?
Medium-weight fabrics like washed drop cloths and poly-cotton blends hang straight without billowing or sagging. They feed through machines easily if you do hem, and they carry enough heft to drape cleanly in a breeze.
Too light and the panel sails at every draft; too heavy and a tension rod or basic hardware will fail under the load.
How do I hang DIY curtains on a budget?
Curtain clips with simple rods skip sewing entirely, and hardware-store dowels or painted plumbing pipe cost less than decorative rods.
A 1¼-inch rod needs rings ¼ to ½ inch larger so they slide without catching. Branches look interesting but tend to sag under weight; manufactured straight stock wins for anything meant to last past the weekend.
Can I make curtains without sewing?
Yes. Iron-on hem tape handles length adjustments on panels like IKEA’s Lenda, though the bond softens in warm water over time.
Clip rings pinch fabric directly and leave zero trace, which matters if you want to reuse the material later. Fabric glue demands more patience and stiffens the drape, so save it for spots no other method reaches.
Are homemade curtains washable?
Pre-wash drop cloths and cotton blends before cutting or hemming so shrinkage happens where you can still adjust.
Hem tape weakens in warm water, so cold wash and line dry buy extra life. Burlap is the exception; washing it releases endless fibers and changes the texture, so spot-clean or avoid water entirely on that one.