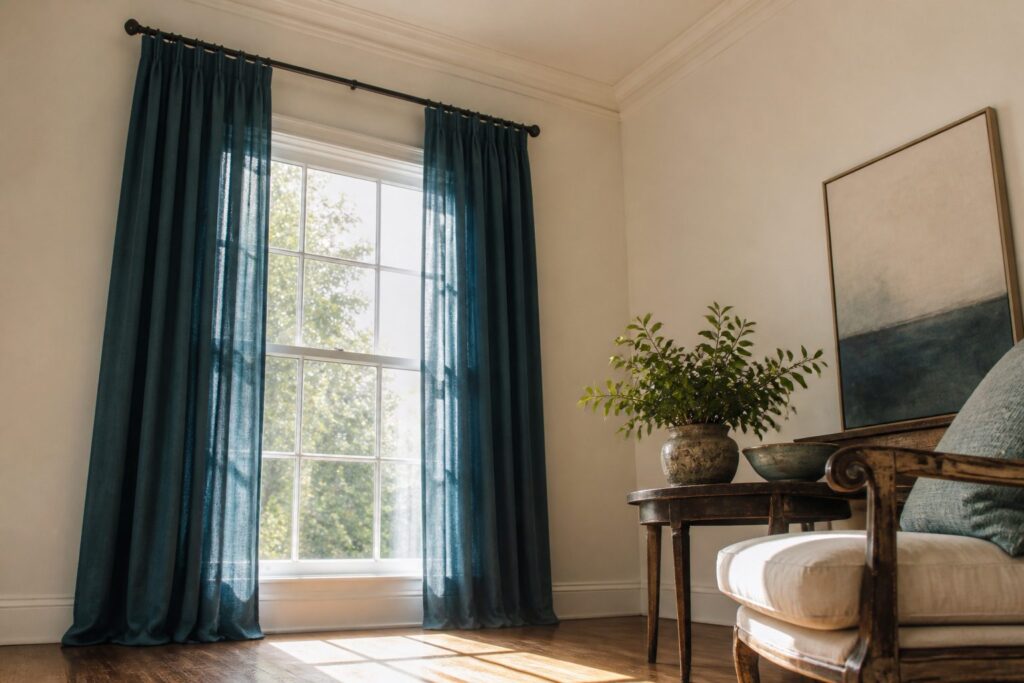
You can hang curtains correctly in one afternoon with a drill and a spirit level, but the result still looks rented if you get the rod height wrong.
Mounting too low drags the ceiling down with it, and most people do exactly that because they bought 84-inch panels and need the extra length to reach the floor.
The fix costs nothing extra: buy for the next size up and hem down, or push the rod 4 to 6 inches above the frame instead of hugging the top of the window.
1. Measure for Curtains
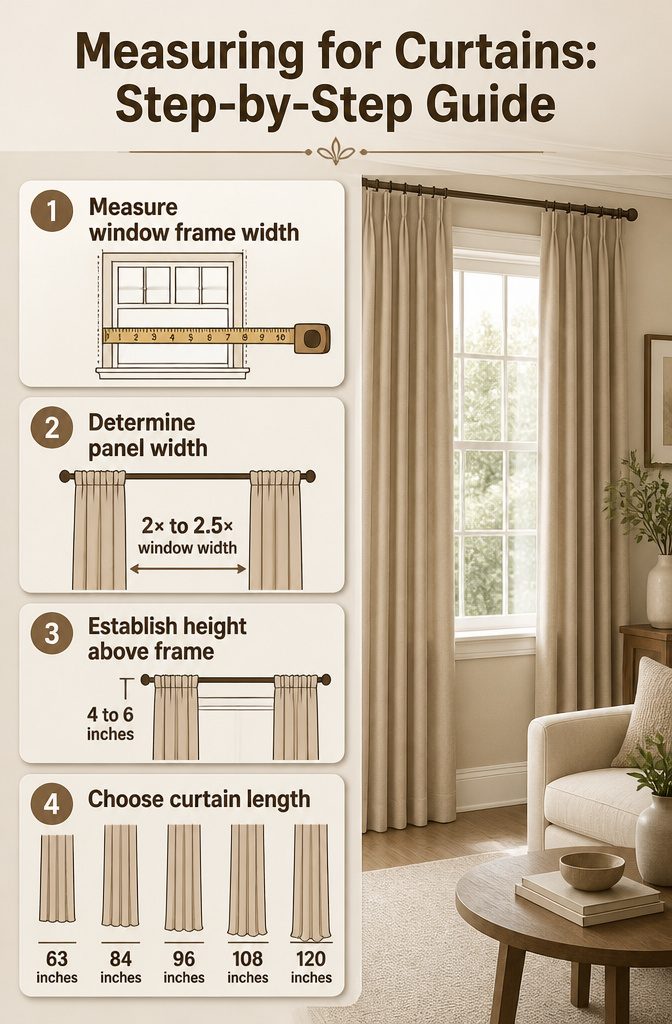
- Measure the window frame width from edge to edge, then add 3 to 12 inches of rod extension on each side. Three inches keeps things minimal; twelve gives the curtain panels room to stack fully clear of the glass when open. I land on six for most rentals, enough to fake a wider window without fighting awkward wall space.
- For panel width, the total should hit at least 2× the window width for standard fullness, or 2.5× if you want heavier fabrics like velvet to read rich rather than flat. Skipping this is how you end up with that stretched, skimpy look two panels on a wide window always seem to get.
- Height starts 4 to 6 inches above the frame on an 8-foot ceiling. Higher ceilings let you push closer to halfway between frame and ceiling, but the 4–6 inch rule keeps the lift effect without looking like the rod is floating lost in the wall.
- Length lands where you want it to fall: sill, apron, or floor. Standard ready-made panels come in 63, 84, 96, 108, and 120 inches. I buy for the next size up and hem down; fabric tape and an iron beat paying custom prices every time.
2. Choose Curtain Style and Length
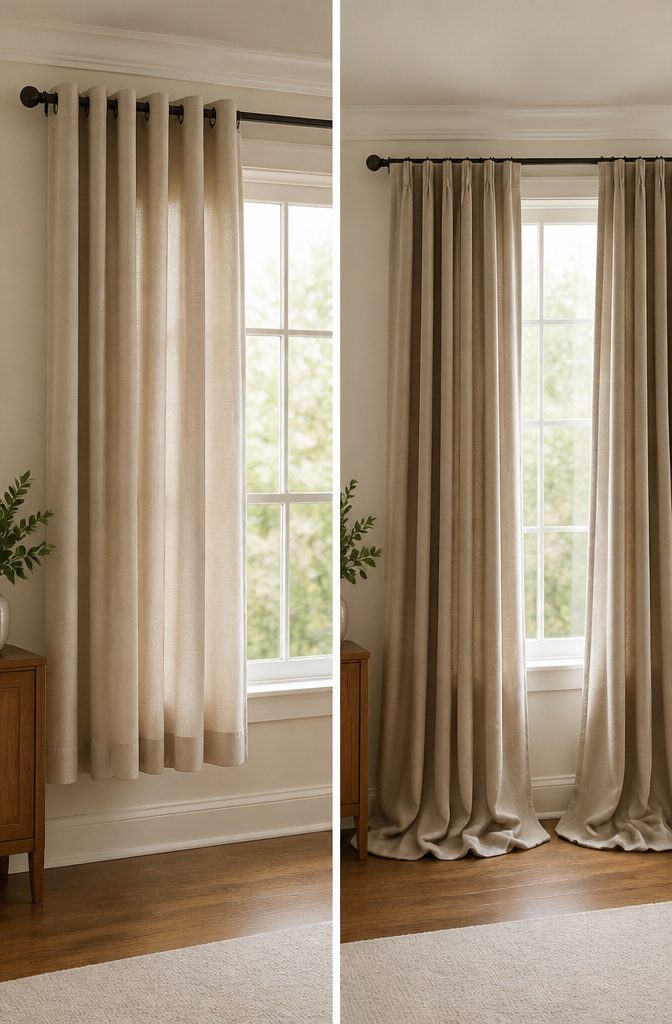
Floor contact is the one detail that separates a finished room from one that looks like a work in progress. I break it into three styles, and each sends a different signal about the space.
Float keeps the hem less than an inch above the floor.
It reads modern and practical, the safest bet for high-traffic areas or any room where you vacuum often and do not want to wrestle fabric. The gap also forgives slightly uneven floors without looking sloppy.
Kiss means the curtain just touches, no break, no bunch. It is the tailored middle ground that designers tend to prefer for living rooms and dining rooms, anywhere you want the fabric to frame the window without staging a performance.
The fabric stays clean longer than a puddle, but you will need to measure precisely; even a quarter inch too long turns the kiss into a stumble.
Puddle extends 3 to 6 inches onto the floor. It adds visual weight and a sense of luxury, which makes it suited to formal spaces or rooms where the curtains stay open most of the day.
The fabric collects dust, so I would skip it near an entry or a kitchen and keep it to bedrooms or sitting rooms where the look outweighs the upkeep.
The bottom of the curtain should "kiss" the floor, which means that it should ever-so-gently touch it. "This looks clean and natural, but also provides some allowance for when the draperies grow and contract."
That contraction and growth matters more than people expect. Linen can stretch one to two inches over time, so if you are set on a true kiss, order short and let the material do the rest.
3. Select the Right Hardware
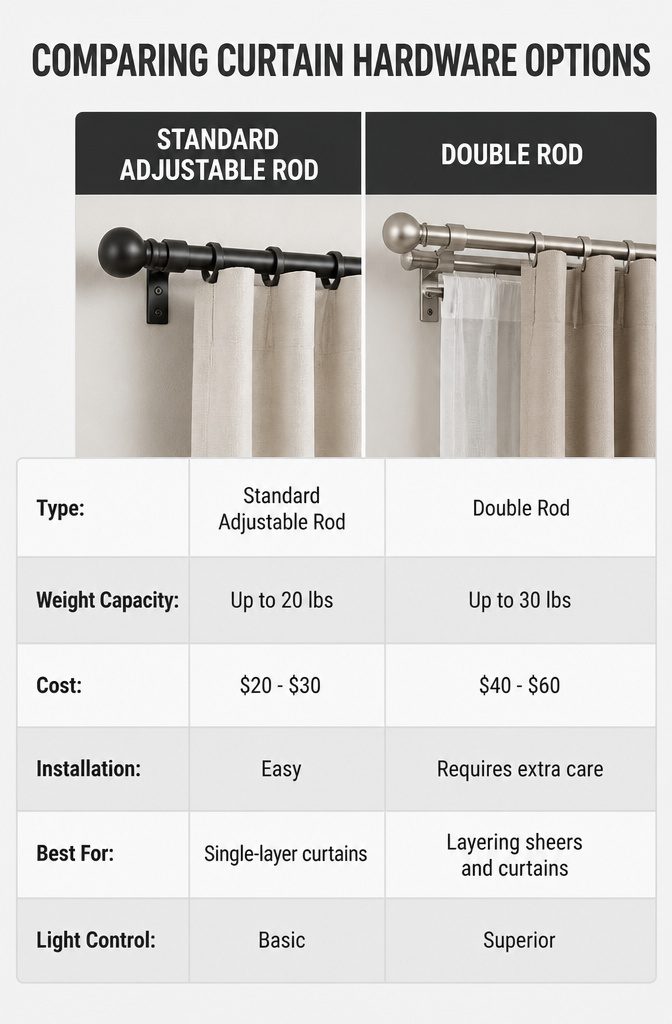
Standard adjustable rods work for most single-layer setups, and that’s where most people start.
A 5/8-inch or 1-inch diameter bracket will cradle the rod, but the rod itself needs to match the weight of your fabric or you’ll get bowing in the middle of the span.
Velvet or lined blackout panels need the thicker option, plus a center support bracket on anything extra-wide.
Double rods cost more but earn their space if you’re layering sheers underneath heavier panels.
The inner rod holds the sheer, the outer holds the main curtain, and both operate independently. It’s the only setup that gives you real light control without swapping hardware twice a year.
Tension rods fit inside the window frame and need no drilling, which matters in a rental. They only work for lightweight curtains though.
Push them too hard and they slip, or worse, they scar the trim. I see them as a temporary fix or a bathroom-only solution, not a living room plan.
The finish matters more than most people think. Matte black or brushed nickel reads from across the room, and cheap metal shows its seams under afternoon light.
The bracket width and rod diameter are fixed decisions; the finish is where you decide whether the hardware supports the room or competes with it.
4. Install Brackets
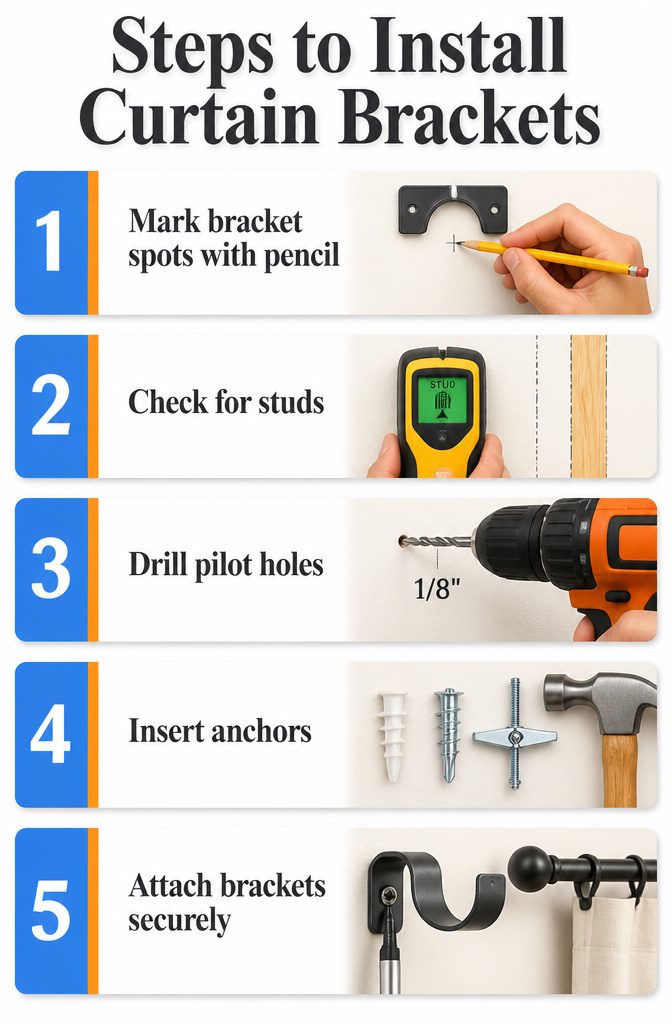
- Mark your bracket spots with a pencil level, then check for studs with a stud finder. Brackets screwed directly into studs hold the most weight, so I always try to land at least one bracket on a stud even if the others miss.
- For drywall with no stud, drill a 1/8" pilot hole and choose your anchor to match the load. Plastic conical anchors work for lightweight sheers. Self-drilling threaded anchors or toggle bolts handle heavier panels or double rods without pulling out.
- For plaster or brick, switch to a masonry drill bit and masonry-specific anchors, plastic or lead. Hammer drills cut cleaner pilot holes in these surfaces, and standard drywall anchors will strip or crumble on you.
- Tap or thread the anchor flush to the wall, then drive the screw until about 1/4" sticks out. Slide the bracket on and tighten. The anchor expands behind the surface while the bracket face stays flat and level.
5. Hang Curtains
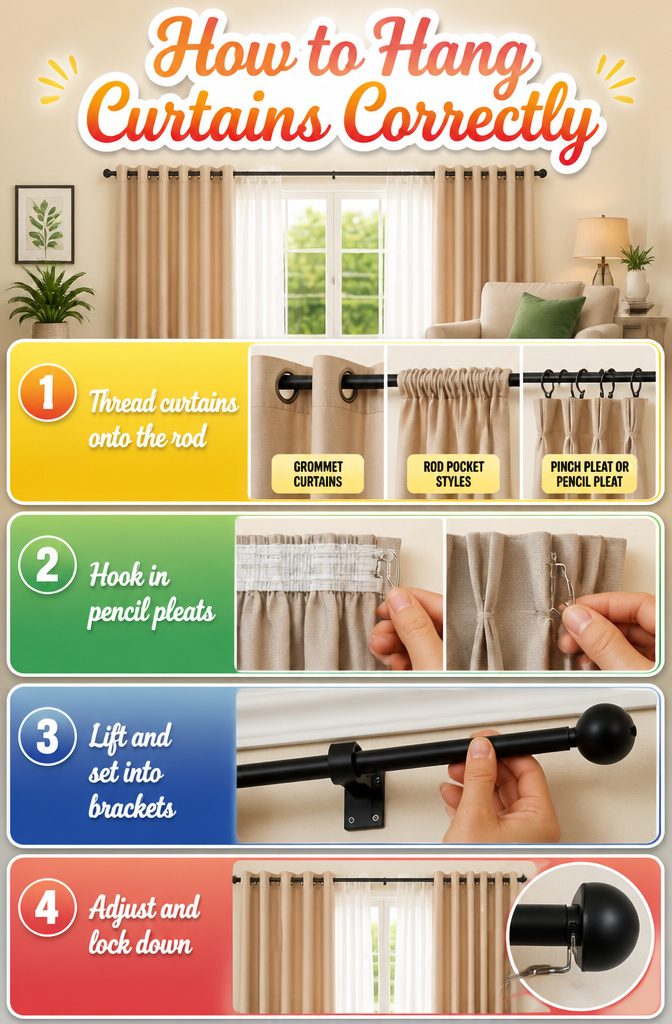
- Thread the curtains onto the rod before lifting anything into place. For grommet curtains, weave the rod straight through the metal rings. Rod pocket styles need the fabric scrunched and fed through the top channel. With pinch pleat or pencil pleat headers, slide your rings or hooks onto the rod first, then attach them to the pleats after.
- Hook pencil pleat curtains by pulling the back strings to gather the header to your desired width, then inserting the hooks into the woven pocket at the back. For pinch pleat, the pleats are already sewn in wider spacing; use the pin-style hooks that push into the back of each pleat and close around the ring eyelet so nothing slips.
- Lift the rod and set it into the brackets. If the span passes 60 inches, that center support bracket keeps the rod from bowing under the weight.
- Tighten any set screws to lock the rod, then step back and adjust the fabric so the curtains fall evenly. The difference between finished and sloppy is usually a half-inch tweak at one end.
Curtain Width for Fullness
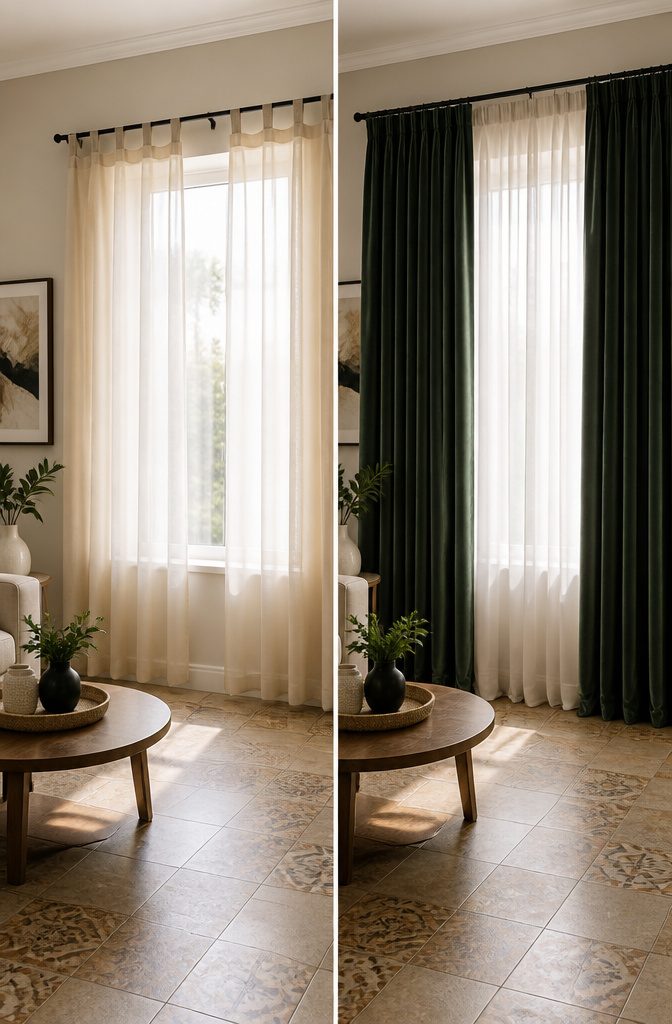
The width you choose determines whether your curtains look like a finished room or a temporary fix.
Aim for panels totaling at least 2 times your window width for a standard, full look when the curtains are closed. That ratio gives enough fabric to gather naturally without pulling flat.
If the fabric is heavy, like velvet or a thick linen blend, 2 times works fine and the weight does the visual work.
Lightweight cotton or sheer panels need more help, which is where 2.5 times comes in. That extra half-width creates the same lush folds that dense material achieves on its own.
Budget usually decides it for me.
Doubling the width means two standard panels for an average window. Pushing to 2.5 times can force you into a third panel or wider custom widths, and the jump in cost is immediate.
The 2.5 ratio does block more light and reads more luxurious, but in a rental or a first home, 2 times with the right fabric is the smarter spend.
No-Drill Options for Renters
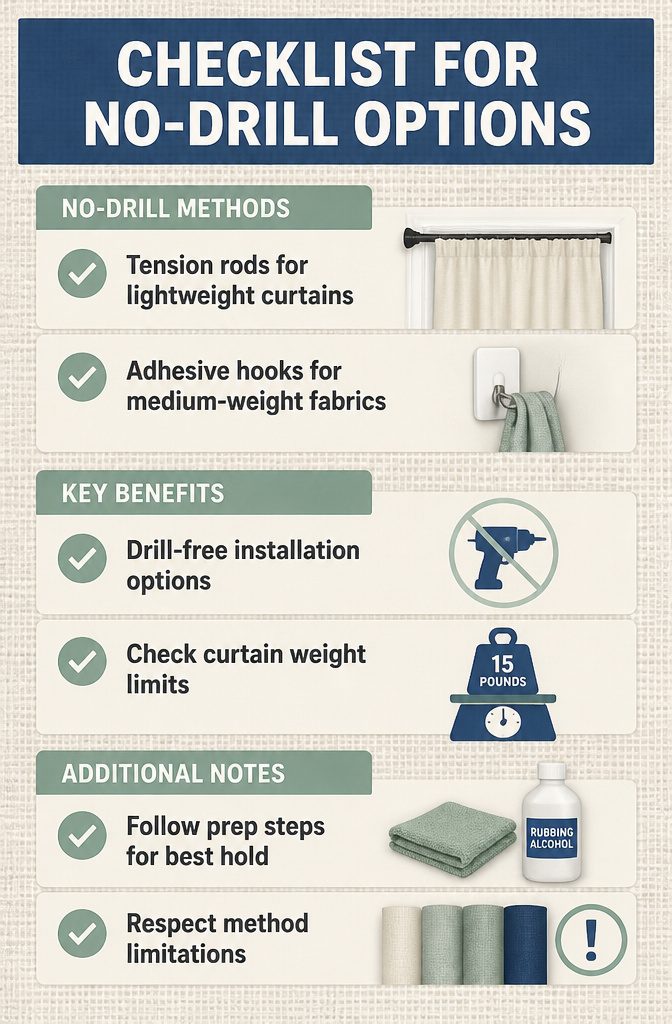
Tension rods and adhesive hooks are the two no-drill methods that actually hold up in a rental, though each has a ceiling you need to respect.
A tension rod tops out at lightweight curtains, the kind in cotton or a linen blend.
The spring presses against the inside of the window casing, which means it works only where you have casings deep enough to grip, and the fabric cannot pull hard.
Anything with heft, velvet or a lined panel, will sag or drop over time.
Modern adhesive brackets are stronger than the strips renters used five years ago, rated to hold up to 15 pounds if the wall is prepped right: wiped with rubbing alcohol first, then left to cure for the full recommended time.
That opens the door to medium-weight fabrics, though I still would not trust adhesive with blackout-lined drapes or anything that pools on the floor.
For sheer or unlined panels in a standard window, tension rods are the faster, cheaper call. For anything with a little more body, adhesive brackets win, but only if you follow the prep steps exactly.
Mistakes That Make Curtains Look Cheap
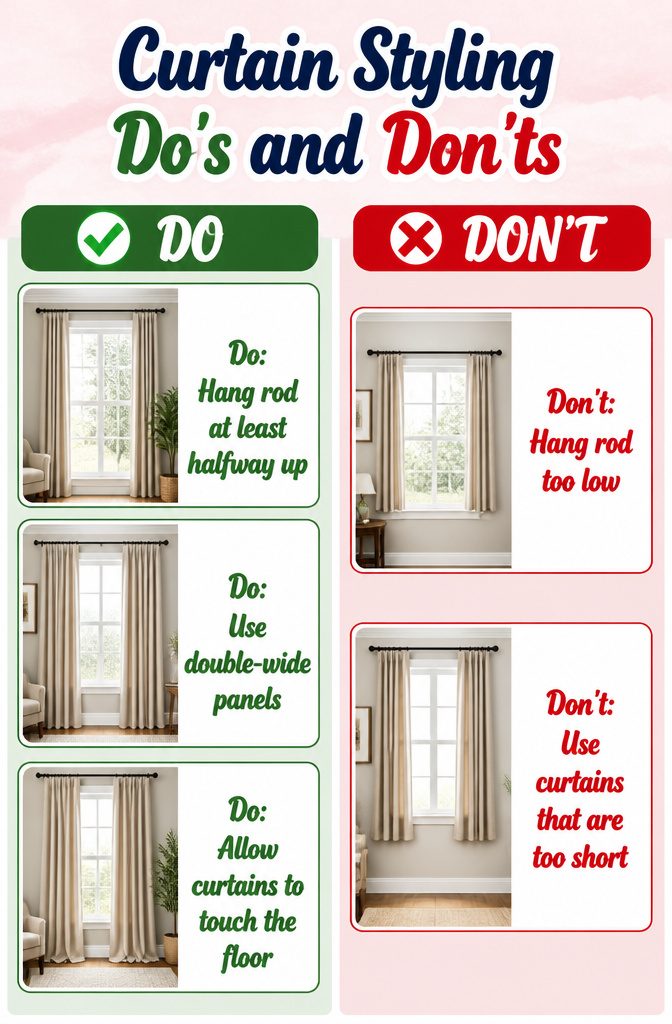
A window dressed wrong reads like a suit cut wrong. The eye goes straight to the problem.
Hanging the rod too low is the mistake I made for years.
The rod sat an inch above the frame because I had bought 84-inch panels and needed the extra length to reach the floor. That low line drags the ceiling down with it.
Now I mount at least halfway to the crown, often higher. The fabric draws the eye up, and the room breathes.
Too short is worse. Curtains that hover above the floor, the "high-water" look, chop the wall off at the ankles.
The standard 84-inch length feeds this: most windows need more. Buy 95-inch and hem to 90 inches if you must.
A slight float, a kiss at the floor, or a deliberate puddle all work. Half an inch of daylight showing underneath does not.
Too narrow undermines you just as quietly. Panels pulled taut across the glass look stretched and mean.
The rod should extend 6 to 10 inches past the frame on each side so the opened panels clear the window entirely. Light gets in, and the wall reads wider.
Double-wide panels matter on large windows.
Two 54-inch panels across a 100-inch window close tight and flat. Four panels, two per side, give the fullness that makes fabric look expensive rather than skimpy.
These fixes cost nothing extra.
Same rod, same drill holes, same afternoon. The difference is only in where you place them.
Frequently Asked Questions
How high above the window should I hang curtains?
For standard 8-foot ceilings, mount the rod 4 to 6 inches above the window frame. Higher ceilings let you push closer to halfway between the frame and ceiling, which draws the eye up and makes the room feel larger.
Should curtains be hung higher than the window?
Yes, mounting above the frame creates the illusion of height and makes windows appear taller. Hanging the rod too low drags the ceiling down visually, while raising it gives the room lift.
What’s the rule of thumb for hanging curtains?
Extend the rod 3 to 12 inches past each side of the frame, mount 4 to 6 inches above for standard ceilings, and choose panels totaling at least 2 times the window width. These three measurements keep the treatment from looking skimpy or off-balance.
How wide should curtains be for my window?
Panels should total at least 2 times the window width for standard fullness, or 2.5 times for lightweight fabrics or a richer look. Anything less pulls flat and reads stretched when closed.
Can I hang curtains without a drill?
Tension rods inside the window frame work for lightweight panels, and adhesive hooks rated to 15 pounds can handle medium-weight fabrics if the wall is prepped with rubbing alcohol and fully cured. Skip both for heavy lined drapes or puddled styles.
What is the best way to hang curtains on plaster or brick walls?
Switch to a masonry drill bit and masonry-specific anchors, plastic or lead. A hammer drill cuts cleaner pilot holes; standard drywall anchors will strip or crumble on these surfaces.
What is the new way to hang curtains?
Layering sheers under heavier panels on double rods gives independent light control without seasonal hardware swaps. For a cleaner wall-to-wall look, French return rods let panels stack with no exposed finials.