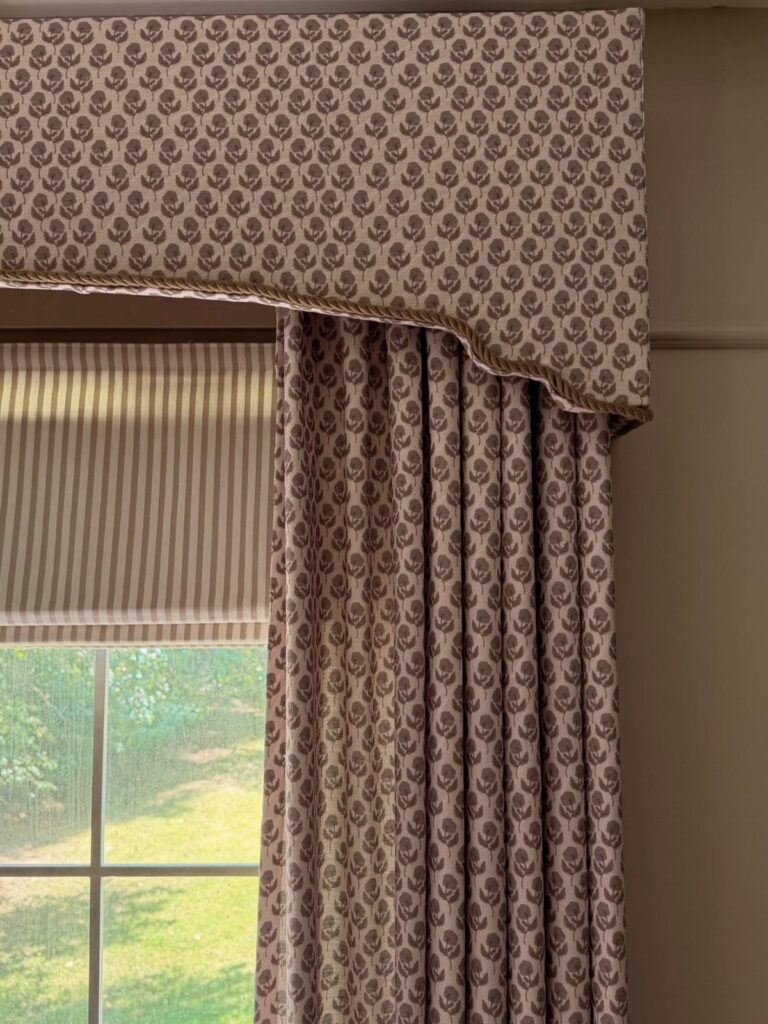
A window cornice can be a $10 pine box, an upholstered board with rope trim, or a crown molding build that needs monthly vacuuming with a brush.
What decides which one you build is whether you want the softness of fabric, the clean edge of wood, or the detail of crown molding, and whether your wall situation calls for picture-frame brackets or direct nailing.
The rope trim on the upholstered version hides staple lines so the fabric underneath does not have to be perfect, which is the kind of detail that lets a Saturday project finish on Saturday.
1. Upholstered Cornice
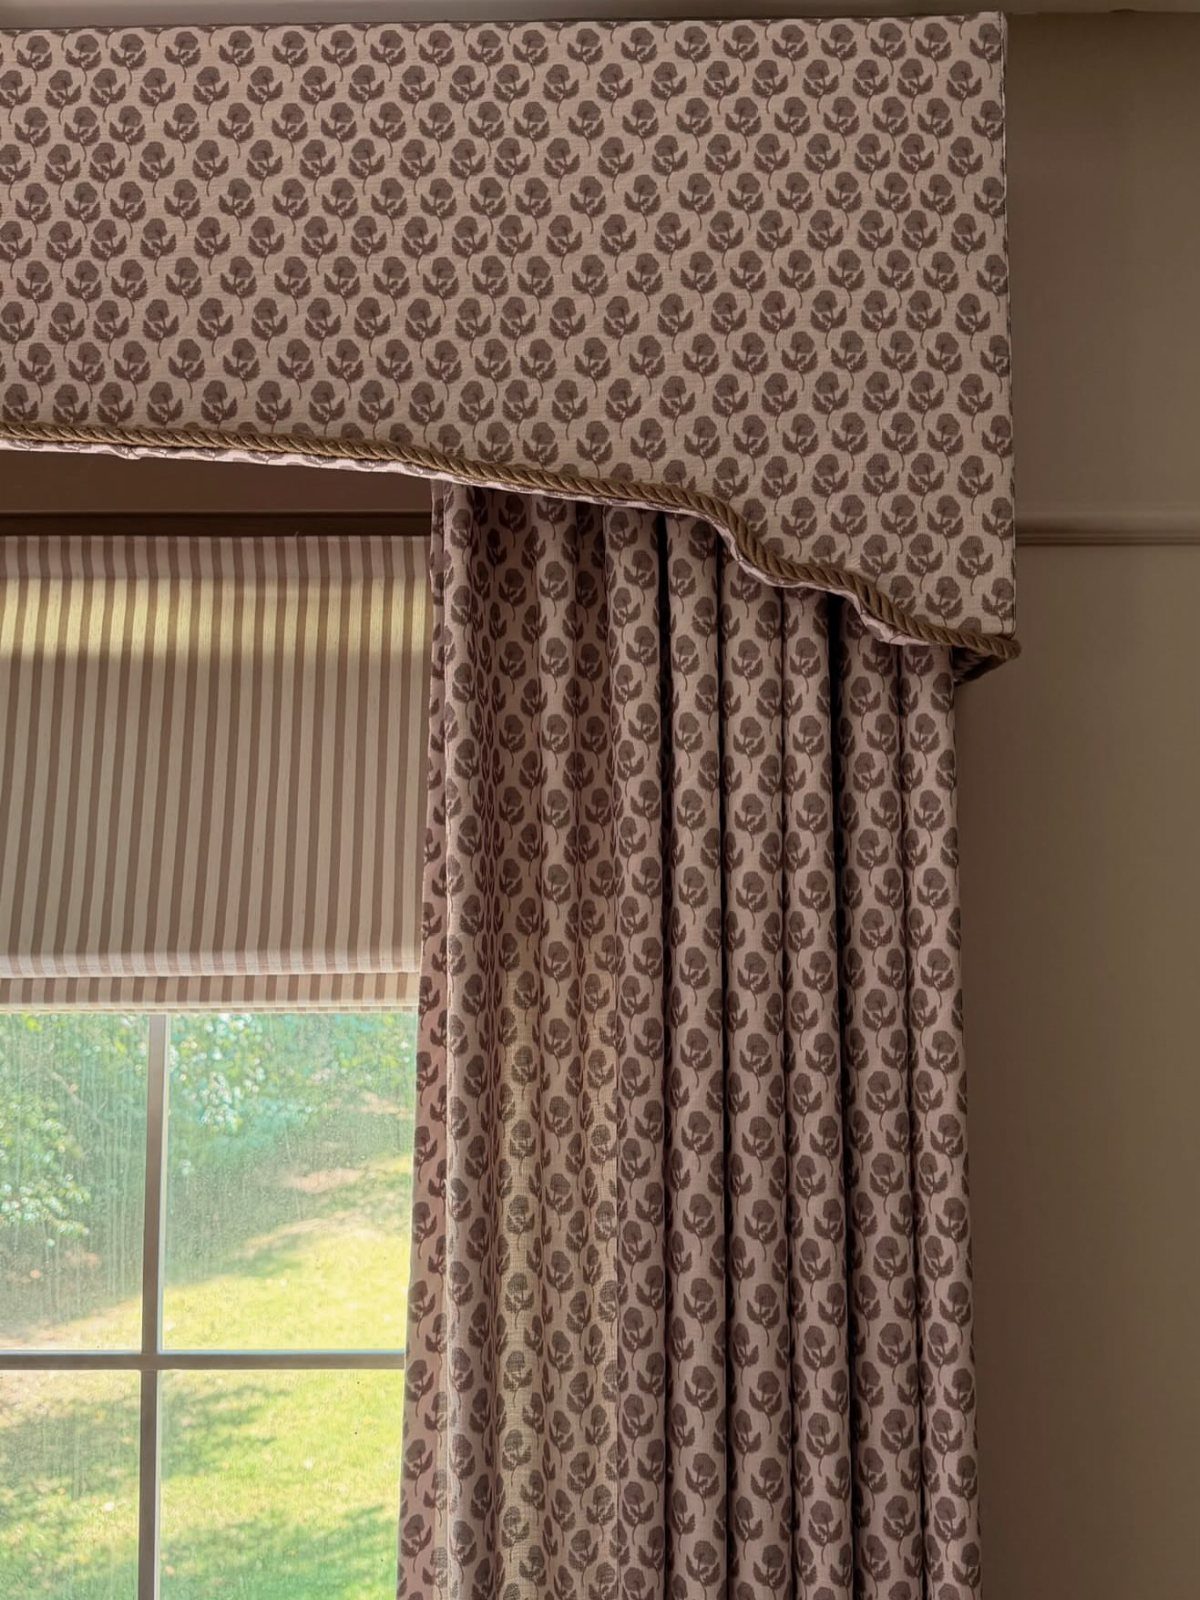
An upholstered cornice starts with a plywood box shaped to your window, then gets padded and pulled tight with fabric so the edges read soft, not built.
I like this one for renters because it hangs like a picture frame; two brackets and you’re done, no drilling into the window frame itself.
Rope trim hides where fabric meets wood, which saves you from needing perfect staple work underneath. The scalloped edge takes a jigsaw and patience, or you keep it straight and save an hour.
2. Wood Valance Box
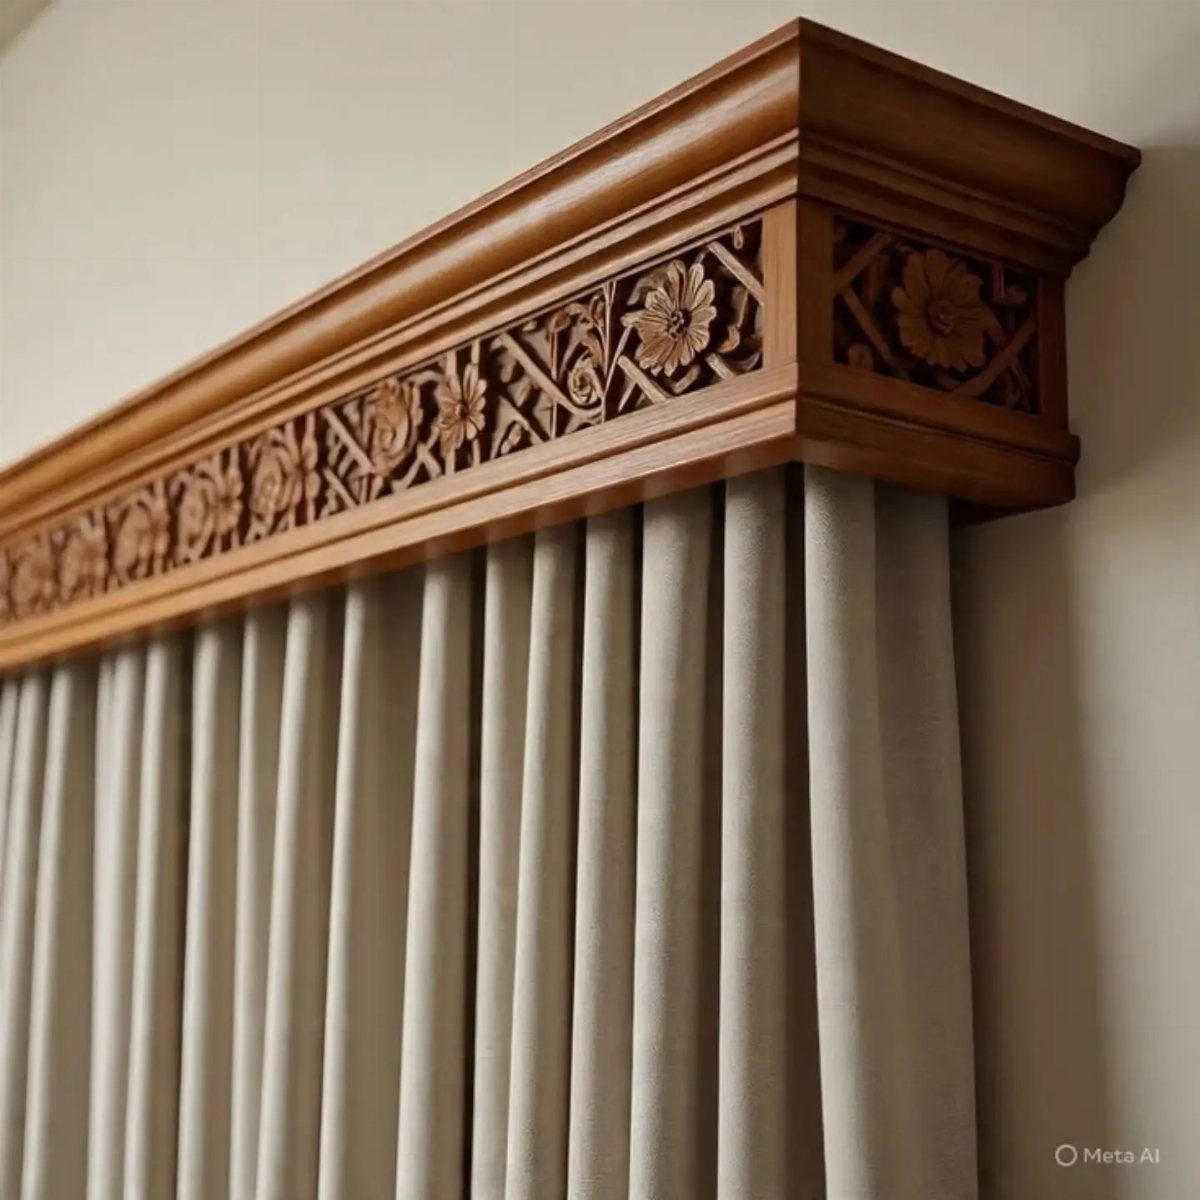
A wood valance box brings in carving and weight that fabric alone never gets.
The fretwork here is the move that makes it feel finished; you can buy pre-cut overlays at most hobby stores and glue them to a simple pine box, or route your own if you have the tool.
I would stain rather than paint this grade of detail, since every cut catches light differently and paint flattens that out.
It mounts with L-brackets into the wall above your window, not the frame, so check for studs or use anchors rated for the weight. Carved wood collects dust, and you will need a vacuum brush monthly.
3. Crown Molding Window Cornice
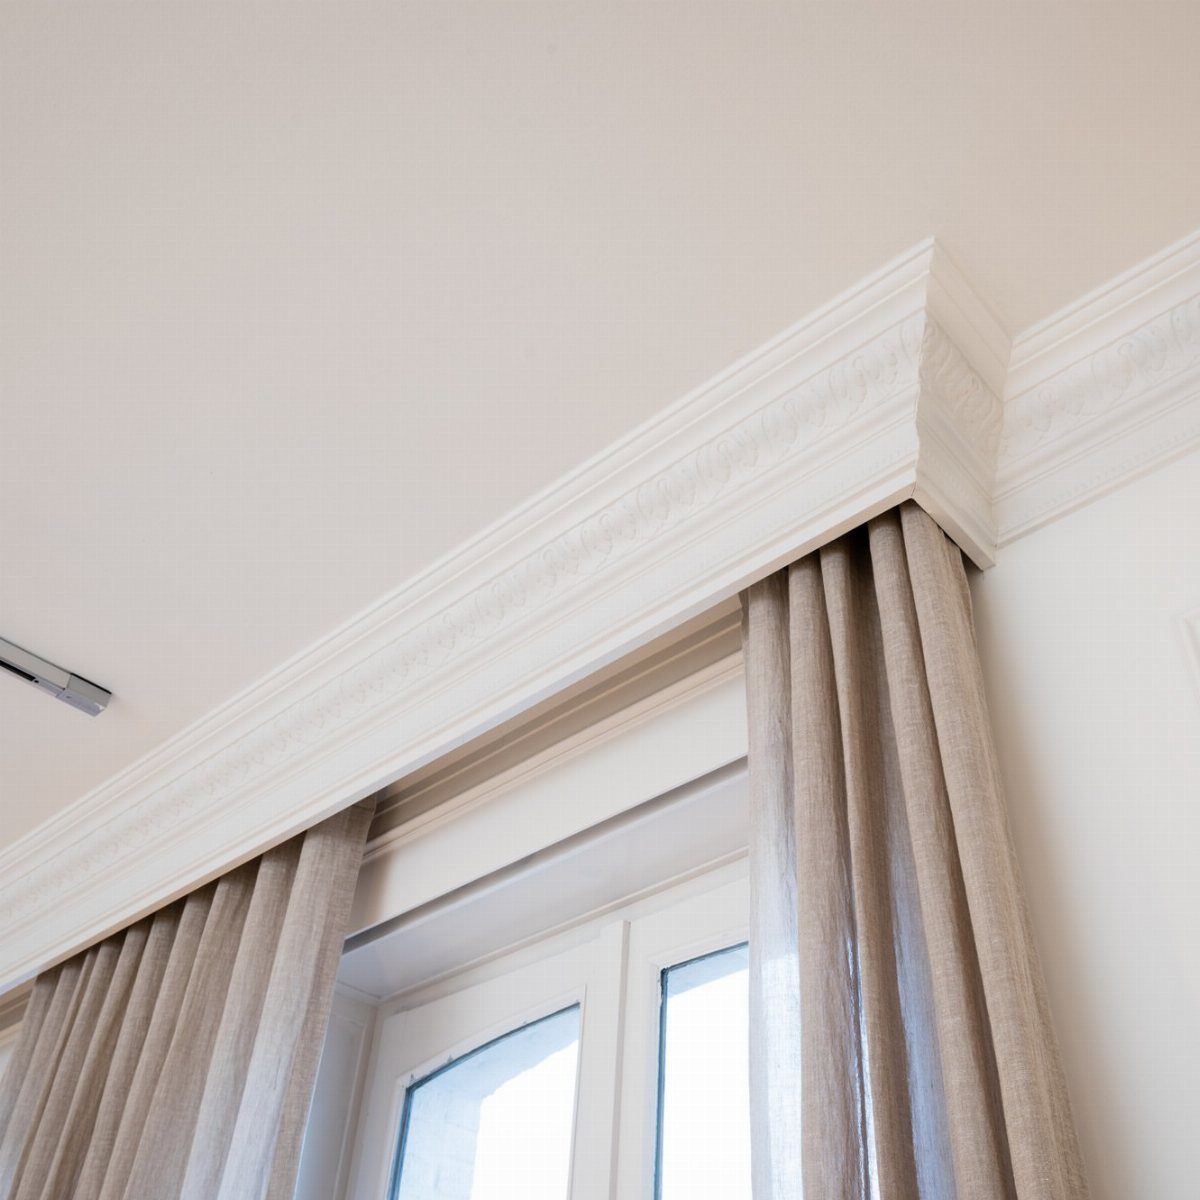
A crown molding cornice lives at the ceiling line, which makes your window feel taller than it is. White paint on polyurethane or MDF molding comes pre-primed and light enough that one person can lift the assembly.
I build these as three-sided boxes in the shop, then cope the corners on site; coping beats mitering because walls are never square.
Construction adhesive and finish nails into the header board hold it, with caulk closing the seam to the ceiling. This one reads formal, so I would not pair it with casual curtains; linen is fine, but keep the pleats structured.
4. Floral Pattern Fabric Cornice
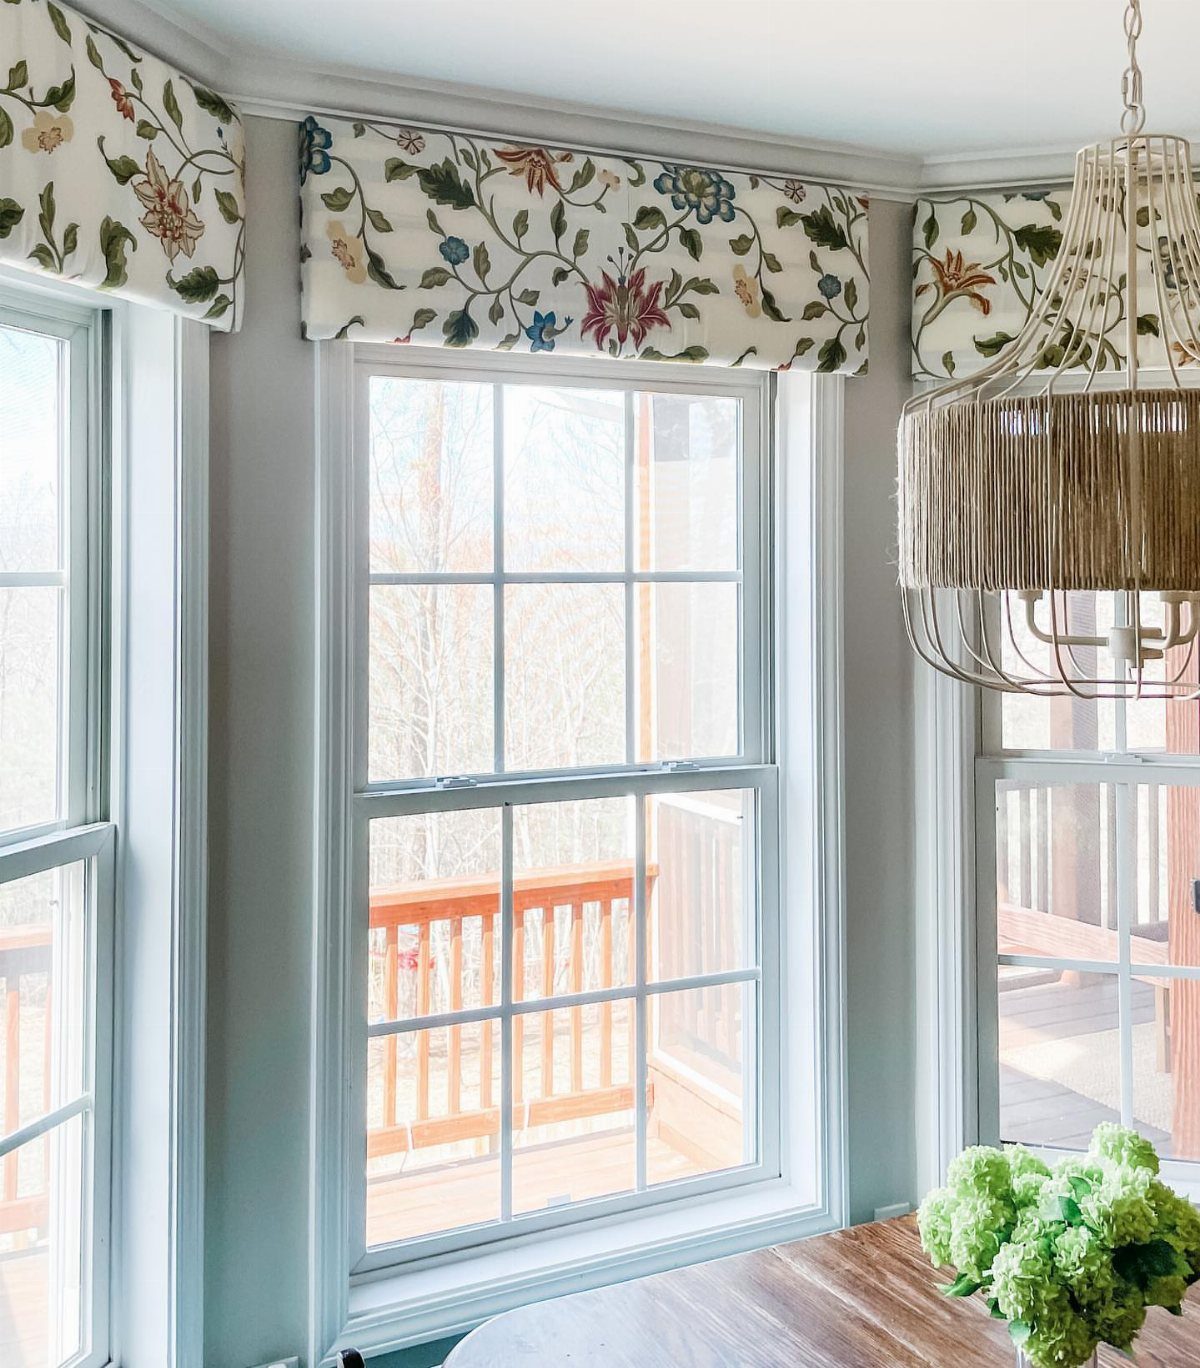
A floral cornice is where you spend your pattern budget for the room.
The vine print wraps over the face and returns, so you need extra yardage for matching; I order more than the math says, and I live with a seam at the back return if I must.
The white frames underneath keep it from going busy, which is the lesson: bold cornice, quiet everything else. This suits a room that already has a neutral base and needs one move to wake it up.
I would not try this as my first upholstery project; the pattern matching is unforgiving, and a plain solid teaches you the box first.
5. Corner Window Fabric Cornice
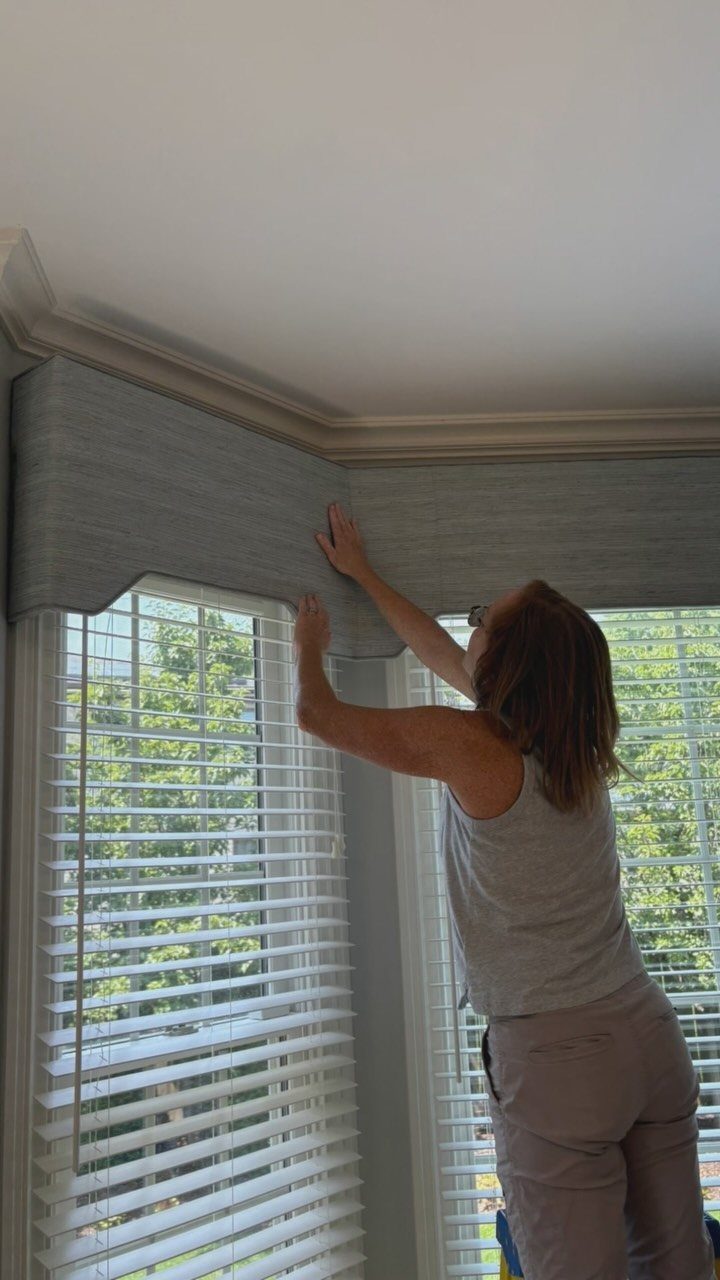
A corner window cornice solves the gap where 2 windows meet at an angle, and the grey fabric here keeps the focus on the architecture, not the treatment.
Build the box as one continuous piece with a mitered corner; two separate boxes always read as a mistake.
I make a full-size cardboard template first, since corner angles in older houses rarely sit square. The face fabric wraps the front, and I use black-out lining on the back to keep the shape crisp.
Budgeting for Projects
A cornice board runs cheap if you plan around the size.
The wood for a valance that long cost one person $10, plus pipe rods to hang it, landing the whole build under $20. Fabric and batting sit on top of that, so your total still stays reasonable for a weekend project.
I would not quote a single number for every window, since a box in a bedroom takes half the lumber of a living room run.
But the range matters: even a wide cornice lands in the same bucket as a takeout dinner, not a furniture payment.
Building it yourself is how you spend less and get exactly what you want. Order your fabric after you have the frame sized so you know the yardage; batting and D rings add only a few dollars more.
Installation Tips
Level the cornice to the frame itself, not to the floor.
In an older house especially, those 2 lines can diverge, and a cornice true to the ground will look crooked above the glass. Measure the full width including trim, then add past each side so the cornice covers the hardware.
Drill from the back, mount a small block with D rings inside, or bore side holes to drop over screws; all three work, so pick the one that matches your tools.
Solid anchoring into wall studs or proper anchors matters most, since a padded box gains weight fast.
Choosing Fabric
Shop fabric in person so your hands can judge weight. Upholstery-grade material drapes cleaner and resists wrinkling while you pull and staple; thin cotton fights you every inch and shows every tug.
I look for a hand that feels like it could survive a chair, even on a cornice that never takes a seat.
Stripes and small repeats forgive minor shifts during wrapping; large florals and geometrics need extra yardage for matching and a steadier eye.
Neutral bases let you swap curtains later without rebuilding the box, which I treat as fixed furniture and the panels as temporary.
If the store only sells online, order a swatch first; the photo never shows how the light hits the weave, and return shipping on 5 yards stings.
Frequently Asked Questions
Do it yourself cornice boards?
Yes, and the build is straightforward enough for a weekend. 2 brackets into the wall above the frame hang it like a picture; no drilling into the window itself.
A straight edge saves time over a scalloped one, and rope trim hides the staple line underneath so the bottom edge stays rough.
What’s the difference between a valance and a cornice board?
A valance is soft fabric that hangs; a cornice board is a rigid, shaped frame, usually wood underneath. A cornice reads as furniture where a valance reads as drapery, and that weight is what draws the eye upward.
An upholstered cornice bridges the two: fabric on the outside, but a plywood box underneath holding the shape. Either can sit above curtains or blinds, but only the cornice gives you sharp corners and a built-in feel.
Are window cornices still in style?
They are, especially when you want height or structure without a full drapery stack.
I see them work now in rooms that need one architectural move: a crown molding cornice at the ceiling line makes a window feel taller, and a grey fabric corner cornice keeps the focus on the glass itself.
Pairing them right keeps the look current; a formal painted cornice wants structured pleats, not casual panels, so nothing feels accidental.
What is the best material for cornices?
Plywood for the box, since it holds screws and takes the shape you cut.
I use MDF or polyurethane crown molding when I want a ceiling-line cornice that one person can lift, and pine for a carved wood valance that takes stain.
Foam board does not appear in my builds; it lacks the rigidity for a span over a wide window and will sag within a season.