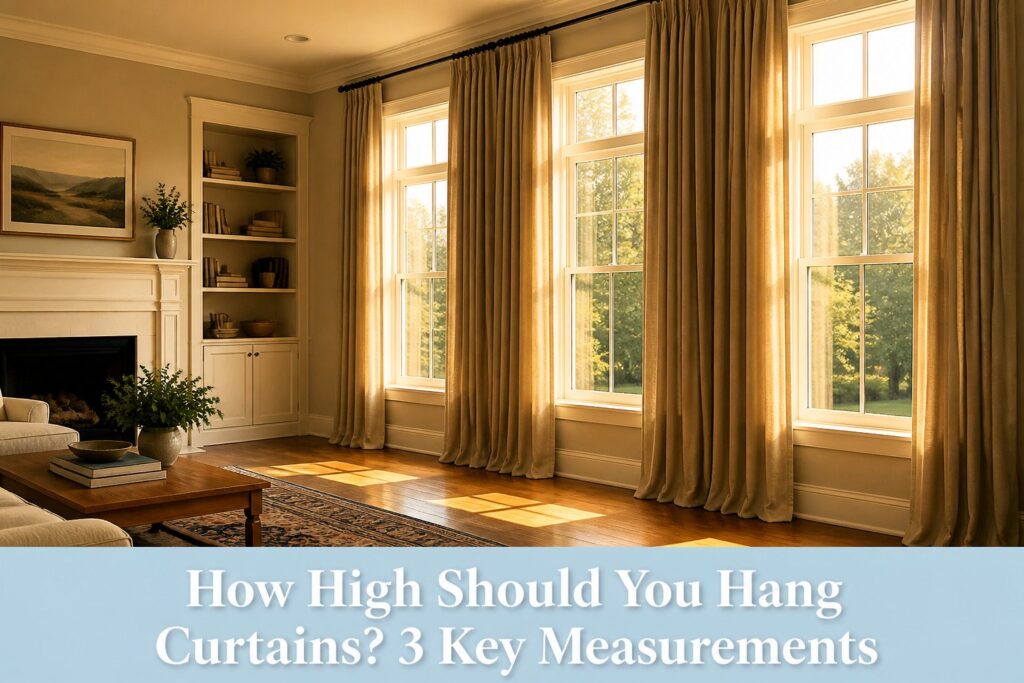
Mount the curtain rod 4 to 8 inches above the window frame for standard 8-foot ceilings, but push it to the ceiling line when the frame sits within a foot of it.
What you get is free visual square footage that makes the room feel taller, though you’ll pay more for longer panels and need brackets anchored into studs to carry the load.
A rod hugging the trim traps the eye and compresses the wall; the extra fabric cost is usually worth it for a weekend project.
How High to Hang Curtains Above the Window
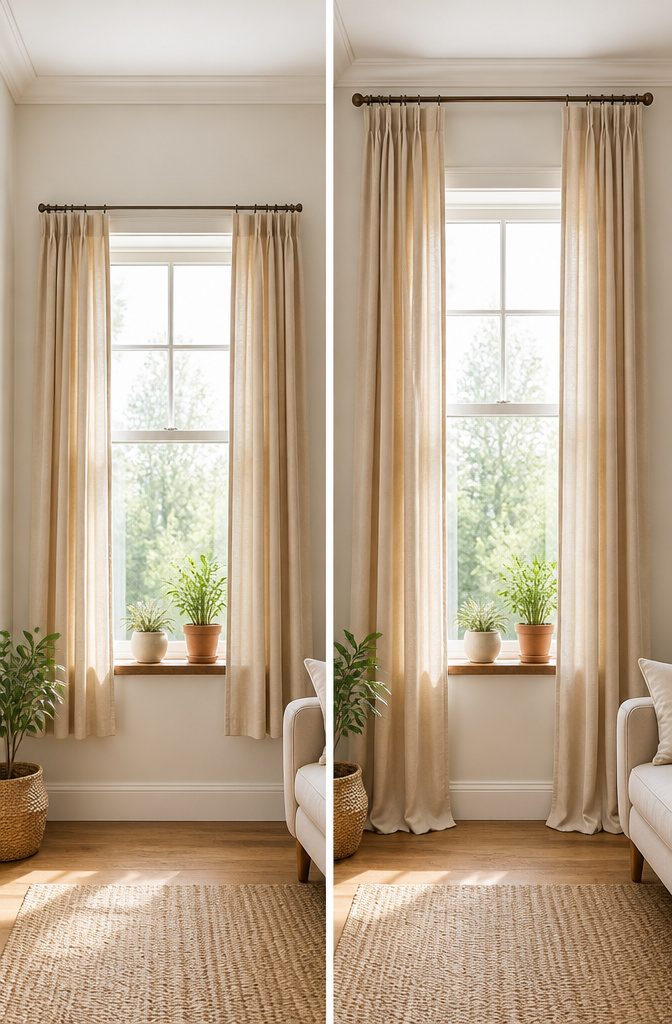
Mount the rod 4 to 8 inches above the window frame for standard 8-foot ceilings. That range gives enough lift to make the window feel larger without leaving an awkward strip of bare wall between the rod and the ceiling.
If your frame sits closer than a foot below the ceiling, split the difference and mount halfway up instead.
Taller ceilings change the math. At 9 or 10 feet and above, push the rod 8 to 12 inches above the frame, or mount near the ceiling line just under crown molding.
The same principle applies either way: lifting the rod draws the eye upward, so the ceiling reads higher and the window reads bigger.
Go too low and the opposite happens.
A rod sitting right on the trim traps the eye at the window line and makes the whole wall feel compressed. The trade-off to going higher is straightforward: longer panels cost more and the wall has to carry the load.
But the visual difference is real, and for a weekend project on a few hundred dollars, the extra fabric is usually worth it.
How Wide the Rod Should Extend
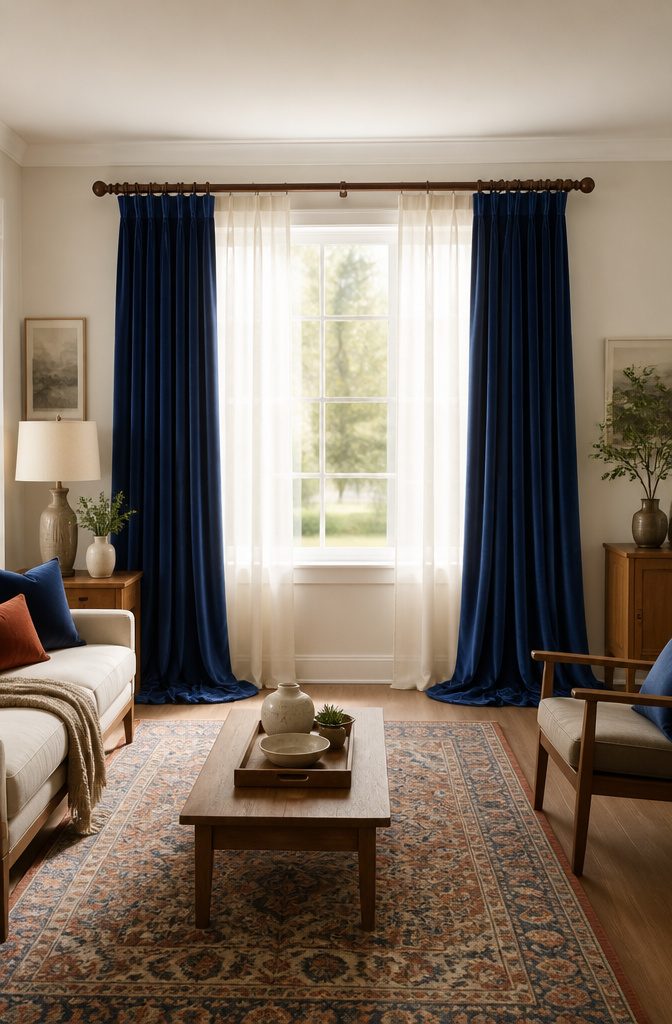
A curtain rod the exact width of the window frame traps the fabric against the glass even when the panels are fully open.
Extend the rod 4 to 12 inches past the frame on each side so the stacked panels clear the glass entirely. For a 36-inch window, that means a rod between 44 and 60 inches wide total.
That extra width does two things at once. It exposes more glass when the curtains are drawn back, which pushes more daylight into the room.
It also stretches the window’s visual footprint so the wall reads wider than it actually is. I think the light matters more than the illusion, but the illusion comes free.
What you give up is wall space. In a tight corner or between built-ins, 12 inches of extension per side can eat into furniture placement or block a door swing.
Bedrooms with blackout panels also gain from a wider overlap at the sides, since less frame shows and less light leaks around the edges.
Where wall space is scarce, I would take the smaller end of the range and live with a little less glass showing.
Curtain Length: Hover, Kiss, or Puddle
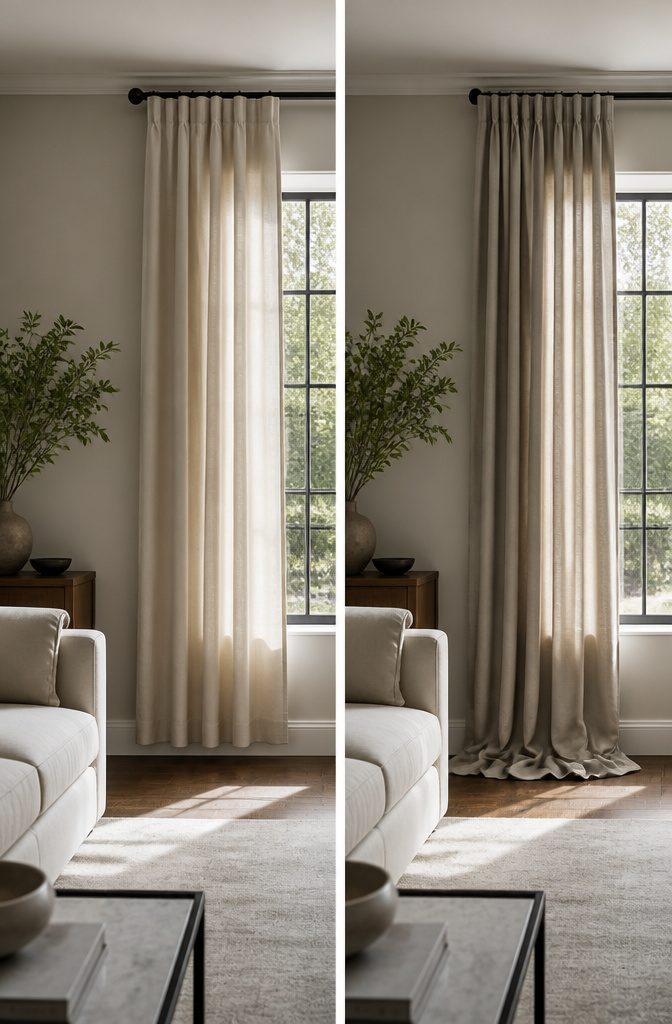
The three length options each carry a maintenance cost that matters more than the look itself.
A hover, about 1 inch above the floor, keeps the hem clear of dust, pet hair, and vacuum traffic. That gap makes it the practical choice for rentals and busy households where curtains need to come down for washing without fuss.
A kiss, where the hem just grazes the floor, reads clean and tailored but demands precise measurement. Half an inch too long and it drags; half an inch short and it floats.
The puddle extends 2 to 6 inches onto the floor and reads romantic with heavier fabrics like velvet or linen, though that extra fabric collects the same debris a hover avoids and costs more in cleaning.
For most renters and anyone measuring on a Saturday morning, hover wins.
It forgives an imperfect tape measure and still looks intentional, while curtains that stop well above the floor tend to look unfinished no matter what the rod height achieves.
Single, Double, and Wraparound Rods
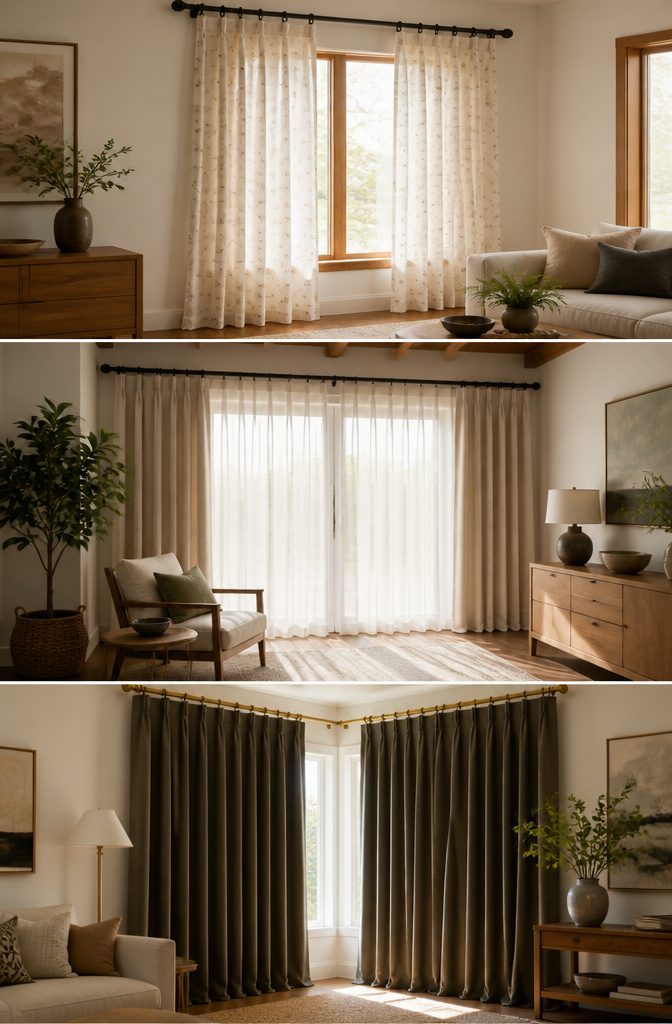
Single rods are the baseline most people picture: one rod, one set of panels, and you’re done. They work for decorative drapes you never touch or for curtains you open and close daily, depending on the hardware quality you buy.
Double rods add a second parallel layer, typically sheers behind your main panels. I like these for bedrooms where you want privacy during the day without blocking light, then full coverage at night.
What you pay is weight: two rods plus two layers of fabric puts real load on your brackets, and I’ve seen cheap sets sag after a season.
Wraparound rods, sometimes called French return rods, curve back to meet the wall at both ends.
This is the one I reach for when light control actually matters, because that curved return closes the side gap where morning light leaks through standard setups.
They’re overkill for a rental you’re leaving in two years; the slightly higher cost and the patched wall holes you’ll leave behind don’t pay off for temporary living.
Stick with a single rod there, or a double if the bedroom faces east and you can’t sleep once the sun’s up.
How Much Fullness Your Panels Need
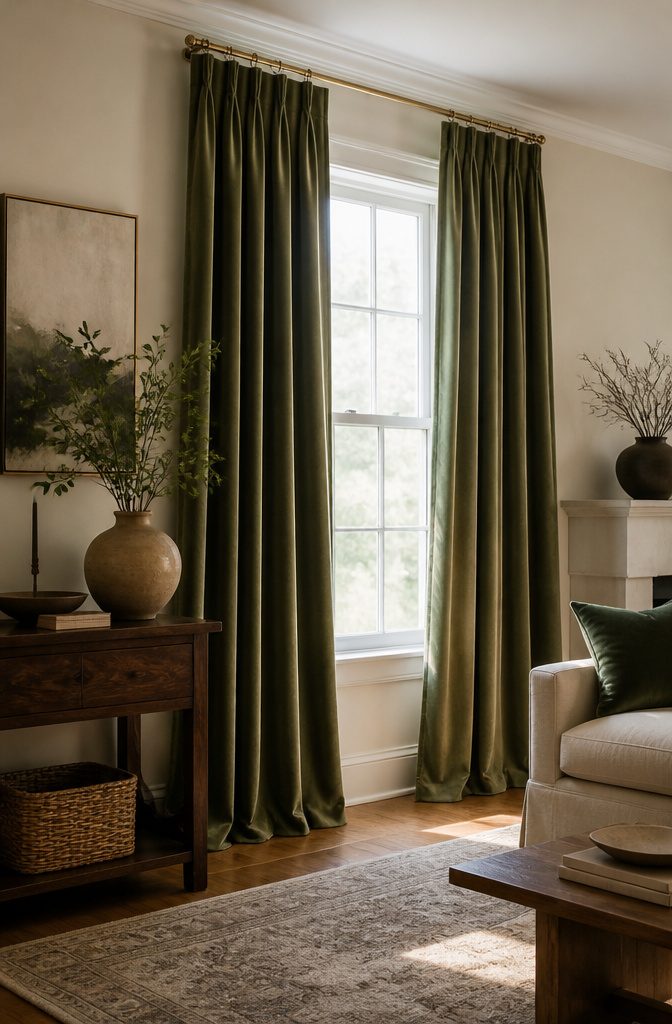
Curtain panels need 1.5 to 3 times the width of your window to read as intentional rather than an afterthought. Where you land on that ratio depends on what the fabric can handle and what you want it to do.
Lightweight linen or cotton at 1.5 times the width gives a relaxed, almost beach-house drape with soft folds that fall open easily.
Push toward 2 times or higher when the fabric is heavier, a velvet or thick weave that needs more material to gather properly and hold its shape.
Rod-pocket panels in particular flatten out fast below 1.5 times width; the channel construction eats some of the gathering potential, so I tend to nudge those closer to 2.
The 3 times end is where things get formal and theatrical, more gathered than most rooms need.
Skimpy panels are the mistake I see most often: a window dressed at barely 1 times width hangs like a bedsheet, and no amount of height-hanging tricks will save it.
The fabric itself looks cheaper than it is because there is nothing for the eye to read as fullness.
For a standard window, doubling the width, two 40-inch panels on a 40-inch window, is the safe middle ground that works across most fabrics and styles.
Installing Brackets Without Disaster
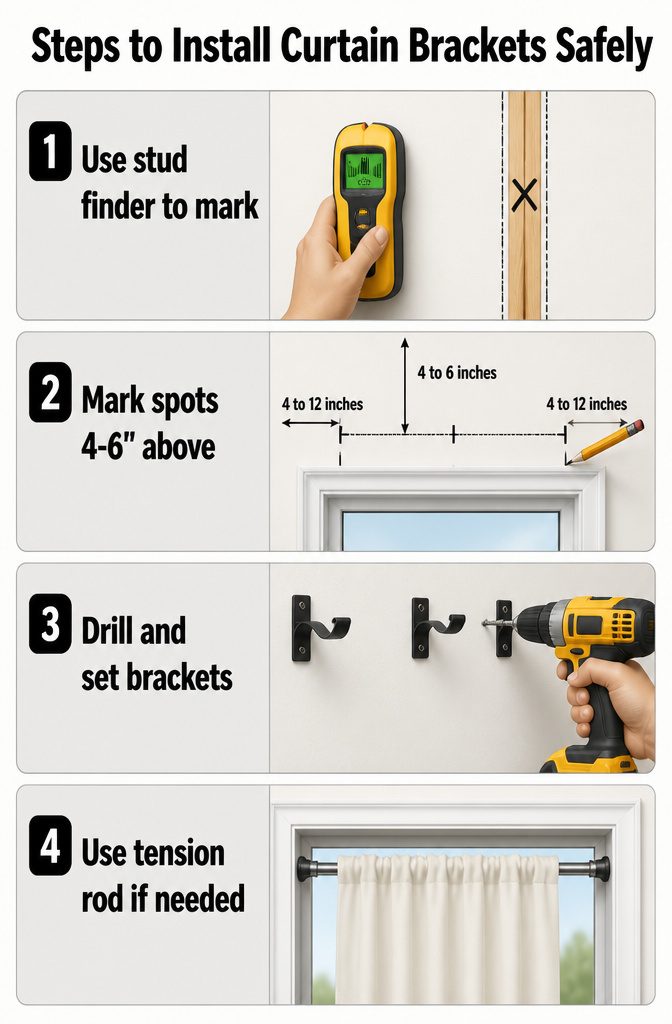
- Hold the stud finder against the wall and mark where solid framing sits. Brackets anchored into wood carry weight without tearing out; drywall anchors are a backup for lighter panels, but I would not trust them with heavy drapes or a wide span.
- Mark drill spots 4 to 6 inches above the frame and 4 to 12 inches wider on each side, then draw a faint horizontal line with a level. Check it twice. A pencil mark that looks level by eye usually is not, and a rod that slants even a little throws off the whole curtain line.
- Drill and set the brackets. For anything over about 60 inches of rod, add a third bracket in the center. Two brackets bow under the load over time; the center support stops the sag before it starts.
- If you cannot drill, a tension rod wedged inside the window frame works. It will not carry much weight and it narrows your usable span, but it keeps the wall intact for your deposit.
Common mistake: trusting the ceiling or window frame as level.
Both settle and both lie. Always measure from the floor up, or use the level on the marks themselves.
Why Placement Changes the Whole Room
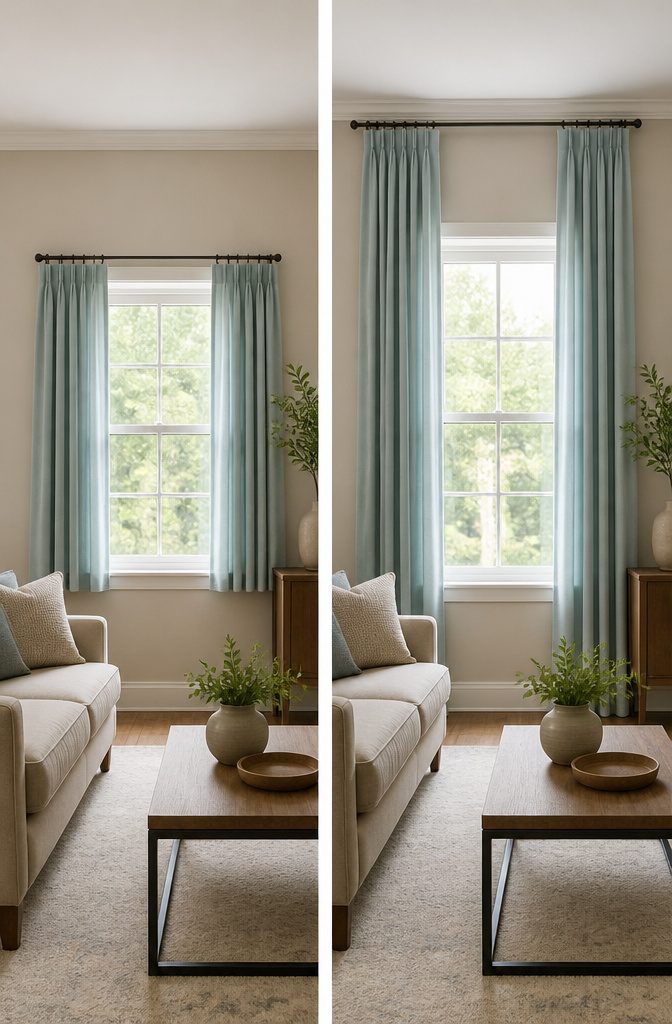
A curtain rod hung at the right height is free visual square footage, and that matters when every dollar in the budget is already spoken for.
Mount the rod too close to the window trim and the wall above the glass becomes dead space; the ceiling drops in the eye and the room shrinks to the size of its actual box.
Raise it 4 to 6 inches above the frame and the same wall suddenly reads taller, the window reads larger, and the whole space loosens up without moving a single piece of furniture.
Curtains should be between 4 and 6 inches taller than the window. This will lead the eye upwards, giving the impression of a room with generous ceiling height.
That upward pull is the whole trick.
The higher rod does not change the ceiling’s physical height, but it changes where the gaze lands first, and in a small living room or bedroom that shift is the difference between cramped and collected.
The cost is zero. The only requirement is buying panels long enough to reach the floor from the new height, which most standard lengths already cover.
The mistake I see most often is playing it safe, hugging the trim to avoid drilling too high and ending up with a wall that looks shorter than it is.
Measuring for Real Windows
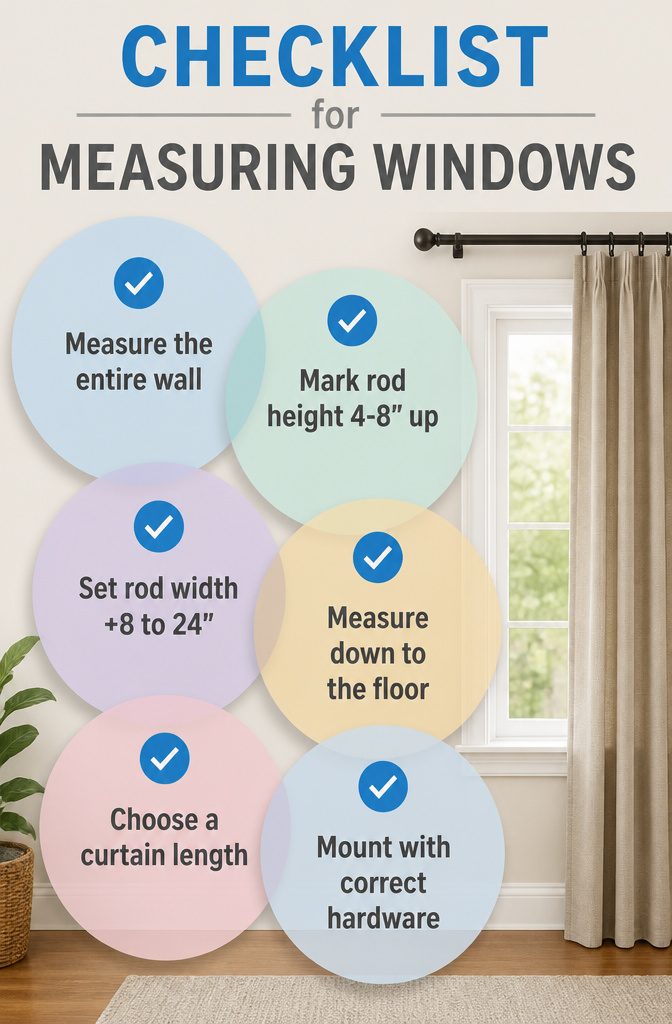
- Measure the wall, not the window. Ceiling height, the distance from the floor to the top of the window frame, and the window width including trim give you the real field to work with.
- Mark rod height at 4 to 8 inches above the frame, higher if the ceiling is tall or the window is small. When the window sits within 12 inches of the ceiling, take the rod nearly to the crown.
- Set rod width by adding 8 to 24 inches total to the window frame width. That means 4 to 12 inches past each side, which lets panels stack clear of the glass when open.
- Measure for length from the bottom of the rod down to the floor, not from the ceiling or the top of the rings. The header and hardware decide where fabric actually starts, so the rod itself is your zero point.
- Pick your finish: hover about 1 inch above the floor, or puddle about 3 inches onto it. I default to hover for active rooms, pets, or uneven floors. Puddle reads romantic but collects dust and complicates vacuuming.
- Mount with wall-appropriate screws and anchors, and level carefully. A second pair of hands matters more on wide or heavy rods, where a slight tilt is hard to correct after the fact.
What Curtain Style Does to the Hang
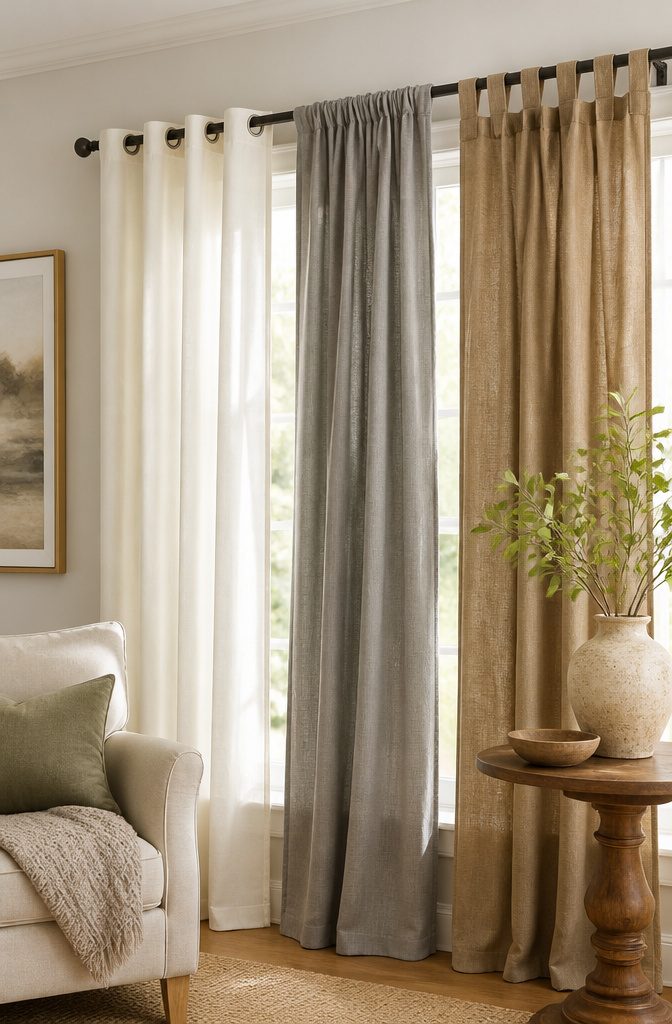
Grommets sit about 1 inch down from the top edge of the panel, which means the curtain falls roughly 1¼ inches shorter than its stated length.
That gap is rigid and predictable, so measuring is straightforward: add the drop to your rod height and you know exactly where the hem lands.
Rod-pocket panels thread directly onto the rod through a channel sewn into the top, giving a soft, gathered header.
The fabric bunches on the rod itself, so the effective height sits right at the rod with no offset, though the shirring eats some vertical length visually.
These need at least 1.5 to 2 times the window width in panel fullness or they hang flat and disappointing.
Back-tab and tab-top styles split the difference.
Back-tab loops hide behind the panel, creating a pleated face that looks tailored; tabs show on the front for a more casual, cottage feel. Both ride at or very near the rod surface, like rod-pocket but with less bulk.
For daily opening and closing, grommets win cleanly. They glide over the rod with almost no friction, while rod-pocket fabric drags and catches.
If you are stuck with rod-pocket and the panels fight you, a quick spray of dry silicone lubricant on the top of the rod helps, though it is a fix for a style that simply was not built for frequent motion.
Renters and the No-Drill Route
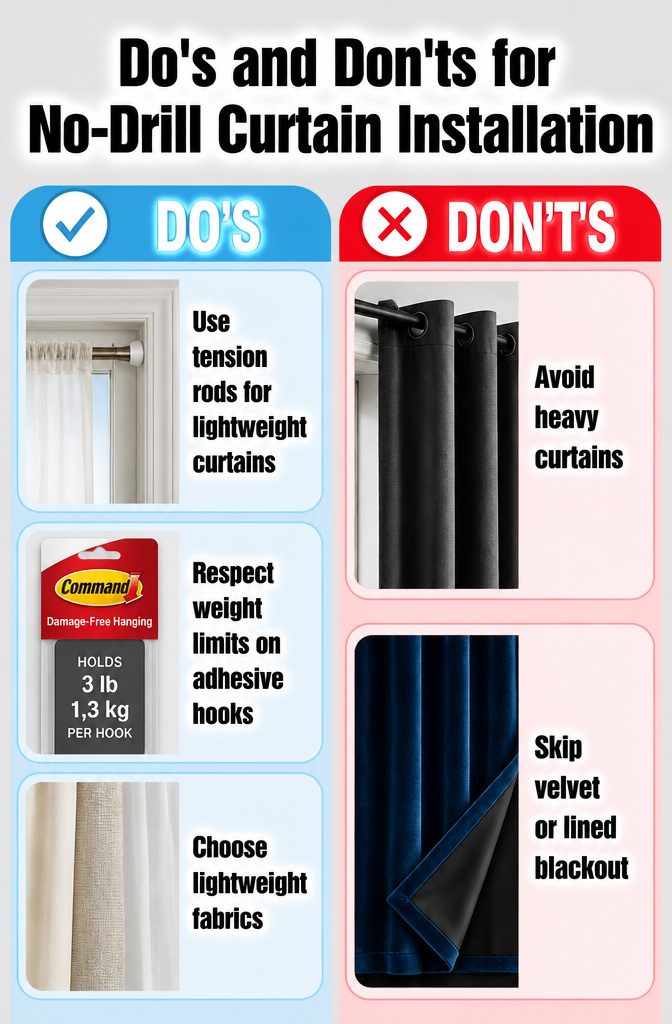
Tension rods fit inside the window frame and work for lightweight panels, maybe 3 to 5 pounds total.
Anything heavier, and the spring slips by mid-afternoon. I have watched a blackout curtain sag three inches in a single day because the rod could not hold the weight; the fabric pulled the rubber ends free from the drywall.
Adhesive hooks from brands like Command can handle a rod mounted outside the frame, but only if you respect the weight limit printed on the package.
That limit is per hook, not per pair, and a 48-inch span with a midweight curtain needs more hooks than the wall looks like it should.
Check the weight limit on the package and stay under it by at least a quarter; the stated number assumes perfect drywall, not the crumbly stuff behind most rental windows.
I would skip velvet, lined blackout, or any fabric with a substantial weave on either system.
Unlined cotton, linen blends, or sheer panels are where these solutions stop being frustrating. The no-drill route saves your security deposit, but it costs you the heavier fabrics that drape best at height.
Frequently Asked Questions
How high should I hang my curtains?
Mount the rod 4 to 8 inches above the window frame for standard 8-foot ceilings.
If the frame sits within a foot of the ceiling, split the difference and mount halfway up instead. For ceilings 9 feet or taller, push the rod 8 to 12 inches above the frame or mount just below crown molding.
How wide should the curtain rod be?
Extend the rod 4 to 12 inches past the window frame on each side so stacked panels clear the glass entirely.
For a 36-inch window, that means a rod between 44 and 60 inches wide total. The extra width exposes more glass for daylight and stretches the window’s visual footprint.
What length should curtains be?
Curtains should hover about 1 inch above the floor, graze the floor in a tailored kiss, or puddle 2 to 6 inches onto it for a romantic effect.
The hover is the practical choice for busy households, rentals, and anyone measuring without professional help.
Can I hang curtains without drilling holes?
Yes, using tension rods inside the frame or adhesive hooks outside it.
Tension rods handle lightweight panels up to about 5 pounds before slipping; adhesive hooks need weight limits respected by at least a quarter for safety. Skip heavy fabrics like velvet or lined blackout on either system.
How do I fix sagging rods?
Install a third bracket in the center for spans over about 60 inches.
Two brackets bow under load over time, and the center support stops the sag before it starts. For double rods, sliding a firm piece of plastic between the two rods can also help straighten them out.
How do I hang curtains?
Find studs with a stud finder and mark bracket locations 4 to 6 inches above the frame and 4 to 12 inches wider on each side. Draw a level horizontal line, drill, and set brackets.
Add a center support for rods over 60 inches. If you cannot drill, use a tension rod inside the frame instead.
How long should curtains be for a 72 inch window?
Panel width matters more than height here. You need 1.5 to 3 times the window width in total panel fabric, so a 72-inch window calls for 108 to 216 inches of panel width combined.
For length, measure from rod bottom to floor and choose hover, kiss, or puddle based on your room and habits.
What height to hang a curtain rod for 84 inch curtains?
With 84-inch panels, mount the rod so the hem lands at your chosen finish: about 1 inch above the floor for a hover, grazing it for a kiss, or 2 to 6 inches onto it for a puddle.
Factor in the header style: grommets drop the curtain about 1.25 inches shorter than the stated length.
Is it better to have curtains too long or too short?
Too long is better.
Curtains that stop well above the floor look unfinished no matter how high the rod sits, while excess length can be hemmed or allowed to puddle. A hover at 1 inch above the floor forgives imperfect measurement and still looks intentional.