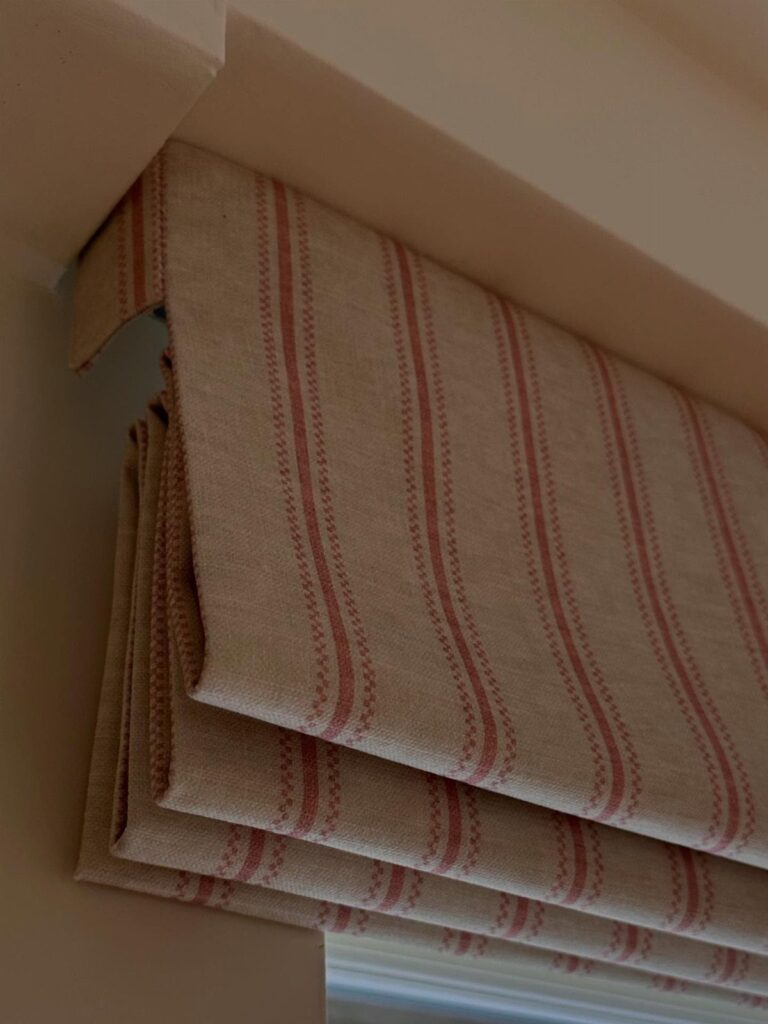
These ideas run from a cheap roll of privacy film to a full crown-molding cornice that takes a weekend and a miter saw, so the deciding factor is how permanent your situation is and how much of the window you actually need to control.
Renters leaning on adhesive film and clip-on hardware can peel out with their deposit intact; first-home owners ready to sink screws into the wall get the tailored look of a cornice or layered drapes.
The detail that tells you which camp you are in is the L-bracket: 2 small holes for a woven shade, or a full box build to hide the rod entirely.
1. Roman Shades
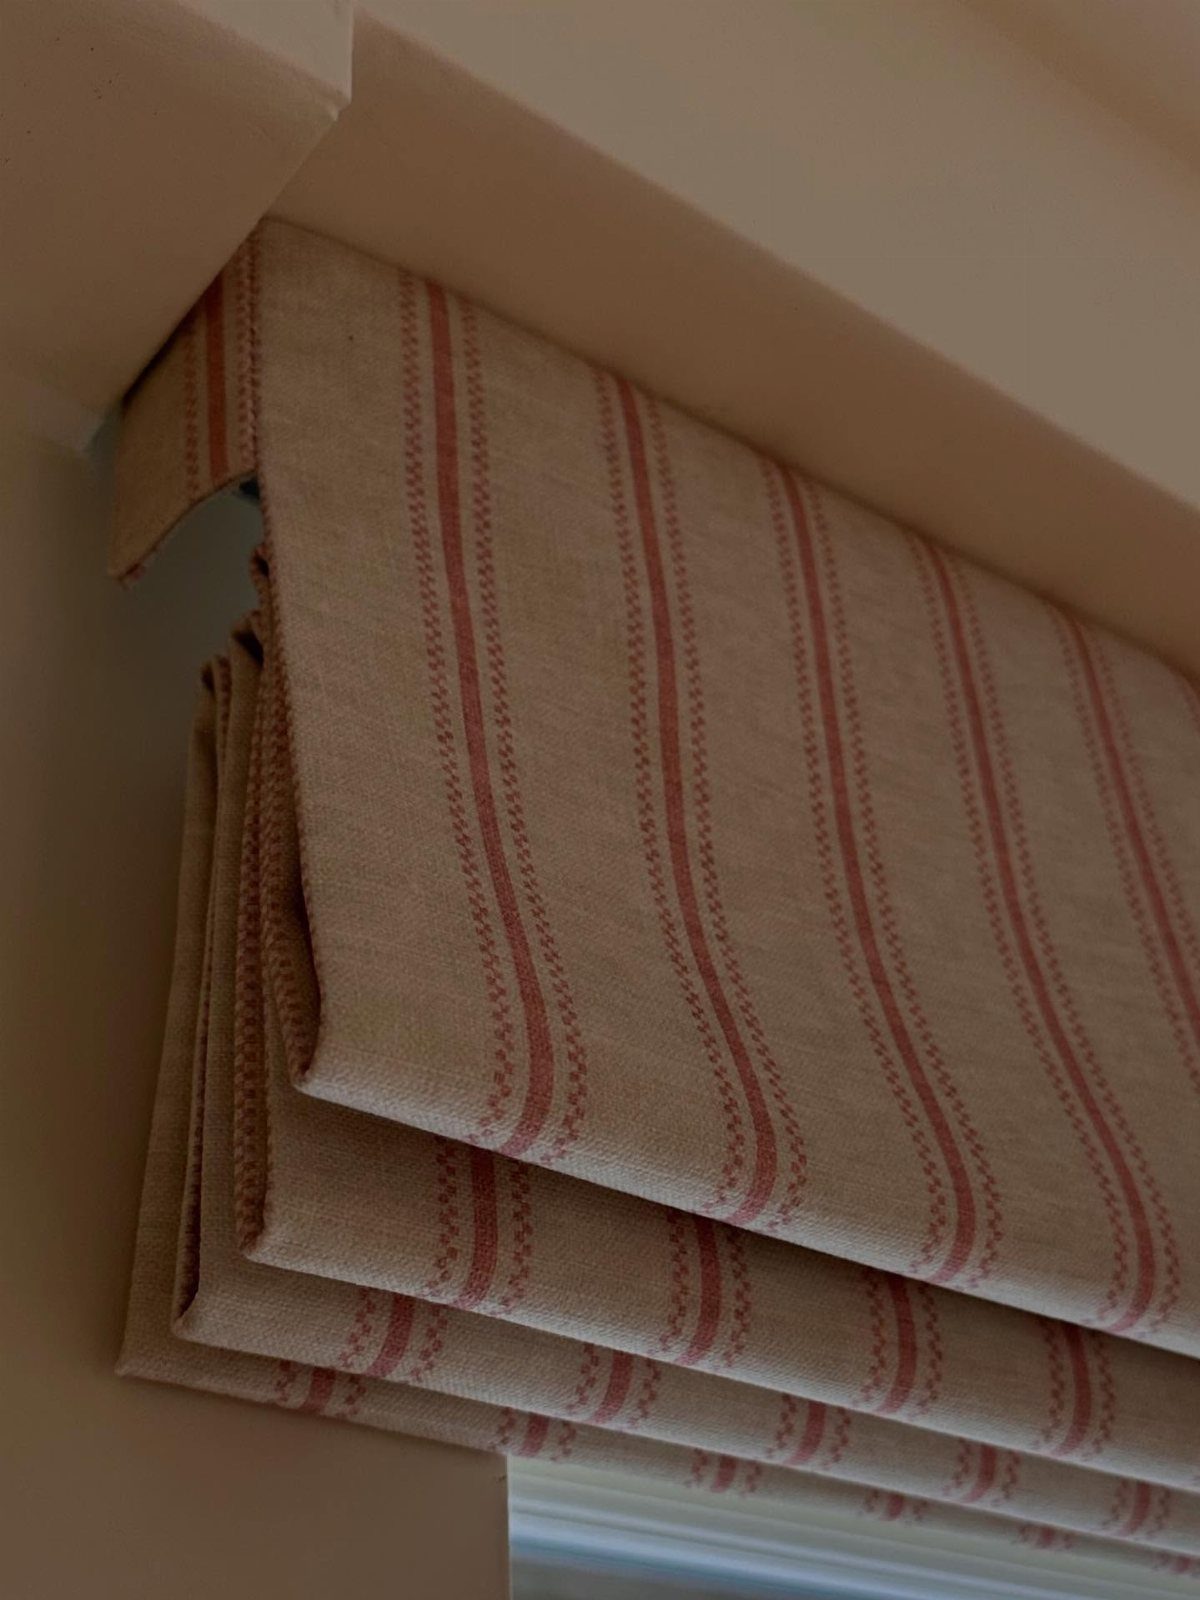
A Roman shade folds itself into clean horizontal pleats as it rises, which means no exposed roller mechanism and no fabric pooling on the floor.
Mounting a striped cotton inside the window recess saves the cost of an outside mount and keeps the wall line intact.
For a first-timer, the build means cutting a fabric panel to size, pressing in horizontal dowel pockets at regular intervals, and threading cord through rings sewn to the back.
I would choose a medium-weight fabric with some body; lightweight quilting cotton collapses into limp folds.
2. DIY Roller Shades
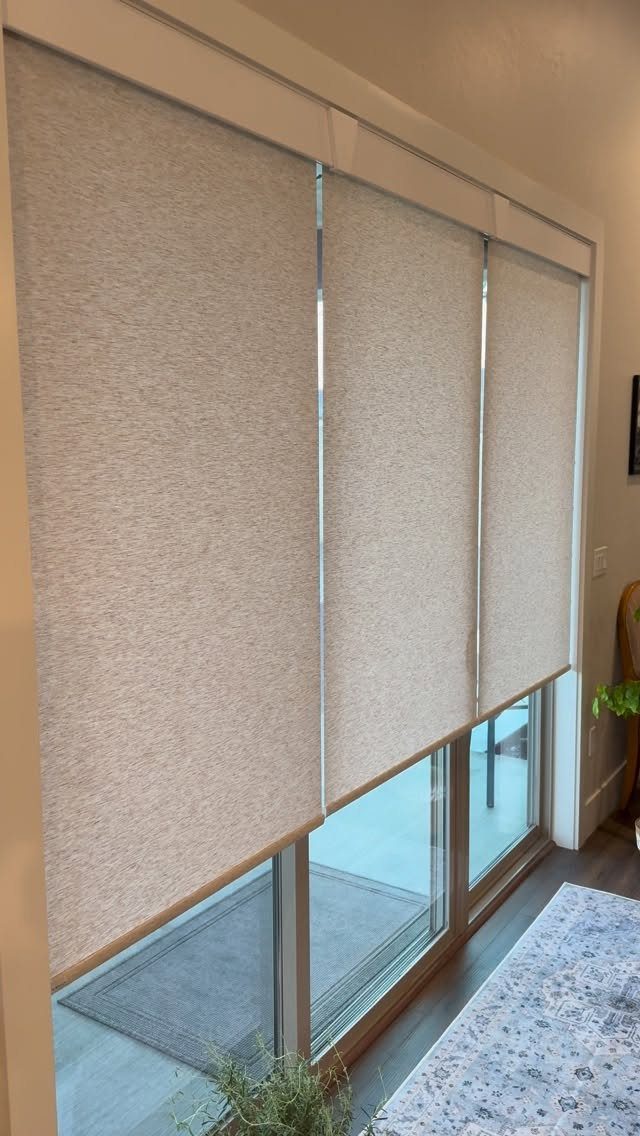
3 roller shades across a patio door give you the option to cover just the section where sun is actually hitting, which a single wide blind cannot do.
The texture visible here, a tight weave in a warm neutral, reads as finished without needing a fabric liner.
Installation is bracket-mounted above the frame; the shade drops from a spring-loaded tube found at most hardware stores.
Measure the inside width of each frame section, subtract a small amount for clearance, and cut the tube with a hacksaw if needed.
The whole job stays affordable for several windows and takes an hour once the brackets are level. I like this setup for renters because the holes are small and the hardware leaves minimal trace.
3. Fabric Valances
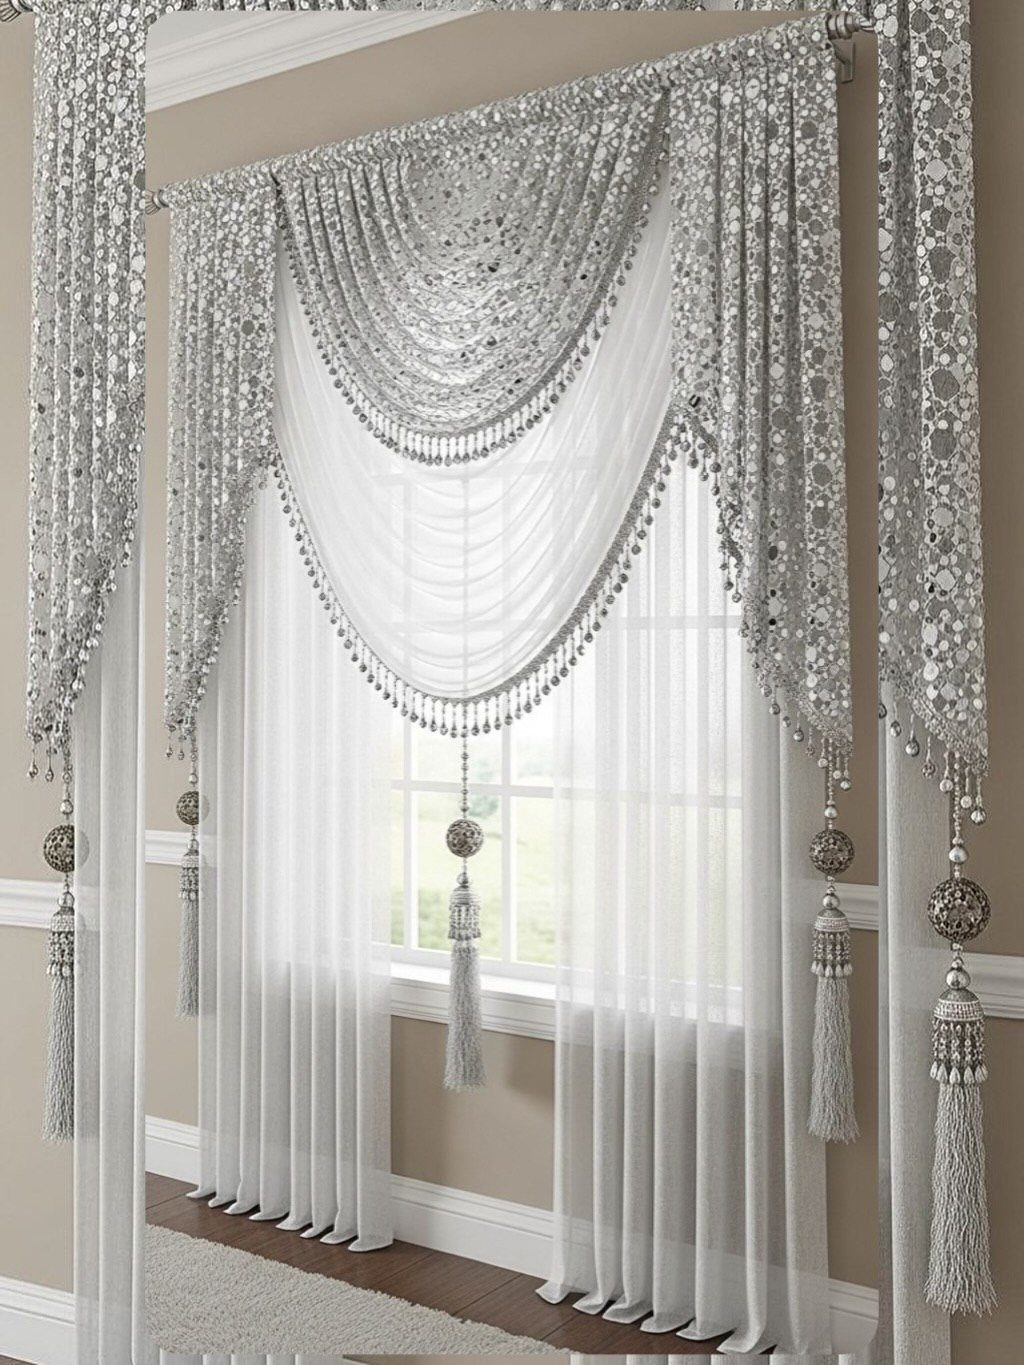
A swag valance softens the top of a window without committing to full drapery, and beaded trim adds weight that helps the fabric hold its drape.
The construction is straightforward: cut a scalloped or pointed shape, line it with interfacing for structure, and mount on a board or clip rings above the main curtain rod.
Allow 2–2.5 times the window width in fabric for proper fullness. I find valances work best in rooms where the window needs dressing up but privacy is already handled by sheers or blinds below.
4. Patchwork Curtains
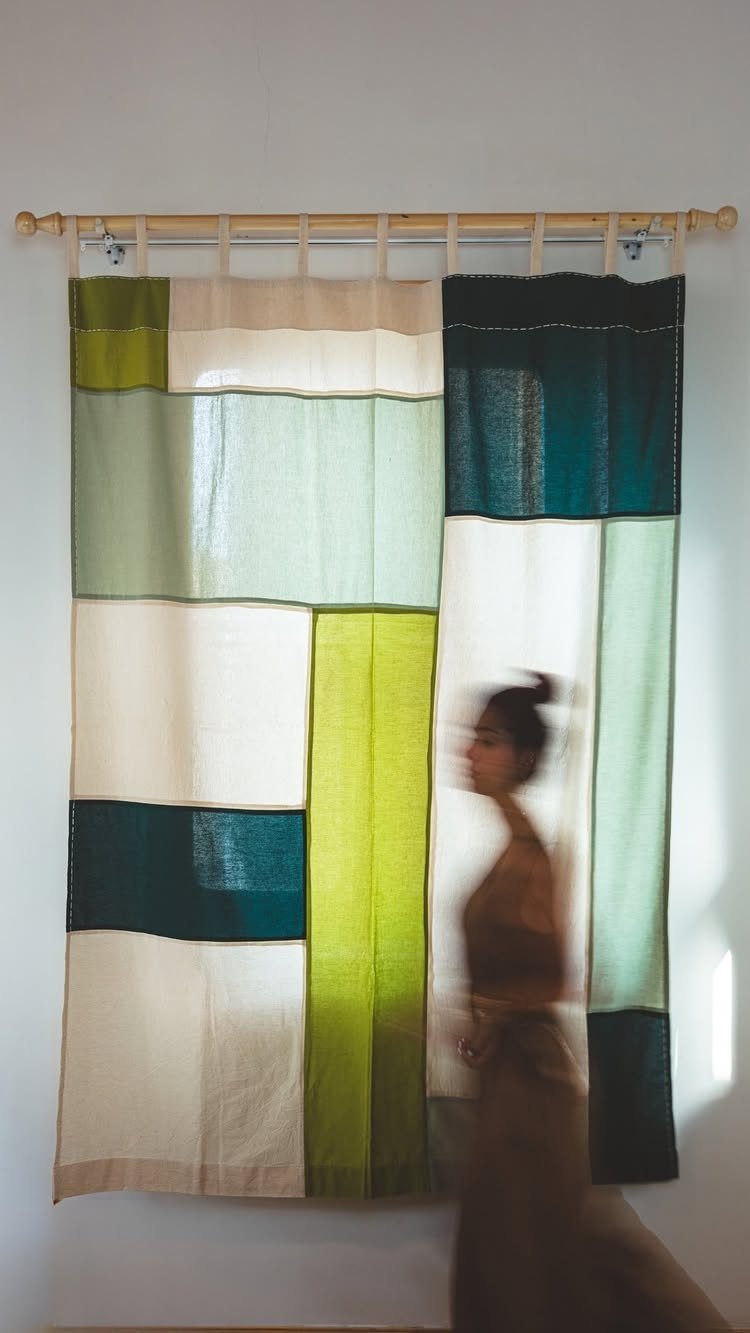
Stitched rectangles of green, cream, and teal give these curtains a handmade texture that reads as intentional rather than improvised, which is the difference between patchwork and mere scraps.
The visible version uses a simple grid of equal-size panels, a forgiving layout if your fabric pieces vary slightly.
For a standard panel, plan on plenty of same-size squares, allowing for seams and a finished hem.
Quilting cotton or lightweight linen blends press flat and hang without bulk. I would pre-wash every piece to prevent uneven shrinkage later, and I would stick to a limited palette to keep the result from looking busy at window scale.
5. Roller Shades with Curtains
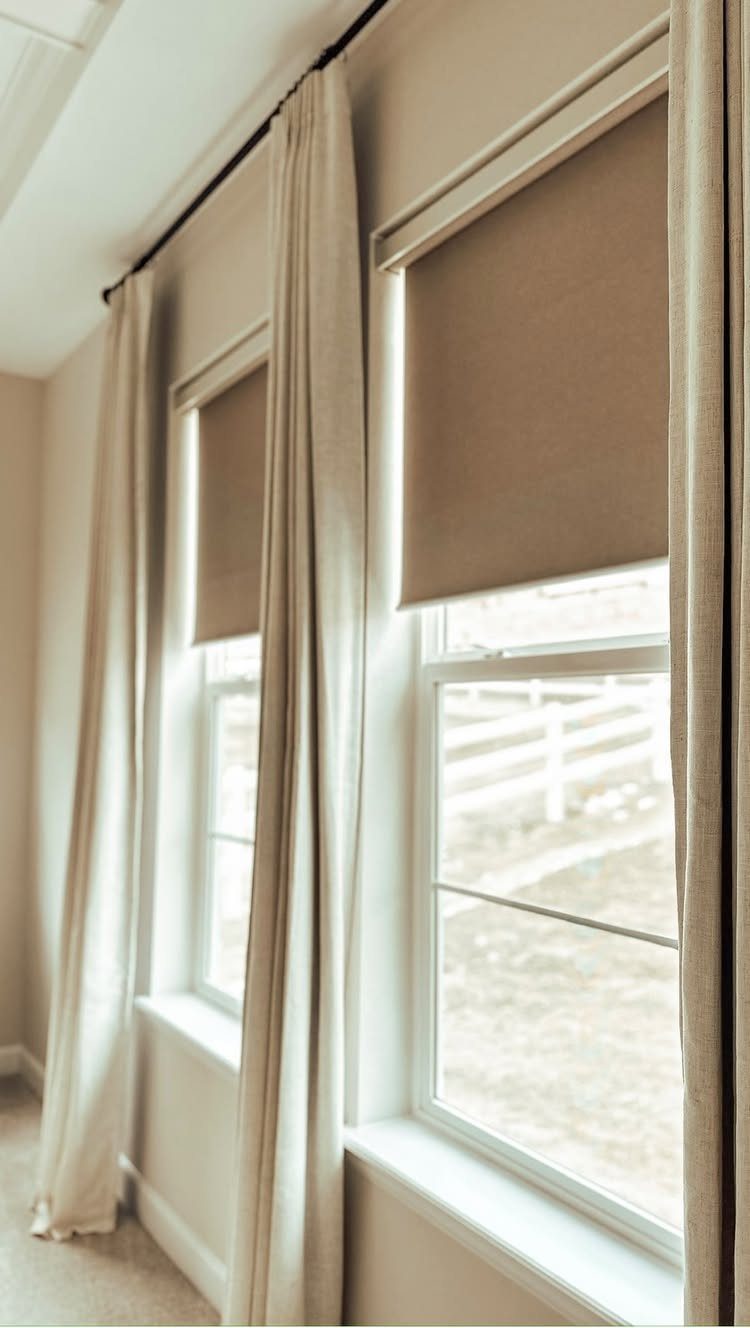
Pairing a roller shade with drapery gives you 2 tools for different jobs: the shade blocks light and view when lowered, the panels frame the window and add softness when the shade is up.
Stopping the shade at mid-height is how I would use it most days, keeping the upper glass open for light while the lower half stays covered for privacy.
Mount the roller shade inside the frame or just above it, then hang the curtain rod wider on each side and well above the frame to stack the panels clear of the glass.
Neutral on neutral, as here, keeps the layering from competing. This combination costs more than either treatment alone, but less than a custom shade with integrated blackout liner.
6. Woven Wood and Bamboo Shades
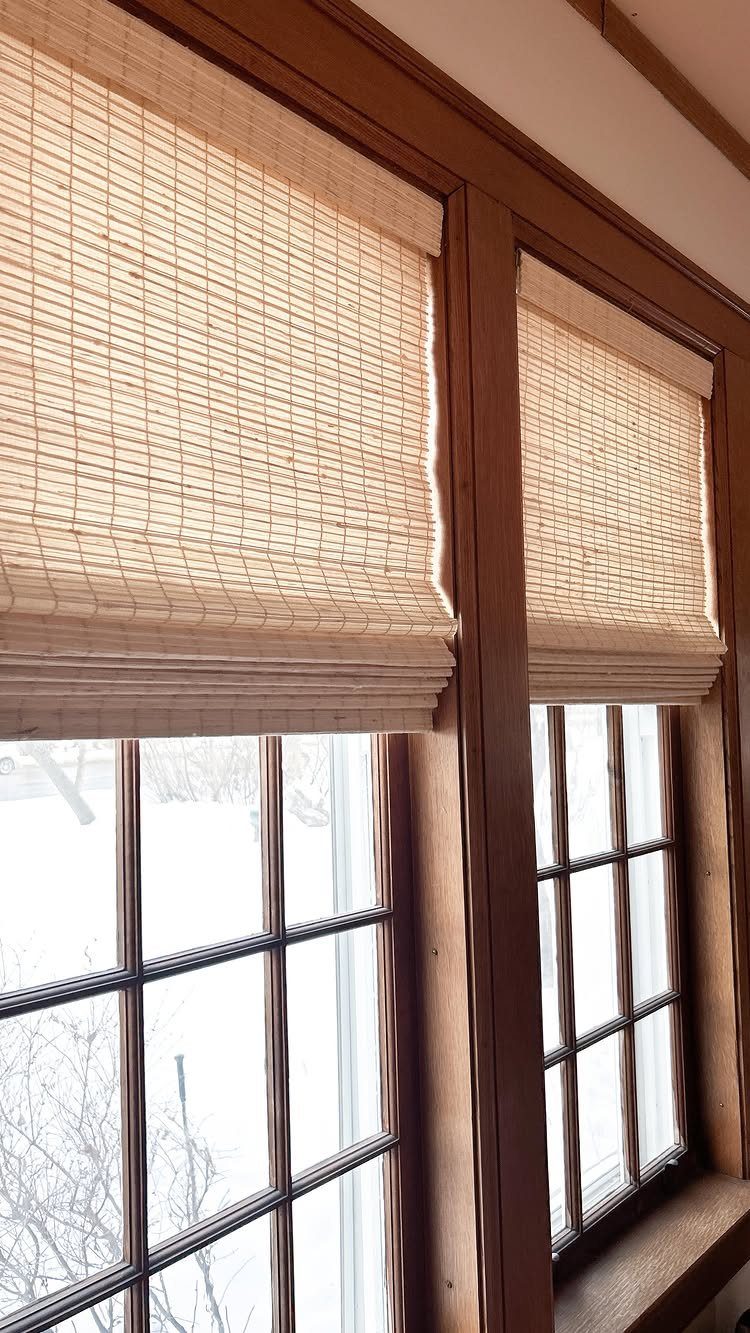
Woven shades filter light rather than block it, which makes them suited to rooms where you want daytime privacy without losing the sense of outdoors.
These run per window for standard sizes, more if you need an exact custom fit to a frame like the wooden one visible here.
The slim headrail mounts with two L-brackets; the weight is light enough for hollow-wall anchors if you miss a stud.
I would avoid these for street-level bedrooms unless I added a blackout liner, since the gaps in the weave are visible at night with interior lights on.
For a sun-facing office or upper-floor living room, though, the warmth against snow or green lawn is hard to match with synthetic fabric.
7. DIY Stained Glass Panel
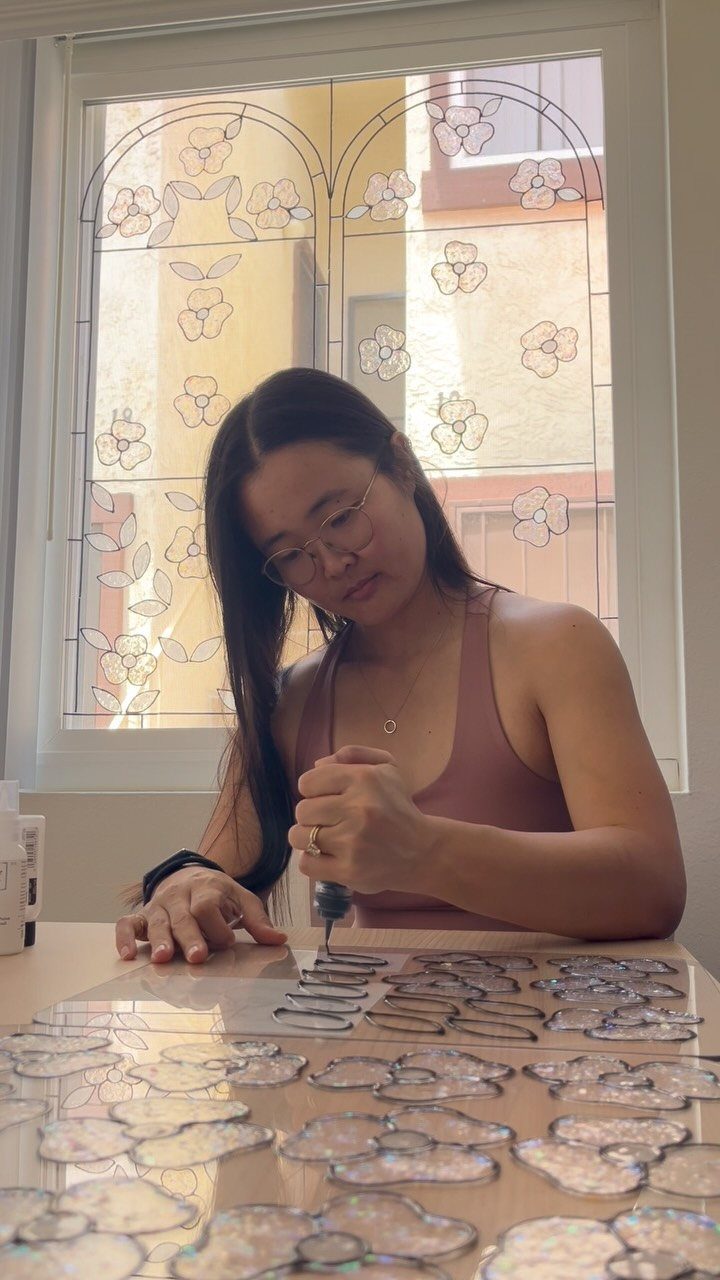
A faux stained glass panel gives you the color and privacy of real leaded glass without the cost of a studio or the permanence of installation.
A floral panel like this one works best when you plan it as privacy art for a high-traffic window: decoration that also blocks sightlines.
I would start with a large sheet of plexiglass cut to the window sash size, then apply liquid leading to trace a design and fill between the lines with translucent glass paint.
The leading dries raised, so the piece reads as genuine from a few feet away. A table and patience are the main tools; the work takes a weekend plus drying time.
8. Decorative Privacy Window Film
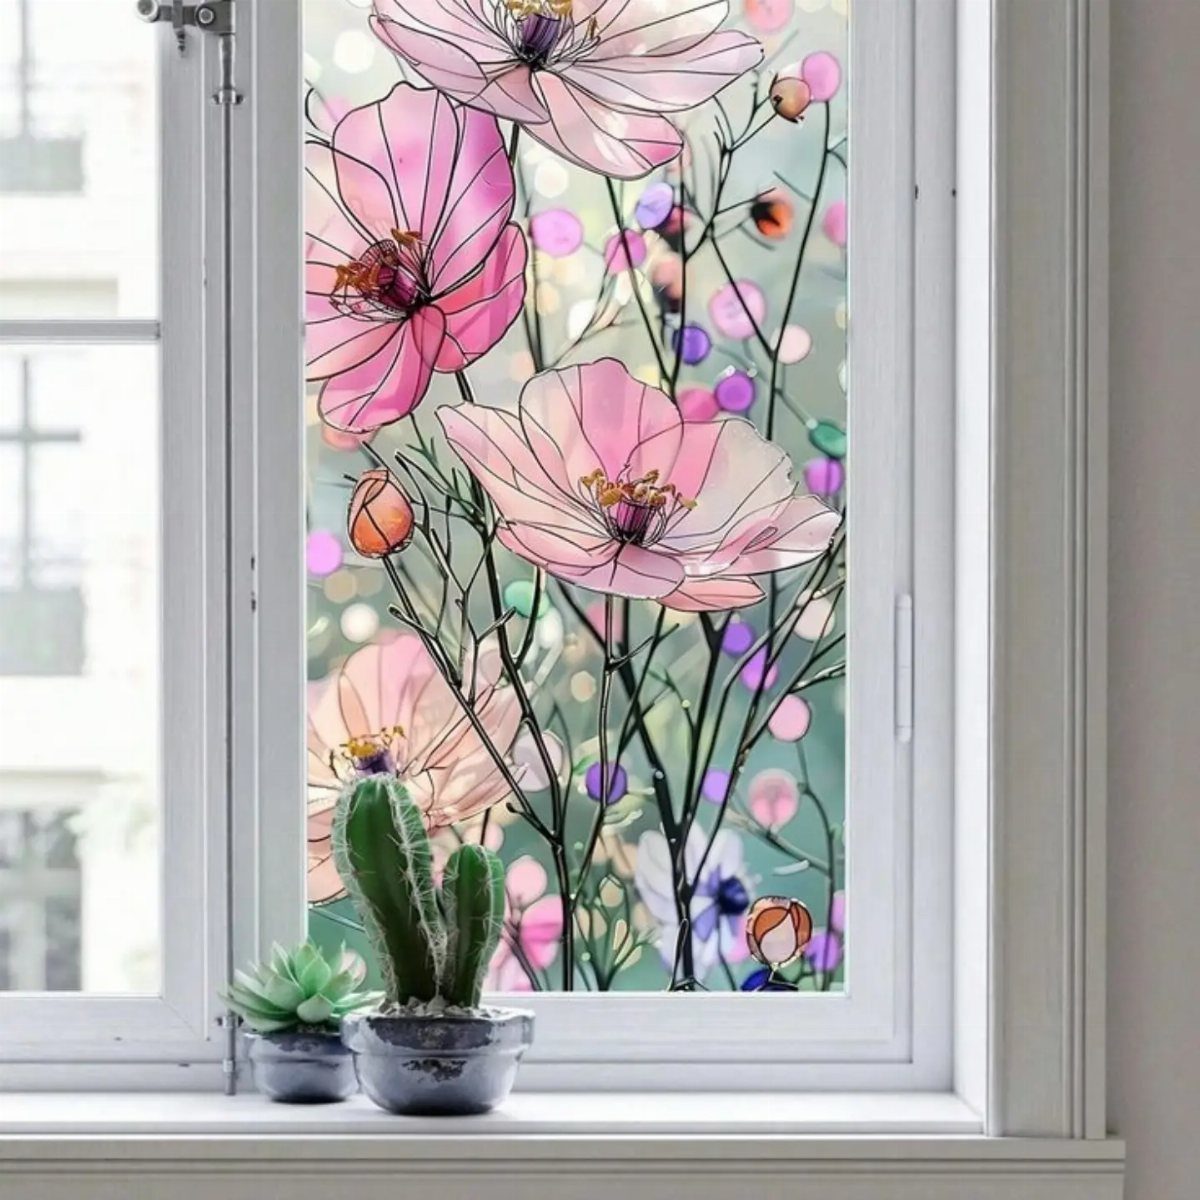
Decorative privacy film sticks directly to the glass and peels off when the lease ends, which makes it ideal for renters who want pattern without hardware.
Color film like the cosmos-and-bubbles version covers a single pane and reads from inside and out.
Clean the glass thoroughly, mist with soapy water, and smooth the film from the center outward with a squeegee or credit card edge. A standard roll runs cheap and covers multiple panes with careful cutting.
I would choose this for a bathroom or street-level window where you need light and obscurity at once; it blocks no sun and adds no insulation, but it costs less than a curtain rod.
9. Layered Sheer and Tieback Drapes
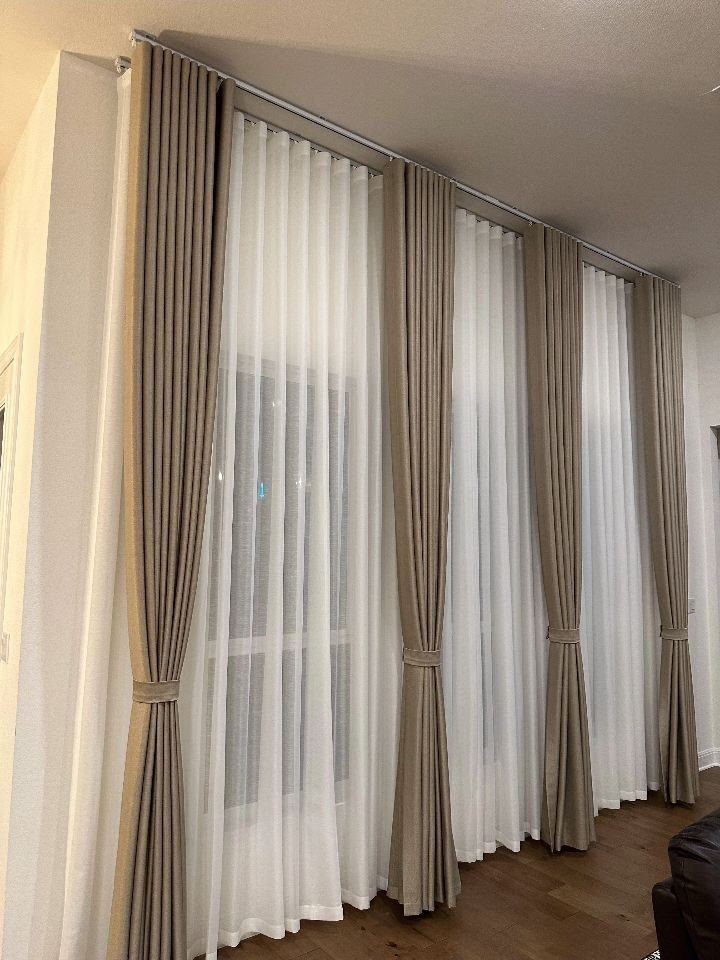
Sheer curtains hung full-time with heavier panels tied back over them give you more options than either layer alone: sheers for filtered daylight, drapes drawn for darkness, tiebacks for framed views, or both layers open for maximum light.
A taupe-over-white setup keeps the palette quiet so the layering itself does the work.
Mount the sheer rod at the frame and the drapery rod wider on each side, high enough to clear the frame top.
I find this worth the extra hardware only on windows you actually open and close the treatments on; for a fixed display, a single layer saves money and washing.
10. Crown Molding Cornice with Drapes
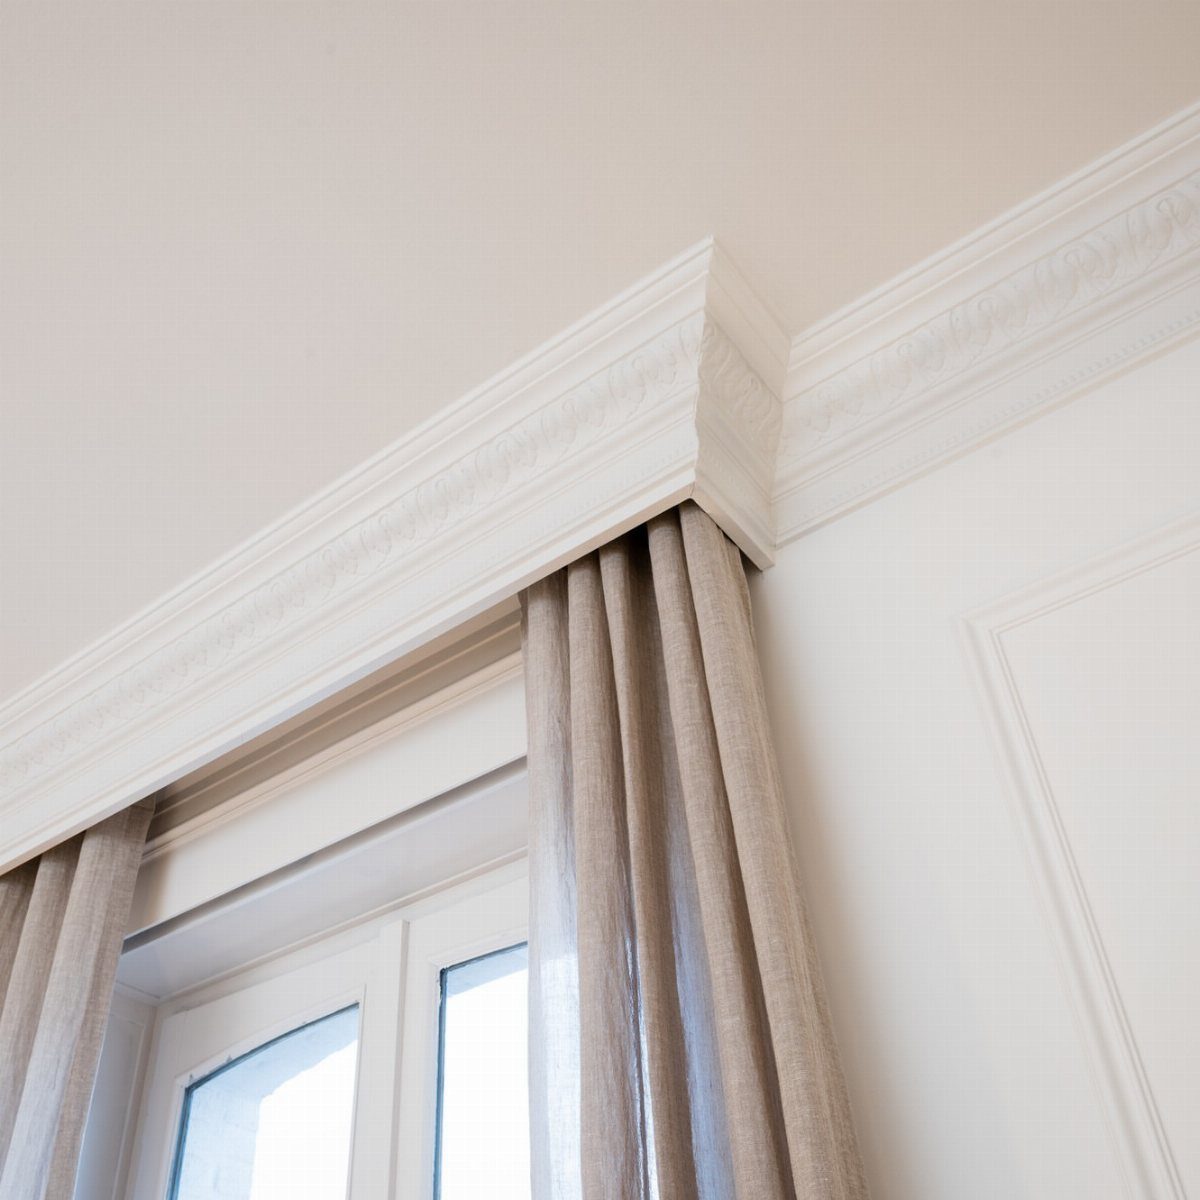
A crown molding cornice turns the top of the window into architecture and hides the drapery hardware entirely, which gives a tailored look even with ready-made panels.
White molding above beige linen reads as built-in, though it is simply screwed to the wall.
Build the box from MDF or poplar, miter the front corners, and cap with a profiled molding strip; paint to match the trim.
The curtain rod mounts inside, so the panels hang from behind the facade with no rings or brackets visible.
I would allow the cornice to project forward enough to clear gathered fabric, and I would keep the face height modest on standard ceilings to avoid crowding the room.
Materials for DIY Shades
The cheapest starting point for a shade is often a cotton drop cloth from the paint aisle. It takes dye well, holds paint if you want pattern, and the weight is right for a roller or Roman build without lining.
Vintage linens work the same way if you want a softer hand and some irregularity in the weave, though you may need to piece narrower cuts together for a wide window.
No-sew builds rely on fabric tape or glue to hem edges and bond layers.
I would test the adhesive on a scrap first; some glues stiffen fabric more than others, and a rigid hem will not fold cleanly on a Roman shade. Curtain rings, clips, and adhesive strips each suit a different mount.
Rings and cord are standard behind a Roman shade. Clips or adhesive work for a temporary hang, though I would check them every few months, especially in humid rooms where the bond can weaken.
For the roller tube itself, hardware stores stock spring-loaded mechanisms in standard widths.
Customization Tips
Pattern does not have to mean print. A stencil and latex paint on a plain shade give you a repeat you control, and the paint stiffens the fabric slightly, which can help a lightweight cotton hold its fold.
I would keep the motif scale modest; a large pattern reads differently when the shade is raised versus lowered, and the distortion annoys me every time.
Trim is where a basic shade starts looking finished. A row of tassels or a narrow ribbon border at the hem takes almost no skill and covers uneven cutting.
I would attach trim after the shade is built and hung, so I can judge the length and placement with the real light behind it.
Layering 2 affordable treatments is the main way I know to get a custom look without paying custom prices.
Maintenance and Care
Dust settles on the top surface of any horizontal shade and shows against light-colored fabric.
A soft cloth or the brush attachment on a vacuum gets run across mine once a month; windows facing a street or the kitchen need it more often.
Spot cleaning is straightforward on cotton or linen with mild detergent and a damp cloth, but I would blot rather than rub, and I would test any cleaner on a hem or back corner first.
Paper shades do not recover from moisture; keep them dry.
Adhesive mounts and clip systems loosen over time, especially with the temperature swing near a window.
I check mine seasonally, pressing strips back into place or replacing clips before the shade sags or falls. A shade that drops unexpectedly can tear its own fabric or chip the sill on the way down.
With regular dusting and prompt attention to stains, a DIY shade lasts several years. The parts that fail first are usually the mount, not the fabric, so a few minutes of inspection now and then saves a full rebuild later.
Frequently Asked Questions
Can you DIY a window covering?
Yes. A Roman shade, roller shade, or privacy film are all builds a first-timer can finish with basic tools and a Saturday.
Cotton drop cloths run cheap at hardware stores, and spring-loaded roller tubes in standard widths sit on the same shelves.
What can I cover my windows with?
Roman shades, roller shades, woven wood or bamboo shades, fabric valances, patchwork curtains, layered sheers with tieback drapes, faux stained glass panels, and decorative privacy film each solve a different problem: light control, privacy, color, or some mix of the three.
Each suits a different need: blackout, filtered light, privacy, or decoration, and most pair well for layering.
How can I disguise glass block windows?
Decorative privacy film sticks directly to glass and peels off later, which makes it ideal for renters. Cosmos-and-bubbles film reads from both sides, gives you light plus obscurity, and peels off clean when you move out.