These 32 ideas run from a dollar bag of craft sticks to a hardwood cutting board you plane yourself, with most landing in the few-dollars range and finishing inside a weekend.
The mason jar Santa is still sitting on a shelf in January, but the spiced nuts and homemade fudge are gone by New Year’s; the question is whether your recipient keeps things or eats them.
If you need a dozen gifts in under an hour, hot chocolate stirrers check every box: they keep for weeks, ship flat, and the recipient just needs a mug.
1. Santa Mason Jar Gift
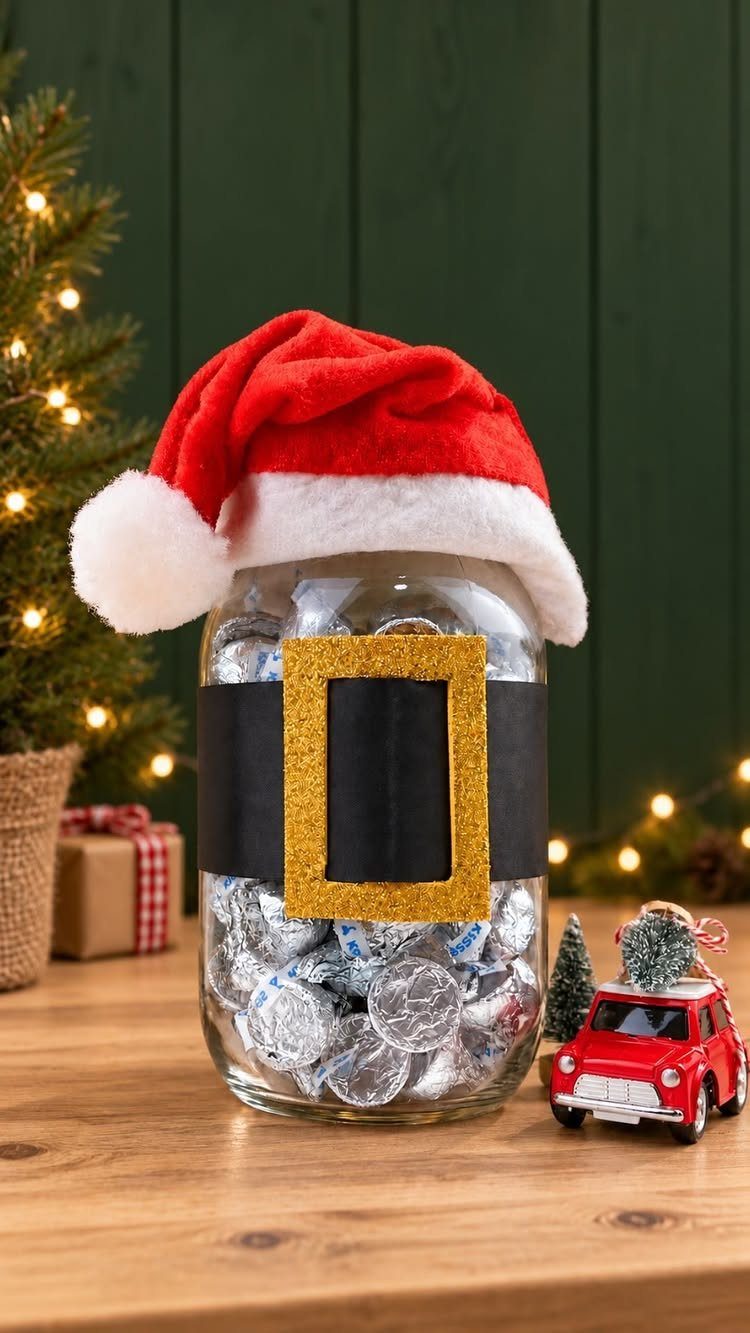
A mason jar dressed as Santa Claus turns a simple candy holder into something worth unwrapping twice.
The parts come from any dollar store: a black ribbon belt, a gold paper buckle, and a tiny hat pinned to the lid. Fill with whatever fits, foil-wrapped chocolates or peppermints or even cocoa packets.
The jar itself is the keepsake; the candy is just the excuse. For a weekend project with kids, this looks harder than it is, costs almost nothing, and finishes in an afternoon.
2. Homemade Hot Chocolate Stirrers
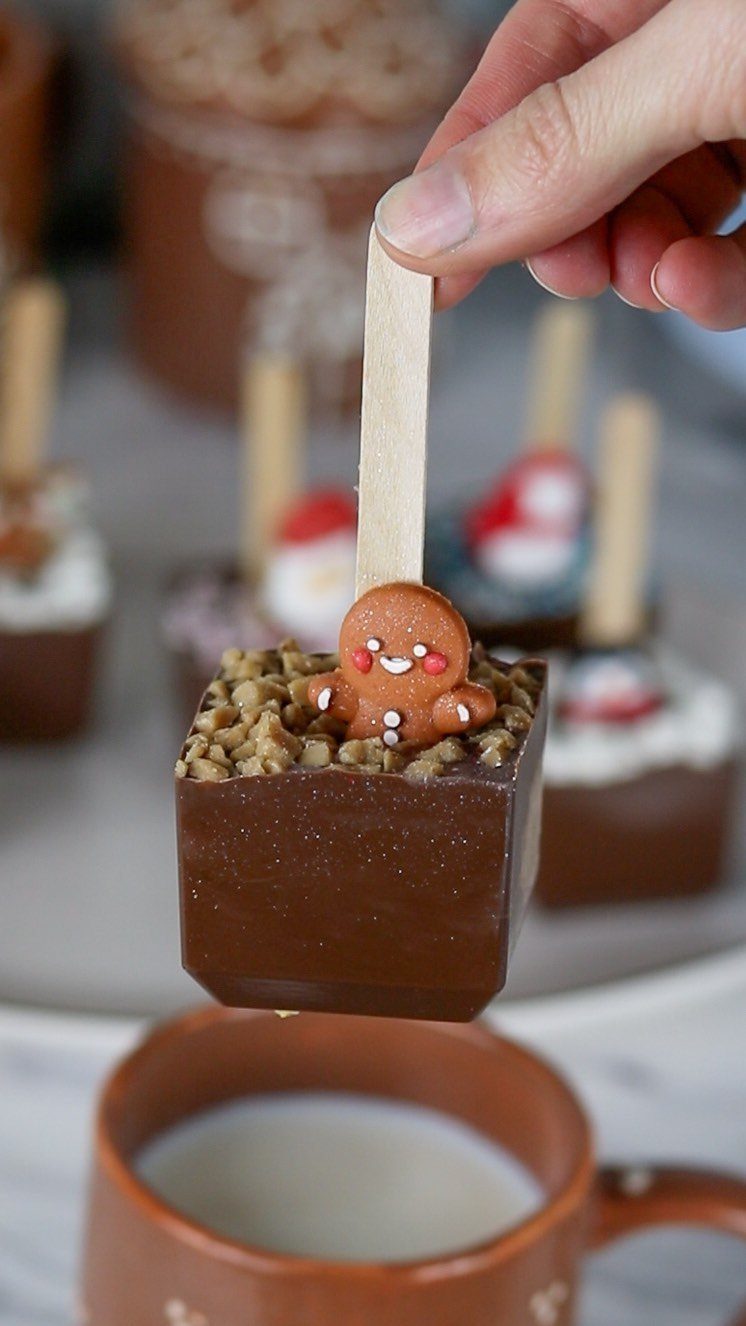
These stirrers start with a chocolate base, a stick, and whatever small candy or cookie you press on top before the coating sets.
Gingerbread men and toffee bits work well, but I have seen them with crushed peppermint, mini marshmallows, or a single candied orange slice. Melt chocolate, pour into a mold or free-form shape, insert the stick, add toppings while soft.
Wrap in cellophane and they keep well enough to make ahead. One batch makes a dozen gifts in under an hour, and the recipient supplies their own mug and milk.
3. DIY Christmas Wreath
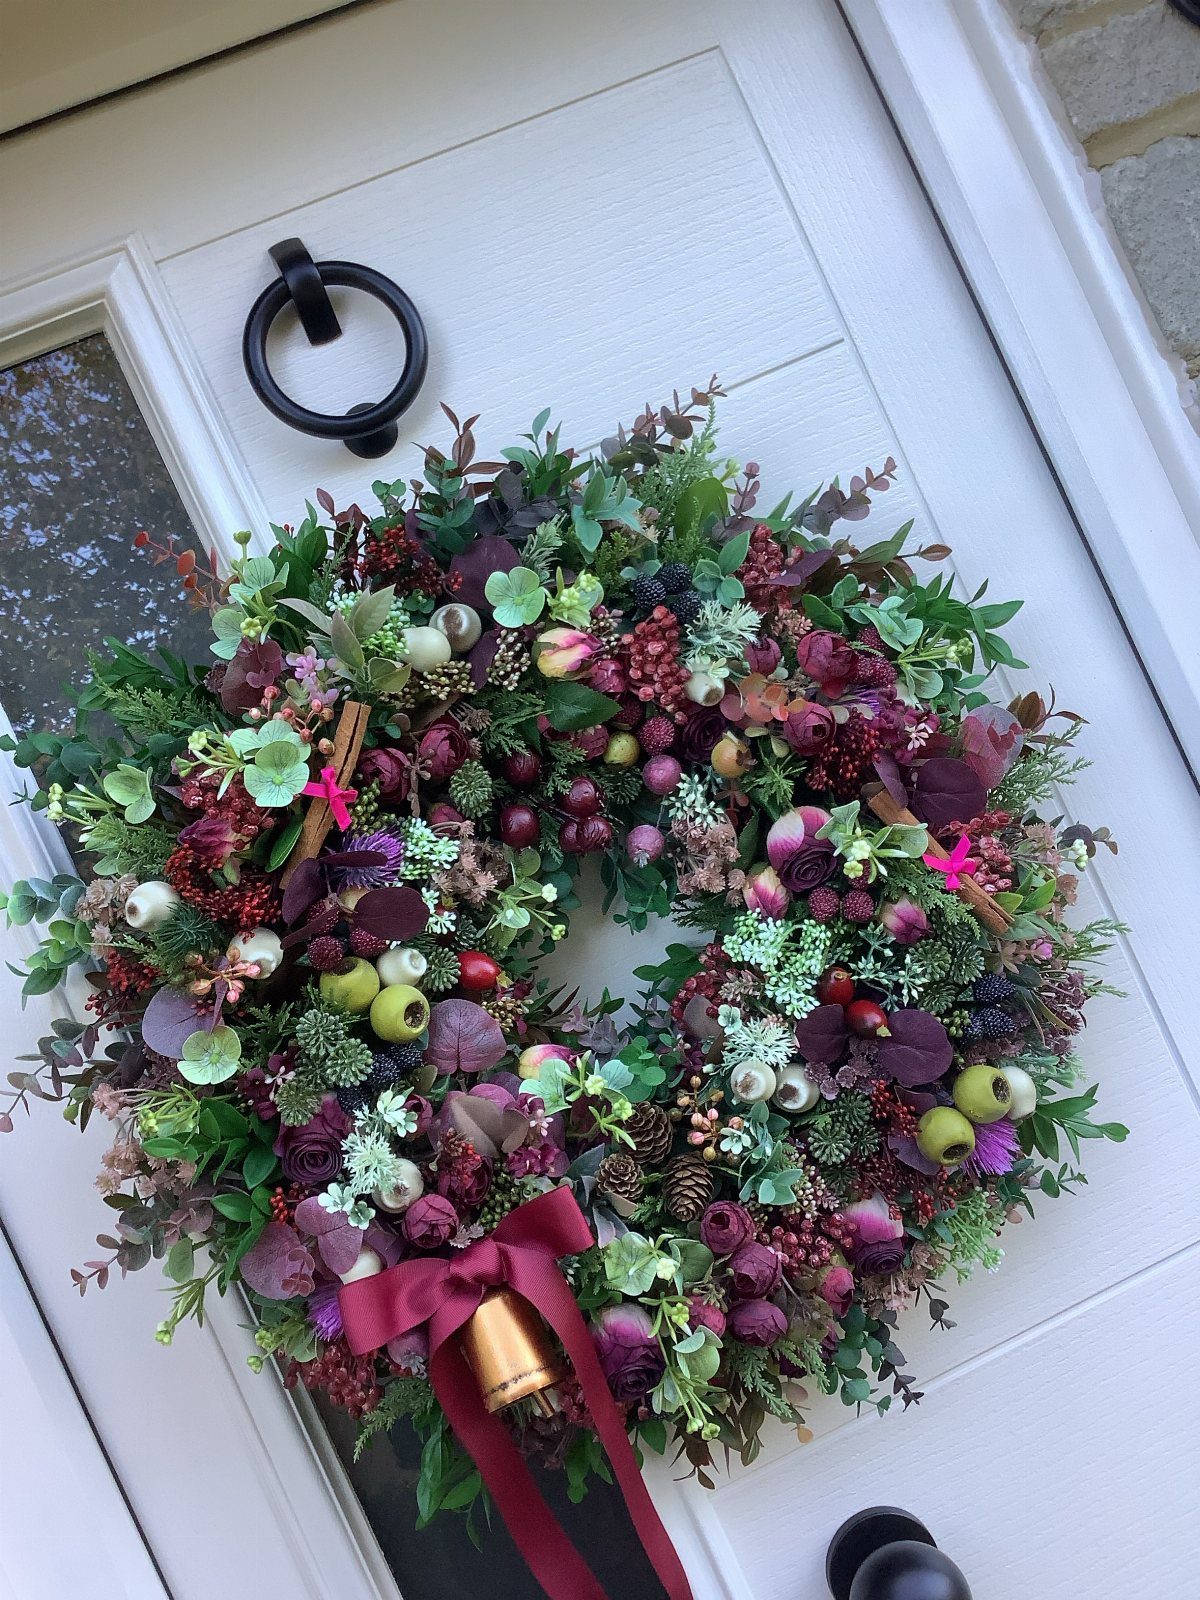
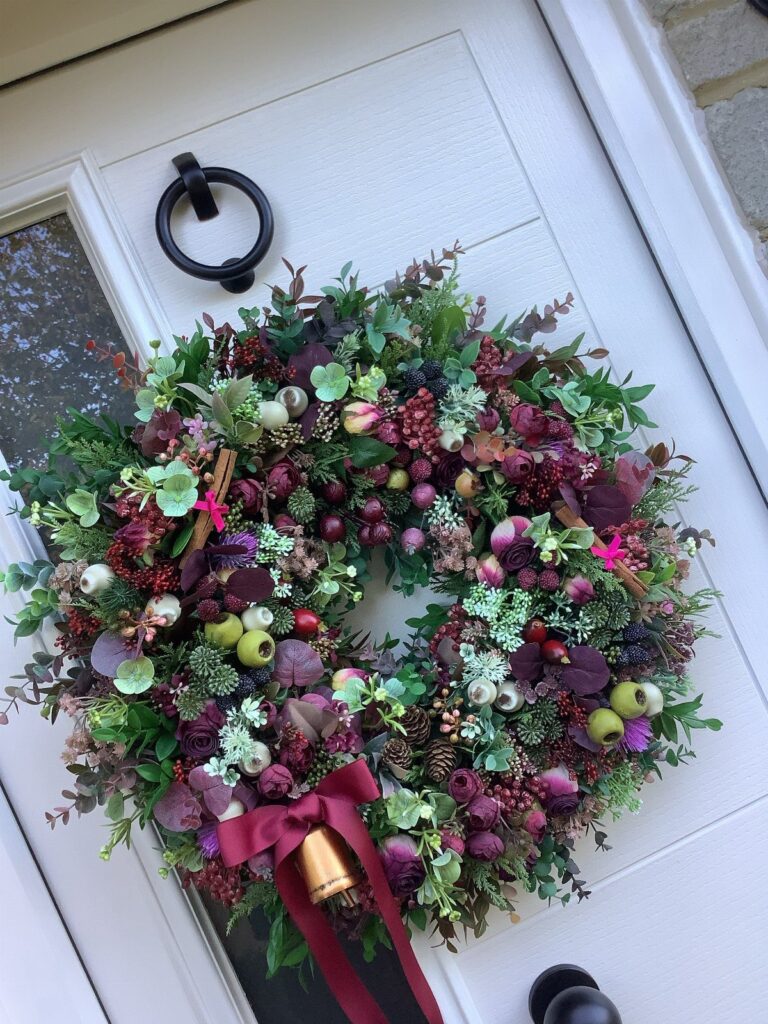
A wreath built on a grapevine or wire frame lets you control the fullness and the color story.
Purple with berries, pinecones, and cinnamon sticks is one route, but the method stays the same: secure greenery first for structure, then layer in accents.
I prefer wired floral picks to hot glue; they hold through January and let me reuse the frame next year.
Materials run cheap; the bulk of the cost is greenery and a wire frame, and most of the time is spent fussing with placement until it looks full.
Hang it with a proper door hook, not the over-the-top kind that scratches paint.
4. Homemade Bath Salts
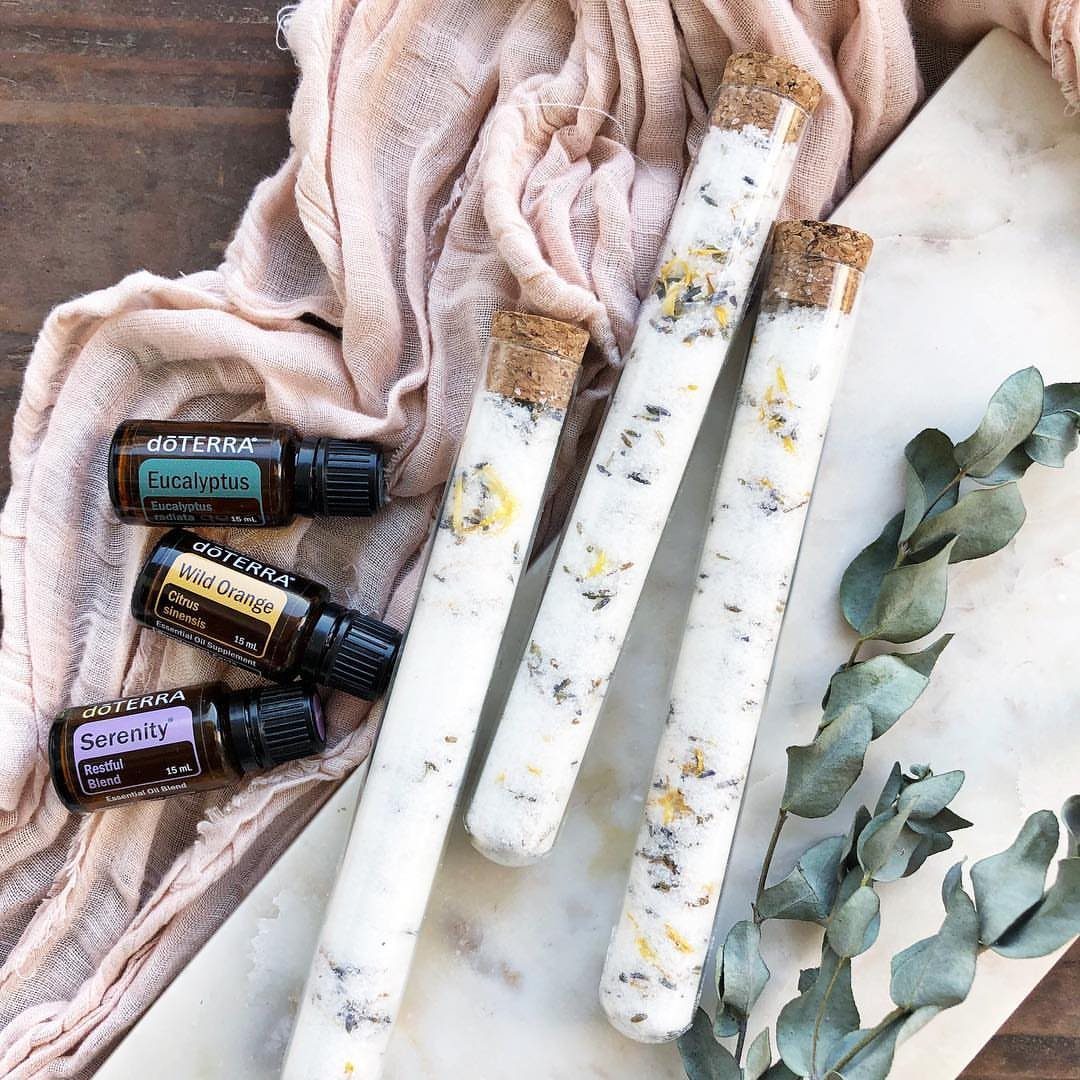
Epsom salt, coarse sea salt, and a few drops of essential oil fill each tube, with dried botanicals for color.
The oils named are eucalyptus, wild orange, and a blend called serenity, but I would stick to one scent per tube so the recipient can choose their mood.
Mix in a bowl, let dry overnight, then funnel into corked glass. The salt and tubes cost little; the only real expense is essential oil if you do not already own it.
The salt itself keeps indefinitely; the scent is what fades, so make them close to when you plan to give them.
5. Personalized Photo Ornaments
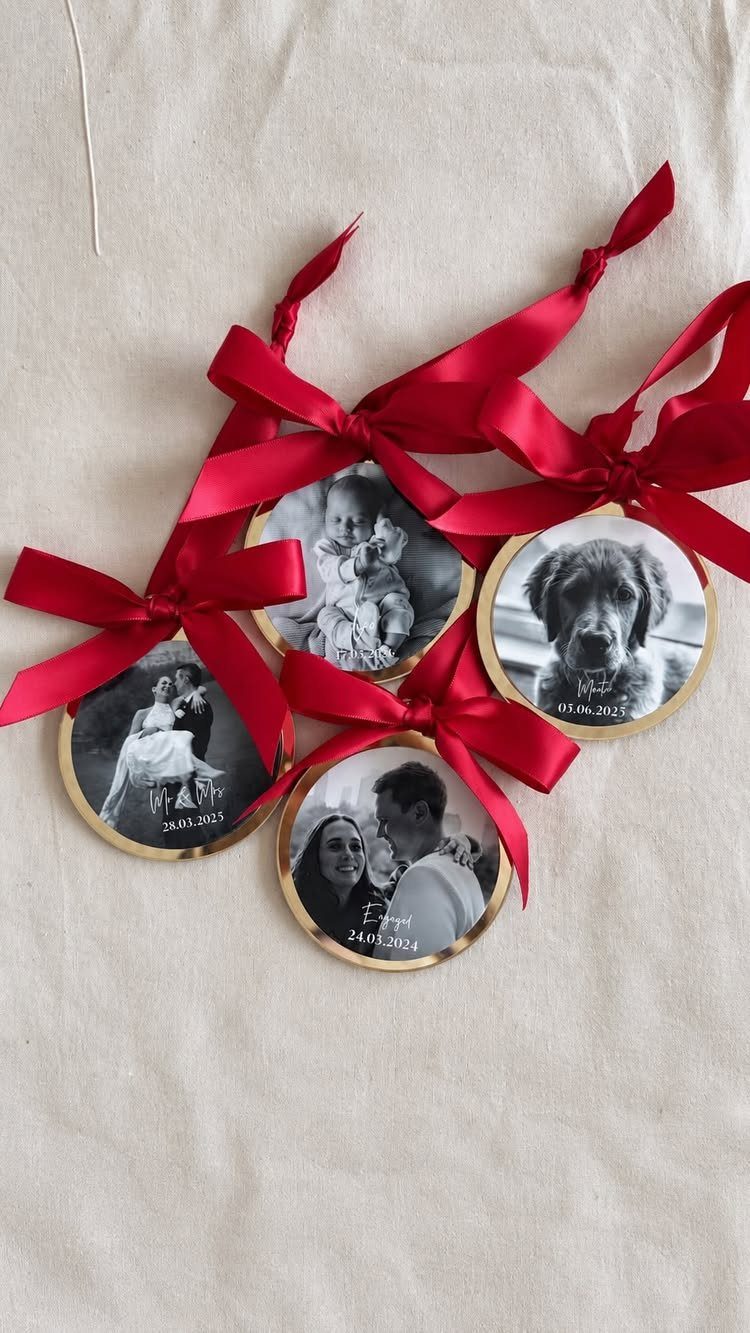
Round gold-rimmed blanks with ribbon hangers frame photos under clear acrylic or glass.
I would print on matte paper, not glossy; it sits flatter and looks like you planned it that way. The text and dates shown, "Engaged" and the year, come from a label maker or fine paint pen.
These need only a circle cutter, the ornaments, and patience. One warning: the metal rims on cheap blanks sometimes pinch.
Wear gloves or spend the extra dollar per piece for better hardware. The blanks and ribbon cost little; the time is mostly spent choosing and trimming photos to fit.
6. Yarn Ornaments
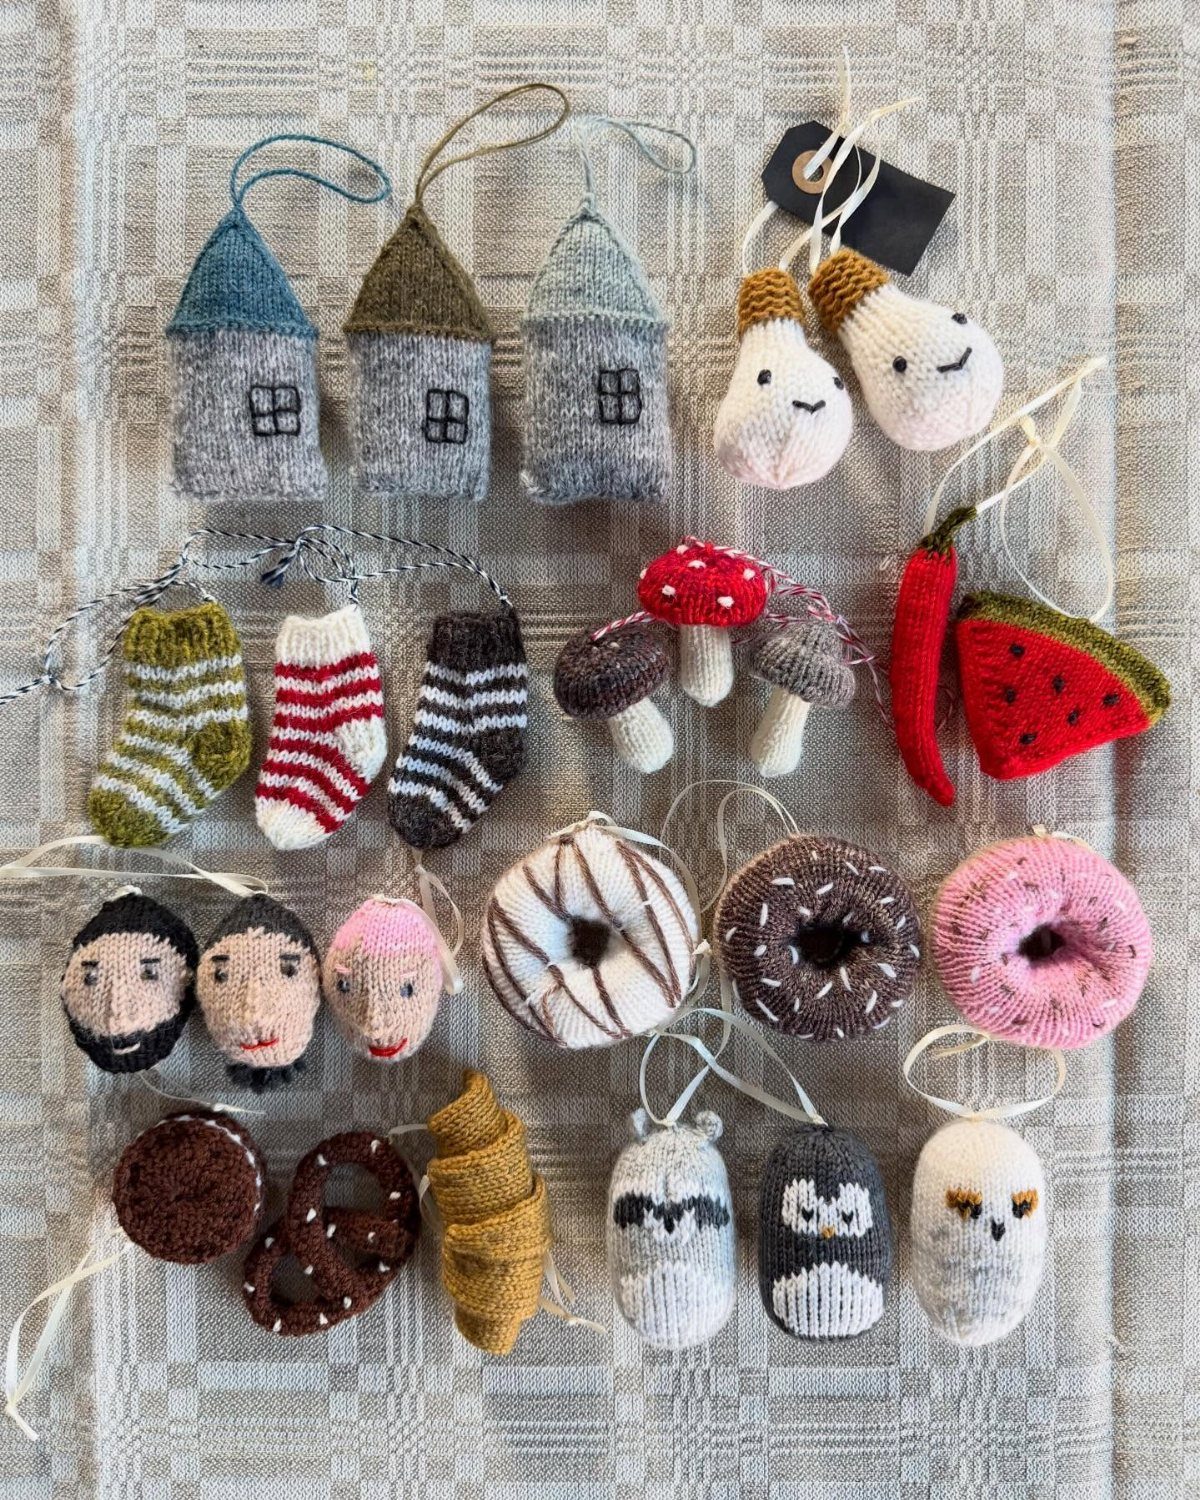
Small knitted shapes, houses and mushrooms and tiny socks, work up fast on double-pointed needles or a small loom. The yarn weight matters more than the pattern; fingering or sport gives crisp detail without bulk.
Stuff lightly with wool roving so the shape holds but sags slightly, the way handmade ought to. I would mount each on a loop of matching yarn, not wire, so the whole piece stays soft.
These work up fast once you get the wrapping rhythm down. For non-knitters, the same shapes work in felt with blanket stitch.
7. DIY Wine Cork Reindeer
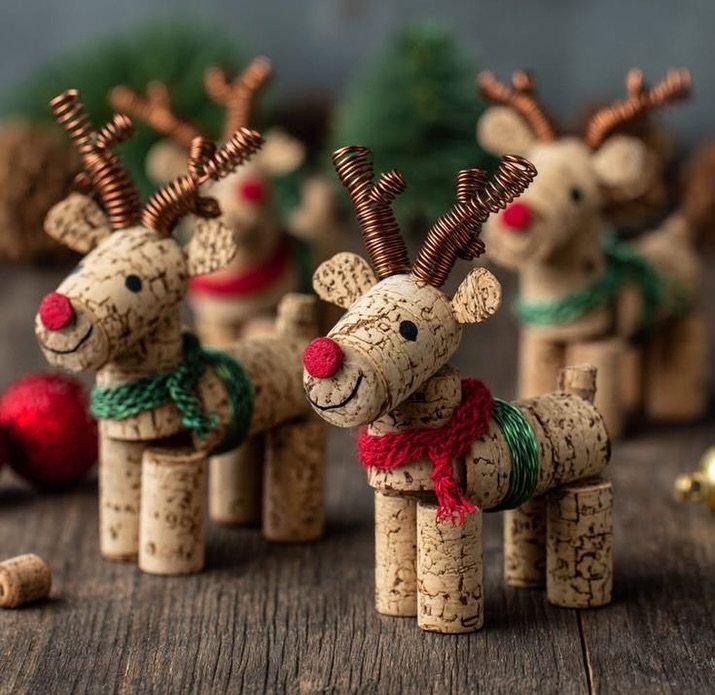
3 wine corks stacked and glued make the body, with a fourth sliced for hooves.
Coil thin wire around a pencil for antlers, press a red pom-pom into the top cork for the nose, and tie leftover yarn around the neck for a scarf.
The corks are free if you save them; wire and pom-poms run a few dollars.
These stand on their own and work as place card holders or mantel clutter. I would keep the faces simple, 2 dots for eyes, nothing more.
8. Embroidered Christmas Sweaters
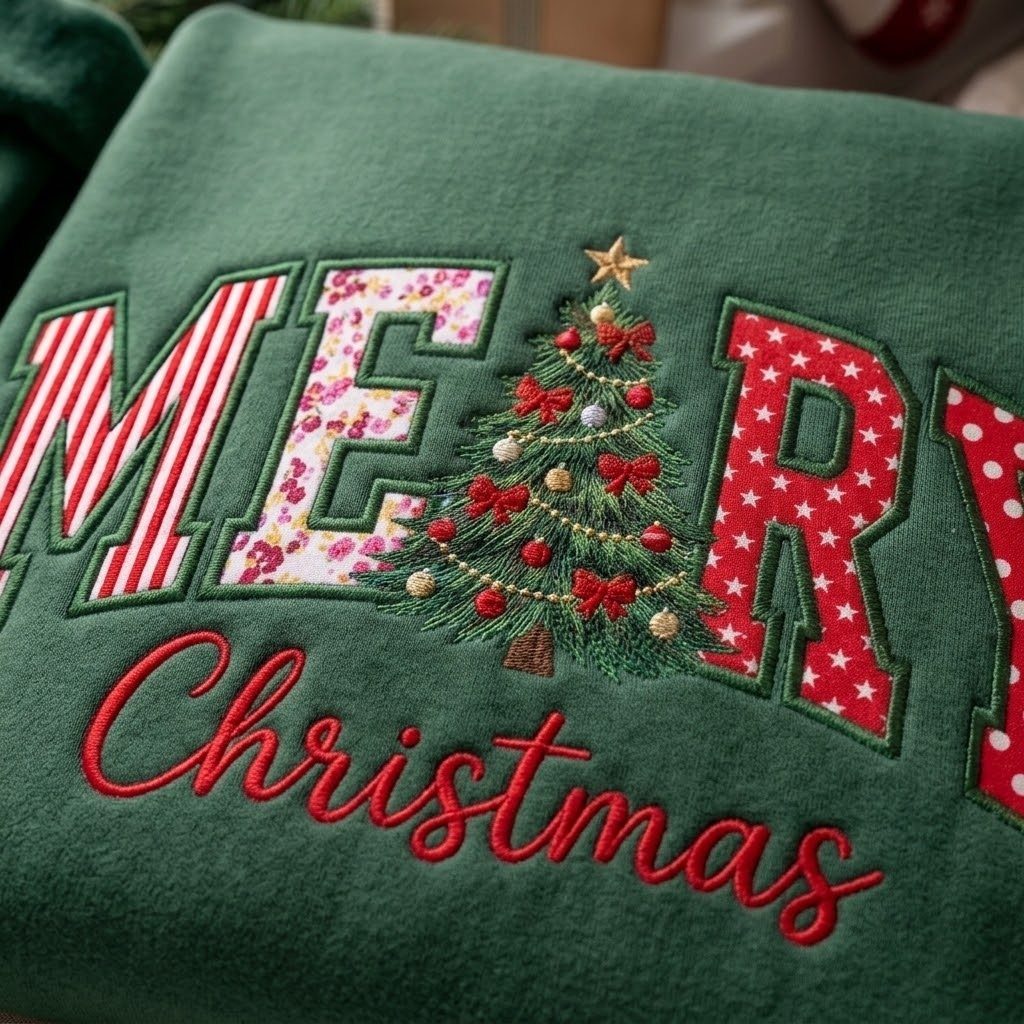
A plain sweatshirt becomes holiday wear with embroidery over the chest: the word "MERRY" with a small decorated tree replacing one letter. The base here is a green crewneck, but any solid color works.
You need a water-soluble stabilizer, basic embroidery floss in a few colors, and a hoop. The tree carries its own ornaments in satin stitch, which takes time but needs no advanced skill.
I would practice the letter spacing on paper first; uneven wording is the usual mistake. One weekend of evening stitching, and you have something no store sells.
9. Homemade Spiced Nuts
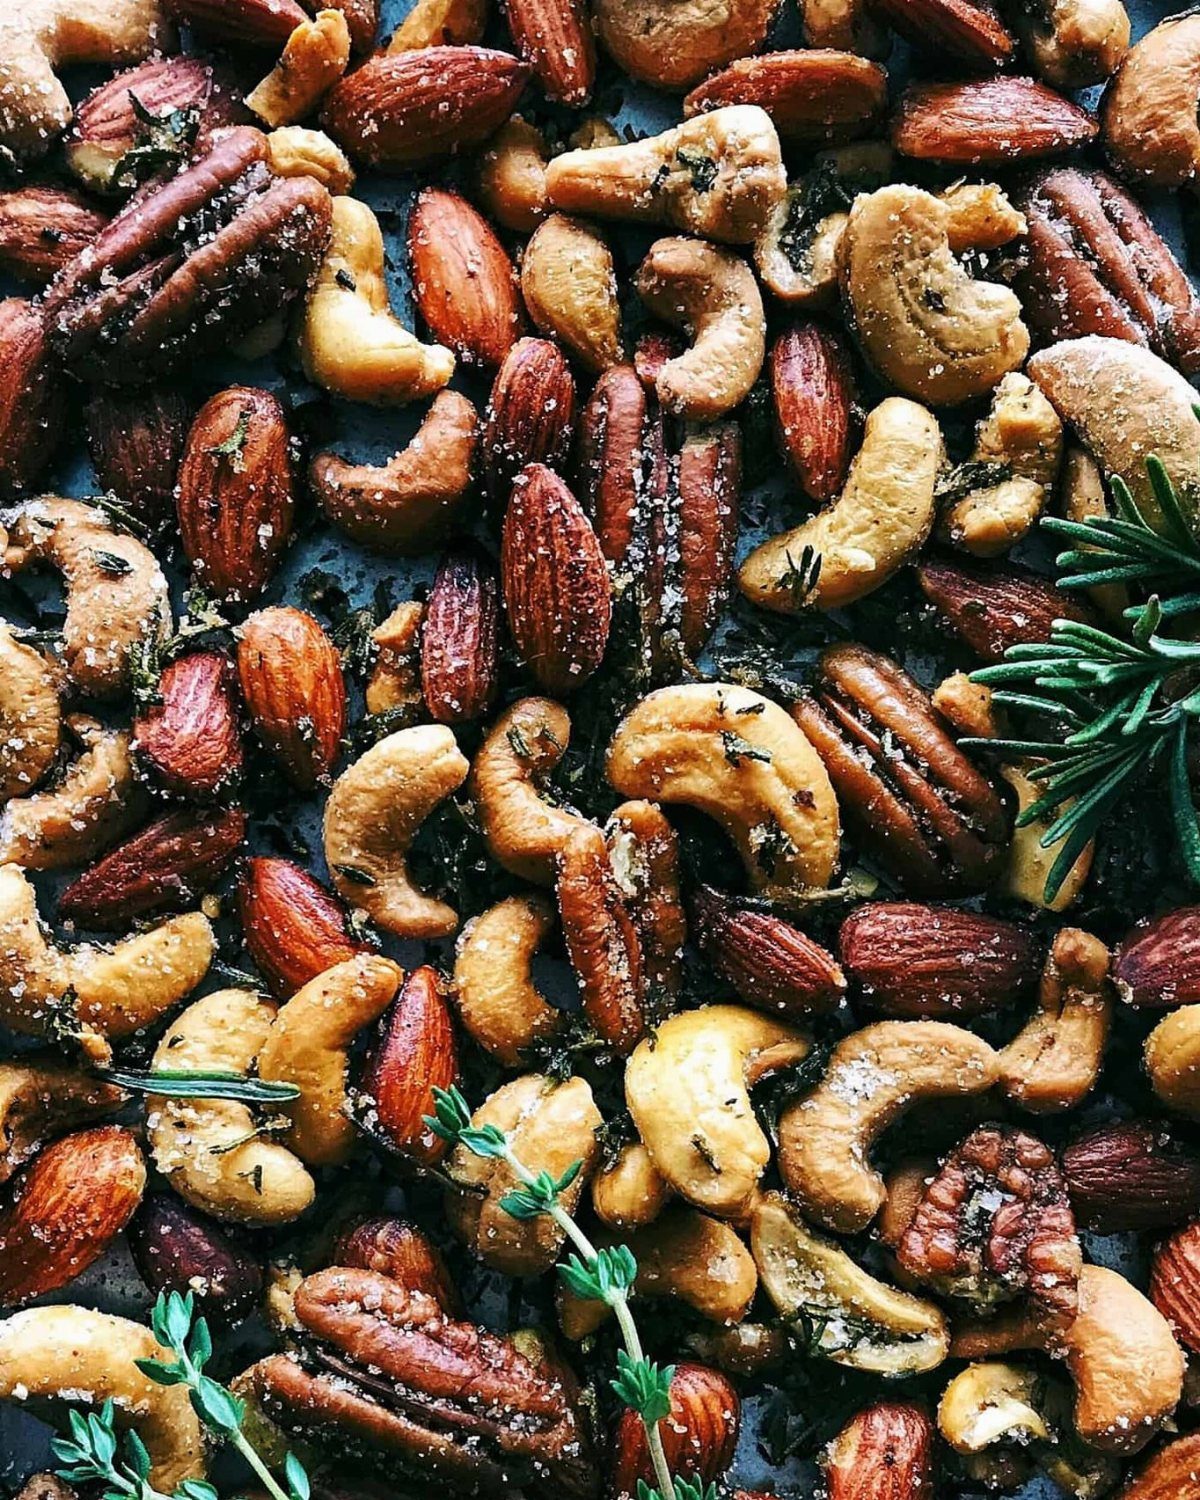
Mixed nuts tossed with rosemary, thyme, salt, and a light oil roast at low heat until fragrant.
Cashews, almonds, and pecans each brown at different rates, so I would add the pecans after the others have had a head start or accept that some pieces will be darker.
Fresh herbs go in after roasting; heat drives their volatile oils off.
These keep well in a jar and cost far less than specialty shops charge. For gifting I would pack them in parchment-lined tins with a sprig on top rather than loose.
10. DIY Christmas Card
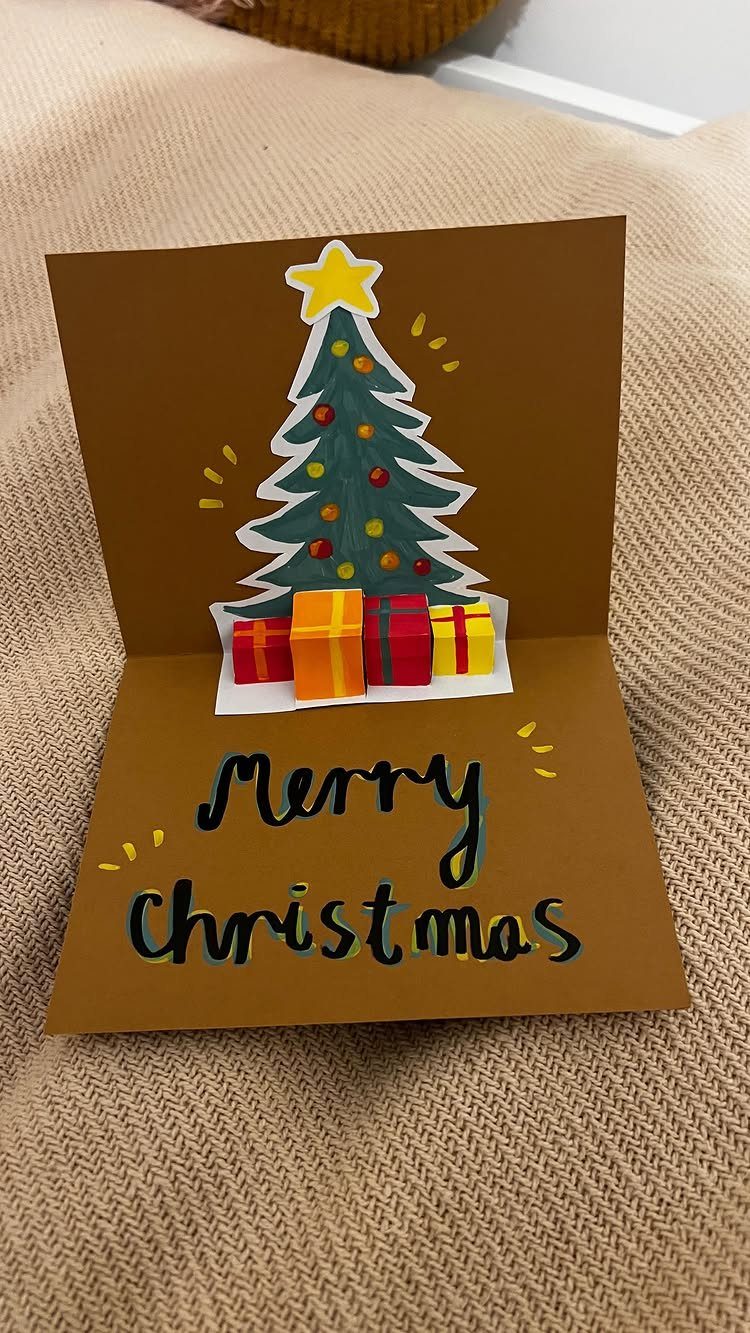
Brown cardstock folded with a painted tree and small paper presents that lift from the fold. The pop-up mechanism is simple: 2 parallel cuts in the center fold, pushed inward to create a step.
Paint the tree flat first, then assemble; wet paint warps the paper and jams the mechanism. A fine brush and craft paint do the job, no specialty supplies.
I would keep the message short and letter it in pencil before ink. One card takes an hour, but the first is the slowest; batch the cutting and painting to make five at once.
11. DIY Snowman Cupcakes
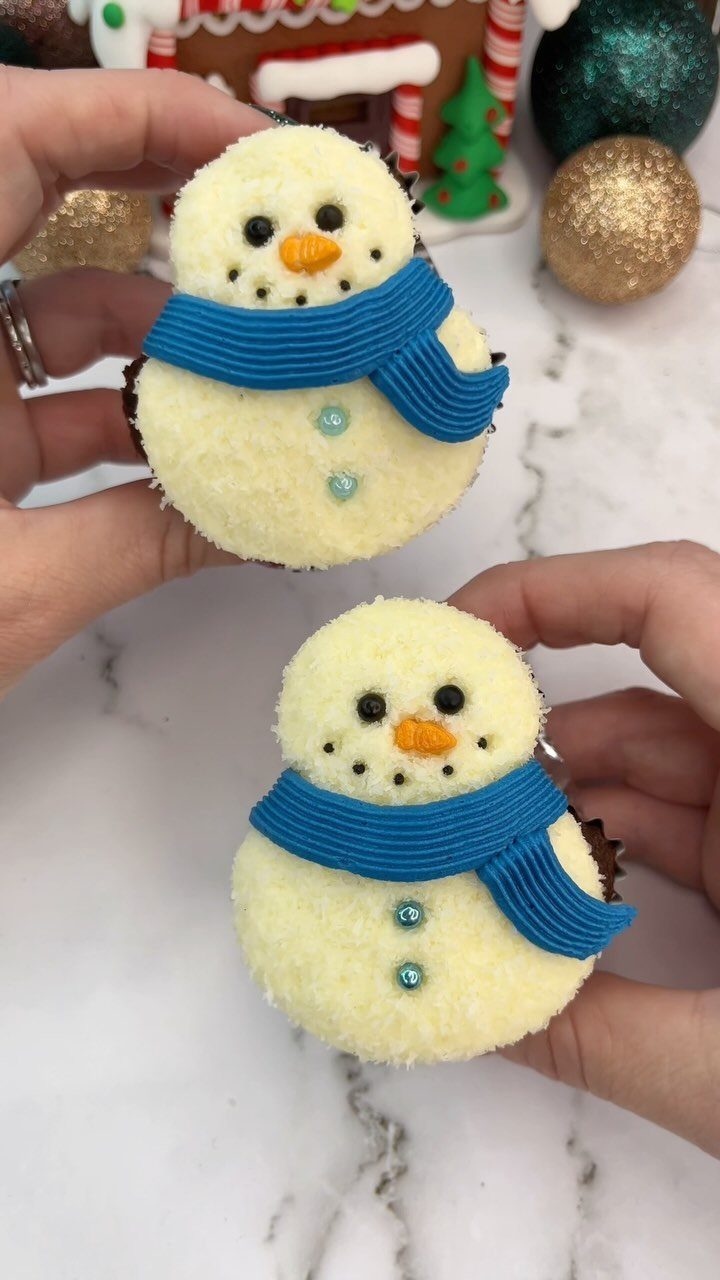
White buttercream piped through a large round tip builds the snowman body in 2 mounds, then a basketweave tip lays the scarf in ridged blue bands.
The face needs only black dots and a small orange triangle, with shredded coconut pressed into the frosting for texture. A small round tip handles the face details after the body and scarf are piped.
Bake the cupcakes ahead, decorate the morning you give them. The frosting crusts overnight and looks tired.
12. Washi Tape Tree Cards
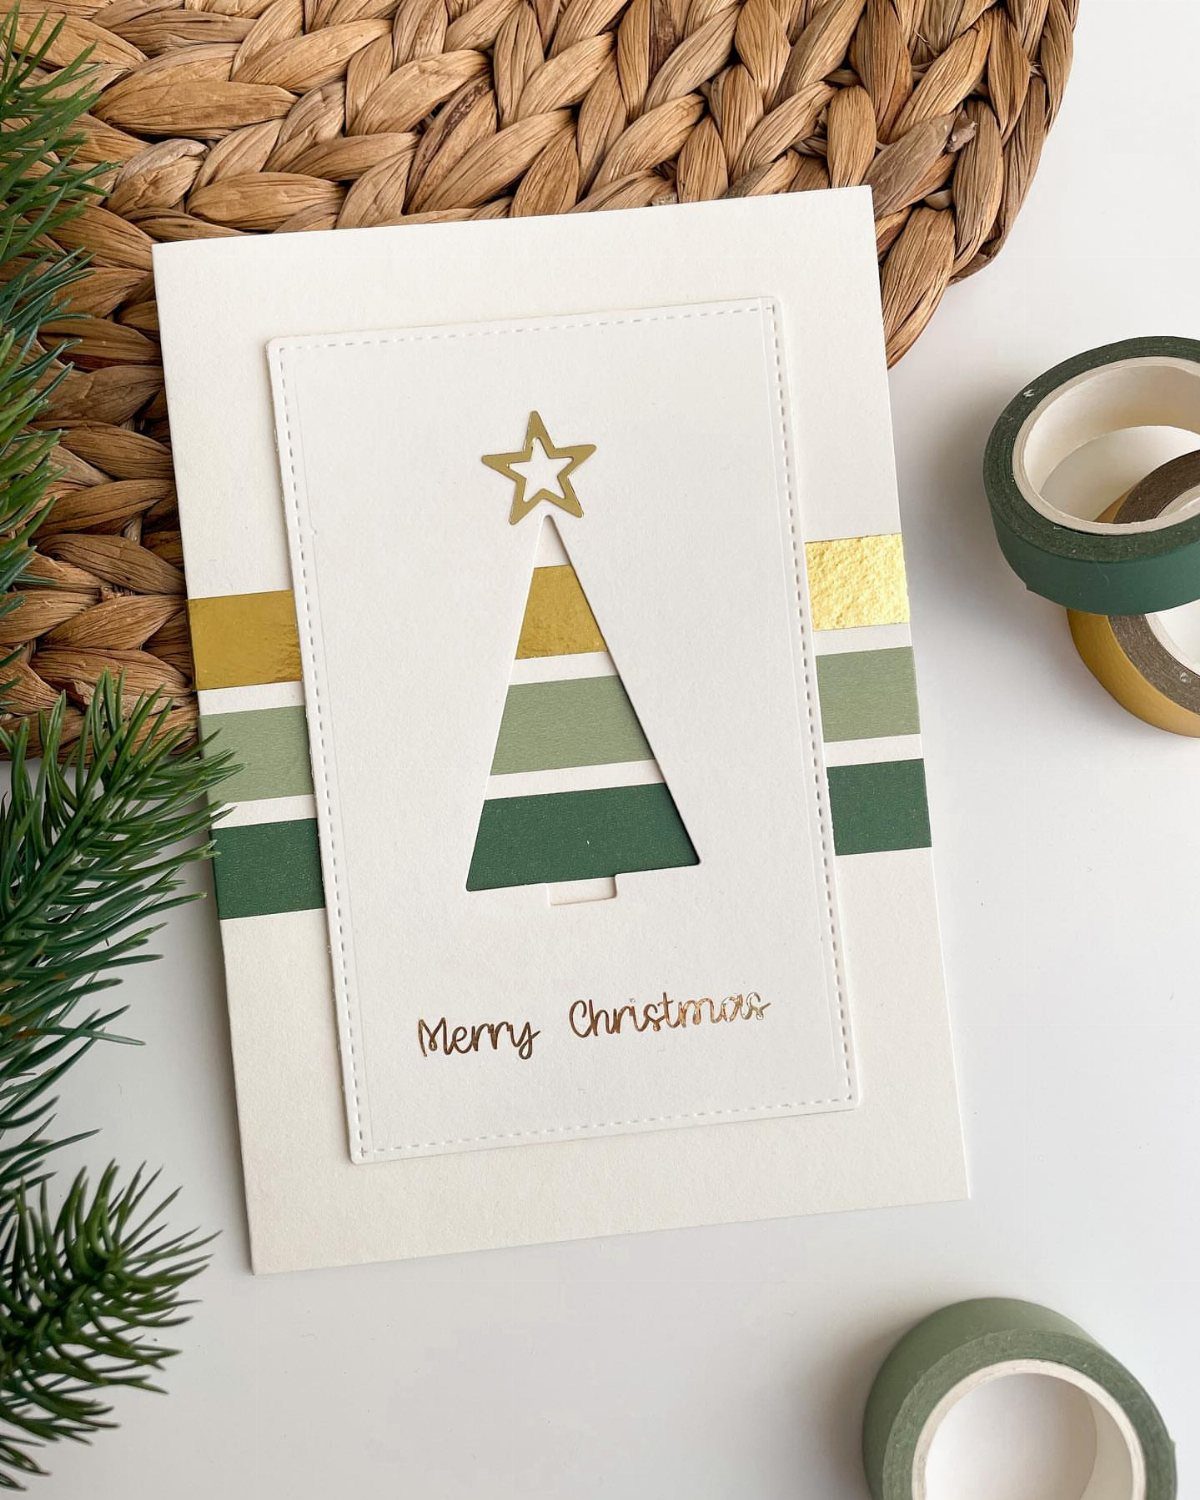
A tree-shaped window cut from white cardstock reveals washi tape stripes in green and gold beneath. The tape is the entire color story; the card stock stays plain.
Layer two or three tape widths for variation, press flat with a bone folder, then cut the tree aperture through both layers. The exposed tape edges read as clean lines, no drawing needed.
I would make the batch in stages: tape all the interiors one evening, cut the windows the next. A dozen fit in a small box, and the materials cost less than a pack of store cards.
13. Snowflake Lotion Bars
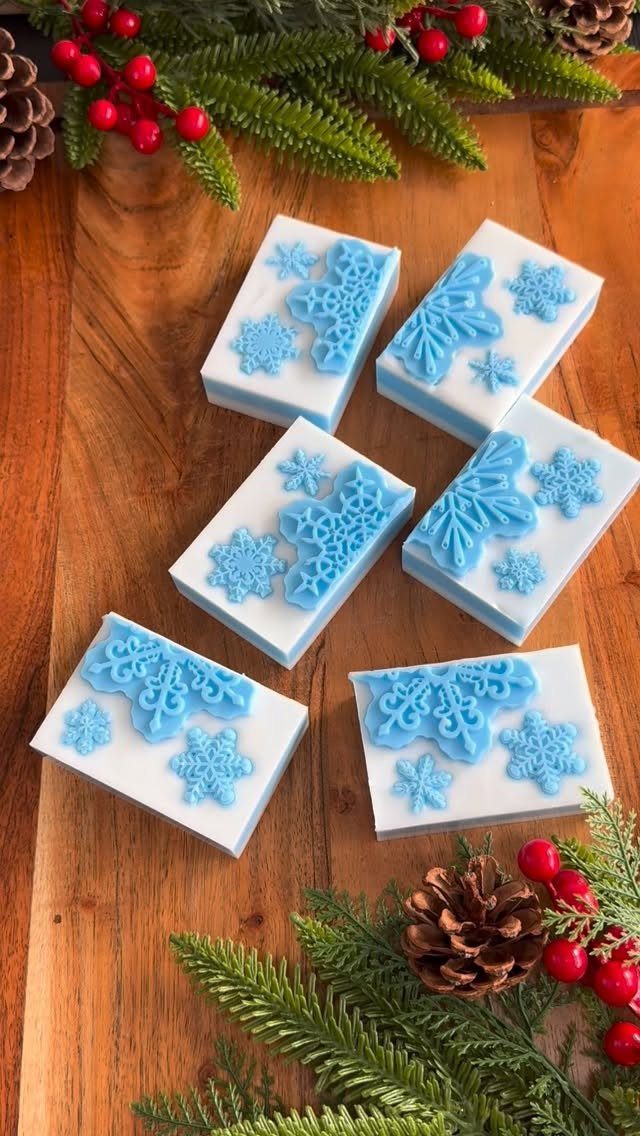
Snowflake lotion bars start with a base of shea butter, beeswax, and a light oil melted together and poured into silicone molds while warm.
The embossed pattern comes from the mold itself; choose one with enough depth that the design survives unmolding. I would scent these lightly with peppermint or leave them plain, since heavy fragrance clashes with the clean look.
The bars harden as they cool and keep for months in a cool drawer. Wrap in waxed paper or small tins; the bars soften in a warm room.
14. Quilted Table Runners
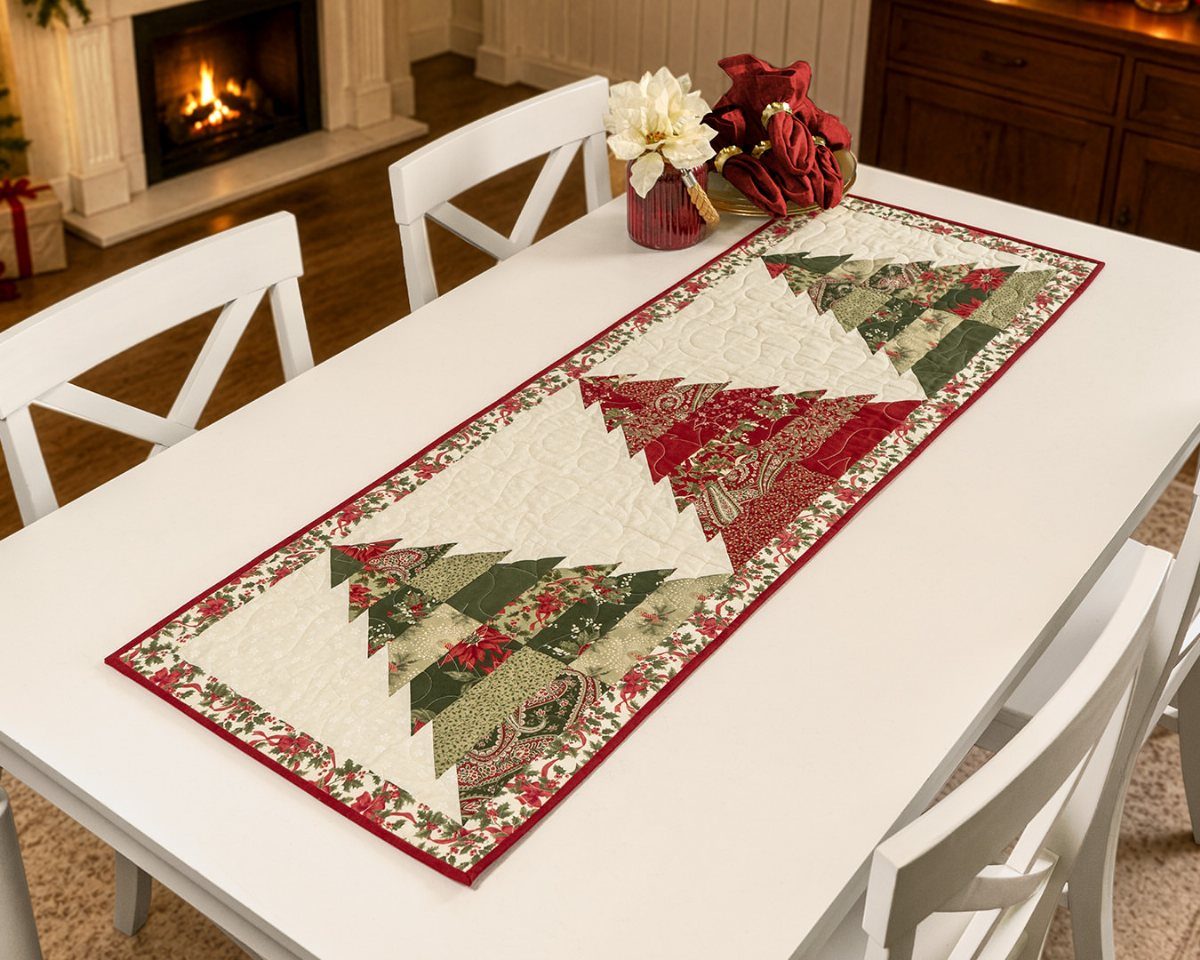
A quilted runner protects the table and survives the holiday meal better than any runner from a big-box store.
The patchwork top shows evergreen trees on a white ground, but the method stays the same: squares sewn into rows, layered with batting and backing, then quilted through all three.
I would cut squares to finish small enough to look intentional but large enough to keep the piecing from dragging out; smaller pieces take forever, larger ones look too plain. The binding is the slow part.
Machine-sew it to the front, fold to the back, and hand-stitch down while you watch something seasonal. One runner takes a weekend if you chain-piece the blocks.
15. Hand-Painted Mugs
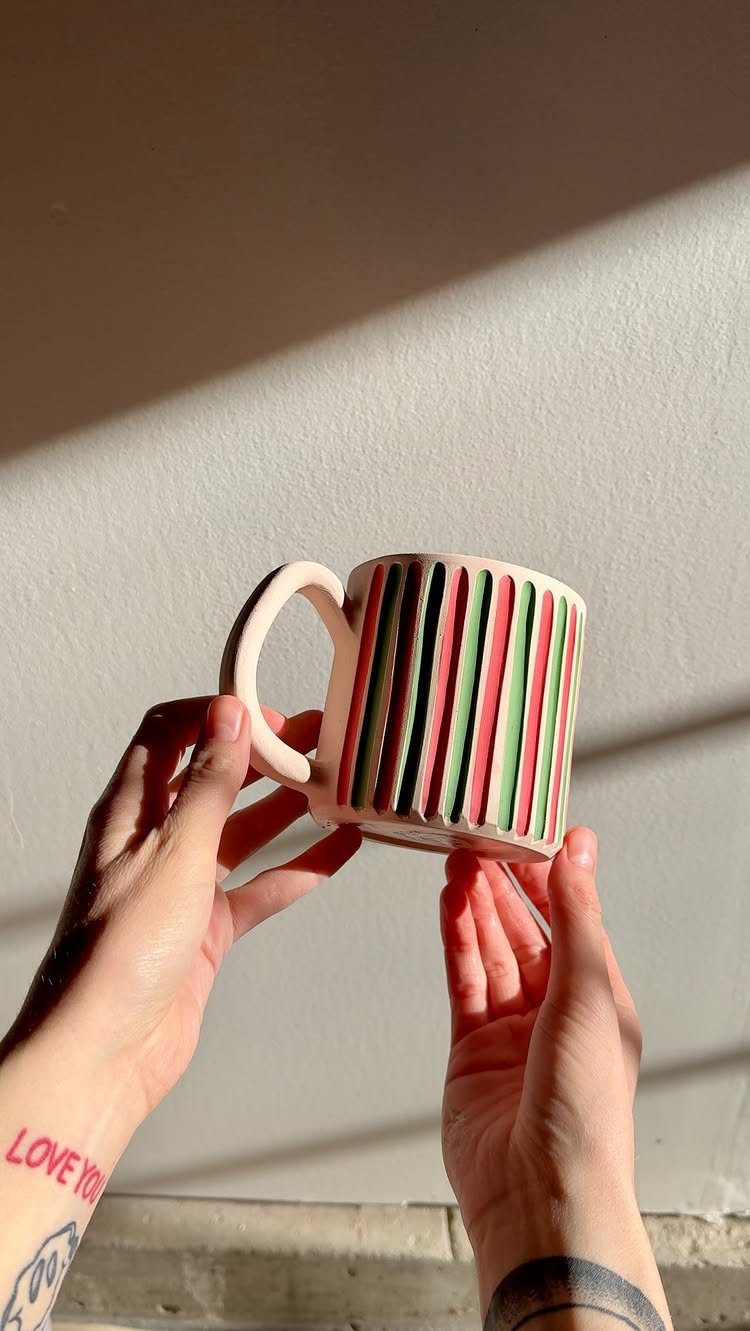
Hand-painted mugs need the right paint or the design washes off by New Year’s. Ceramic paint marked dishwasher-safe, or porcelain pens, are the 2 reliable choices; both bake on at low heat to set.
The stripes are vertical bands in green, pink, and cream, scored or painted into the surface for texture. I would tape guidelines first; freehand stripes wander.
Bake according to the paint label and let the mug cool in the oven to prevent cracking. One mug takes an hour of work plus bake time, and the paint runs cheap enough to make several without thinking about it.
16. Wooden Cutting Boards
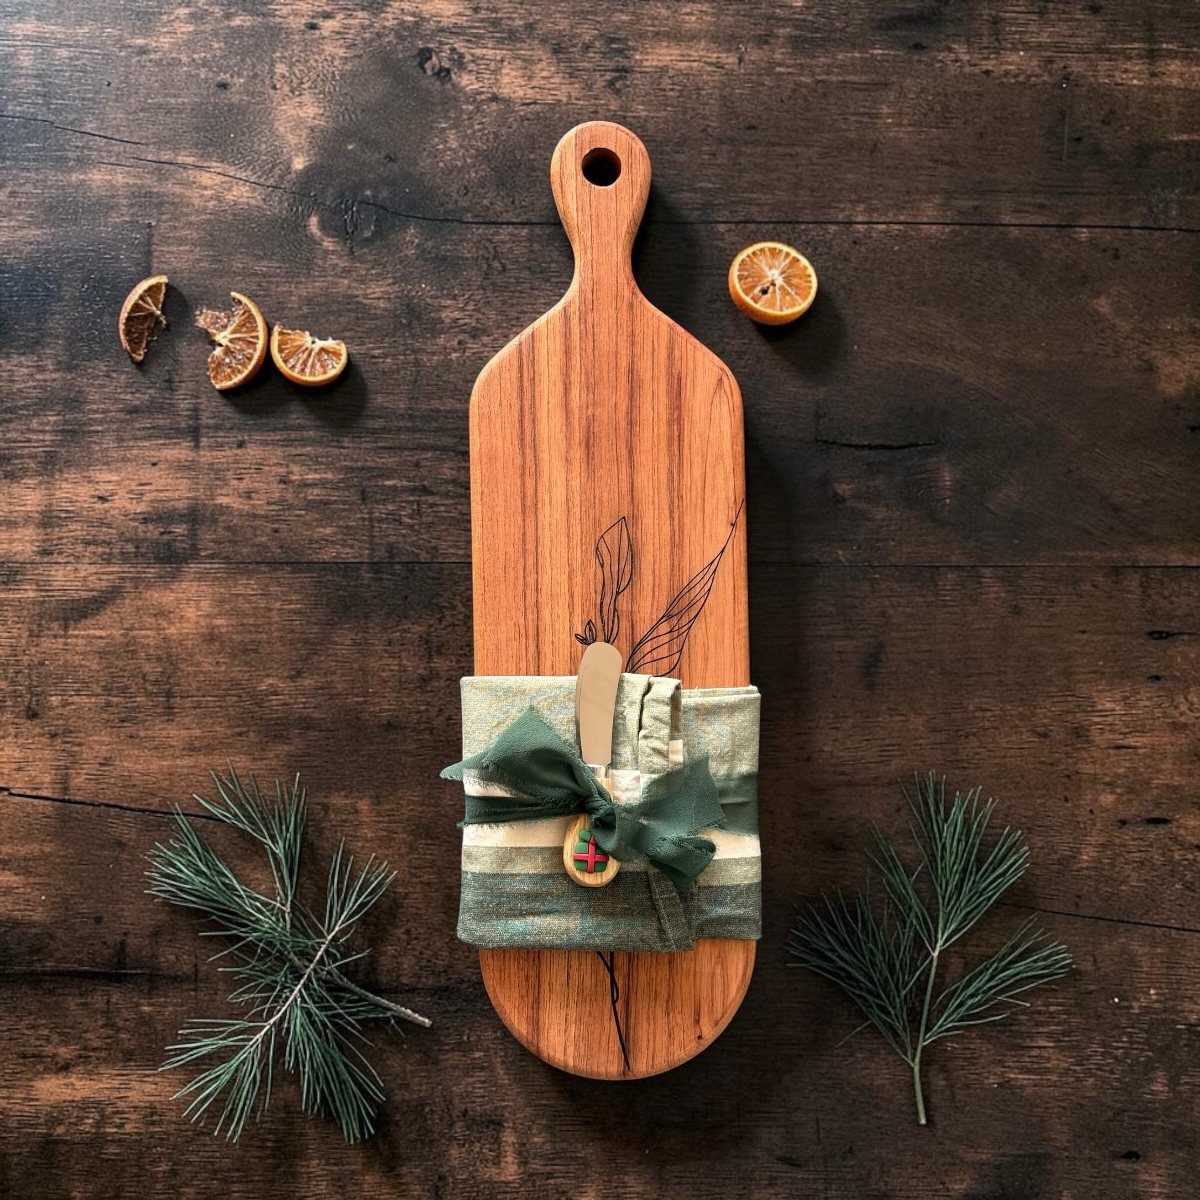
A wooden cutting board with a carved detail and a cloth napkin tied around it reads as complete without extra wrapping. The board itself is the gift; the napkin and small spreader are the presentation.
I would choose hardwood, maple or walnut, and finish with food-grade mineral oil, not polyurethane, so the recipient can use it immediately. Carving needs a router or careful knife work; a simpler route is wood-burning a monogram or small motif.
The cloth napkin should survive washing, since most people will use it rather than save it. Boards this size run unfinished at a hardware store for less than a name-brand cutting board, or cut your own from a hardwood blank.
17. Craft Stick Christmas Trees
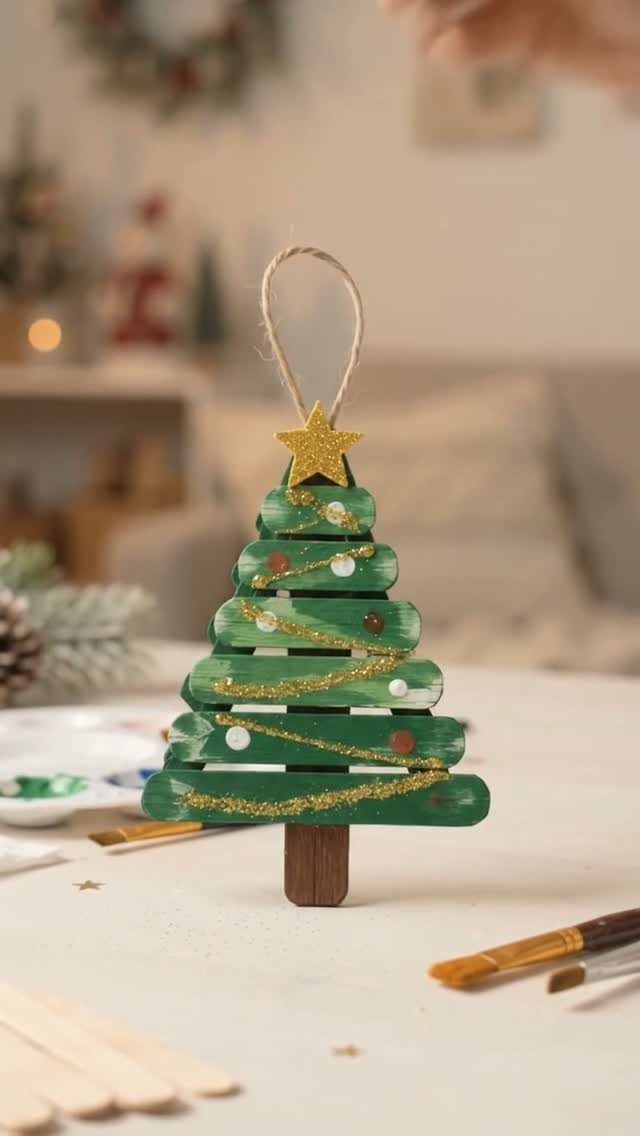
Craft stick trees layer painted sticks from longest at the bottom to shortest at the top, glued at the center line to form a triangle.
Green paint covers the sticks, then glitter glue and dot paint add the decoration while the green is still slightly tacky or after it dries hard. A gold paper star, folded and glued, tops the tree.
I would use clothespins as a drying rack; laying wet sticks flat makes them stick to the table. One tree takes a half-hour of actual work plus drying time, and a bag of sticks costs a dollar.
18. Reindeer Food
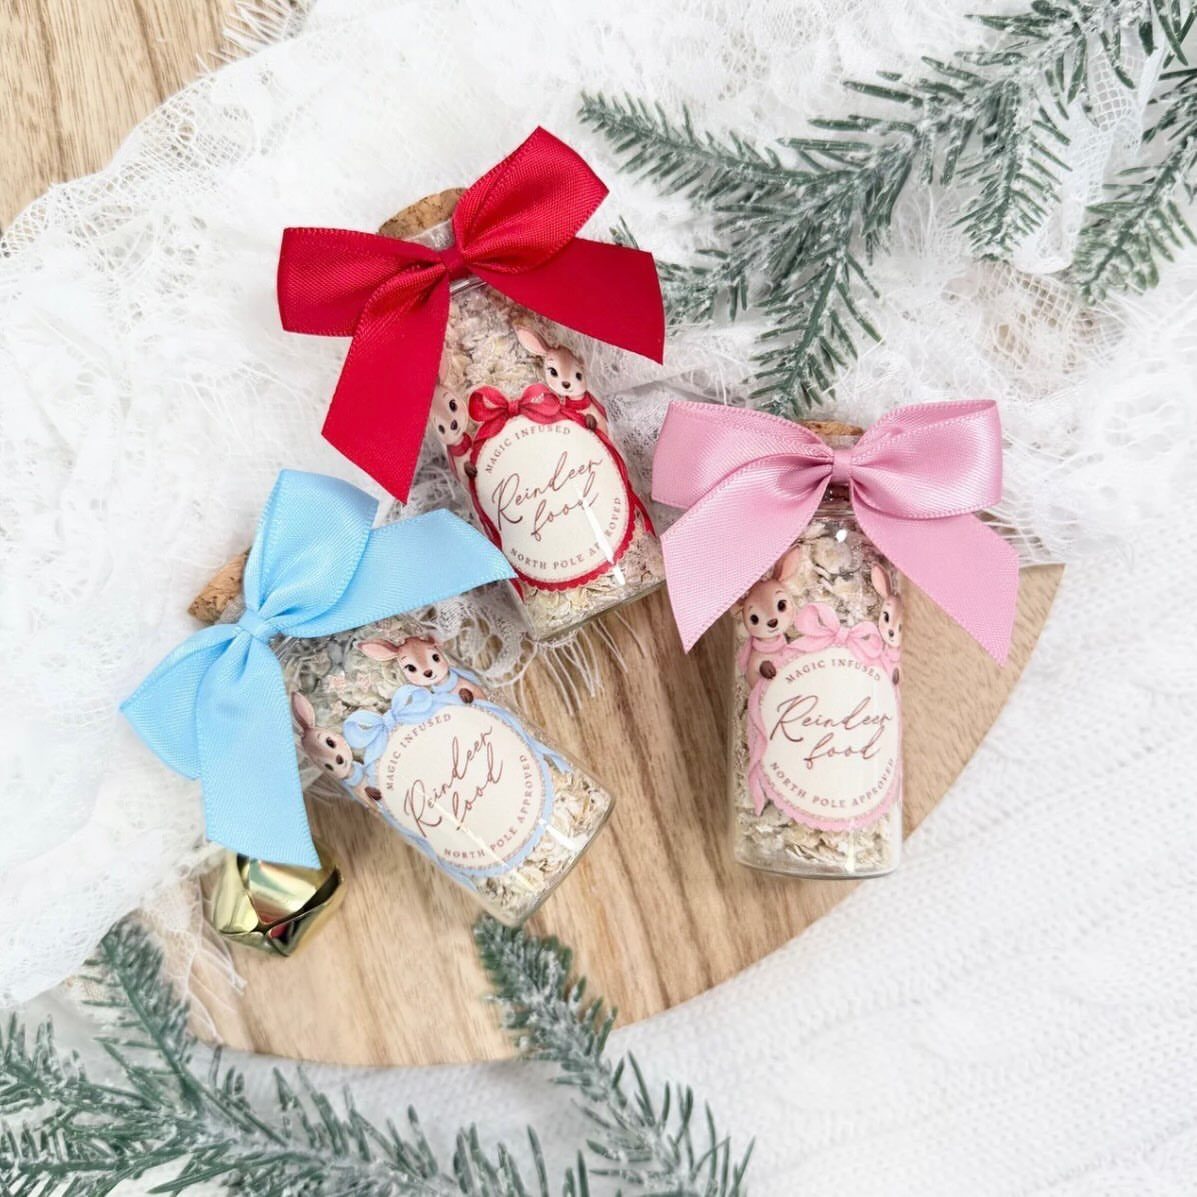
Reindeer food mixes oats with edible glitter or colored sugar in small corked bottles, each tied with a satin bow. The label does the work of turning pantry oats into something a child can scatter on the lawn Christmas Eve.
I would use glitter marked edible or biodegradable; standard craft glitter is plastic and stays in the yard. The bottles are the expense; small corked vials run a few dollars each, or use clean spice jars you already own.
One batch fills a dozen bottles fast enough to make while the oven preheats, and the recipe scales to however many children you need to supply.
19. Salt Dough Ornaments
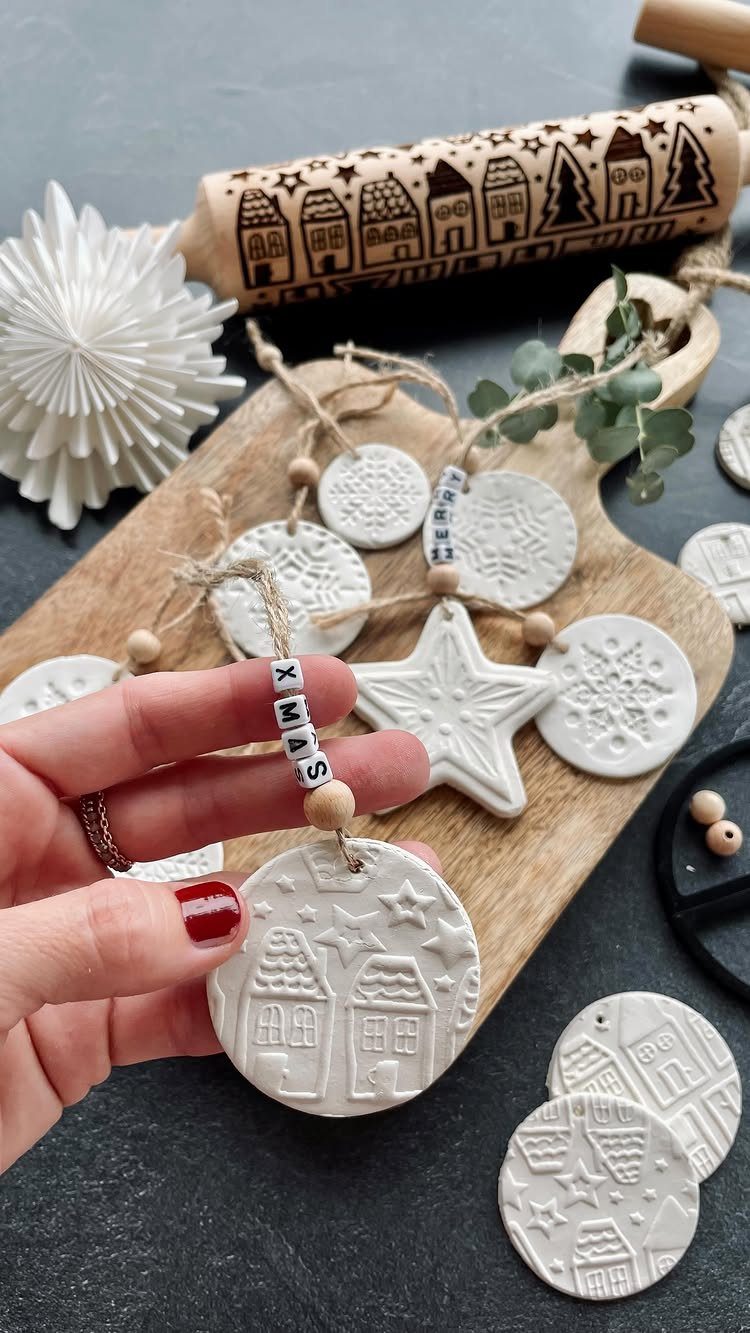
Salt dough ornaments need only flour, salt, water, and a rolling pin.
Roll to about the thickness of a pencil, press a patterned rolling pin or stamp for texture, cut a hole for twine before baking low and slow until hard.
The embossed house and "XMAS" lettering stay sharp if you do not overwork the dough. I would bake a test piece first; too thick and the center stays soft, too thin and they snap.
Paint after cooling, or leave them white for a Scandinavian look. One batch makes a dozen ornaments for the cost of pantry staples, and children can manage the pressing and cutting with supervision.
20. Homemade Fudge
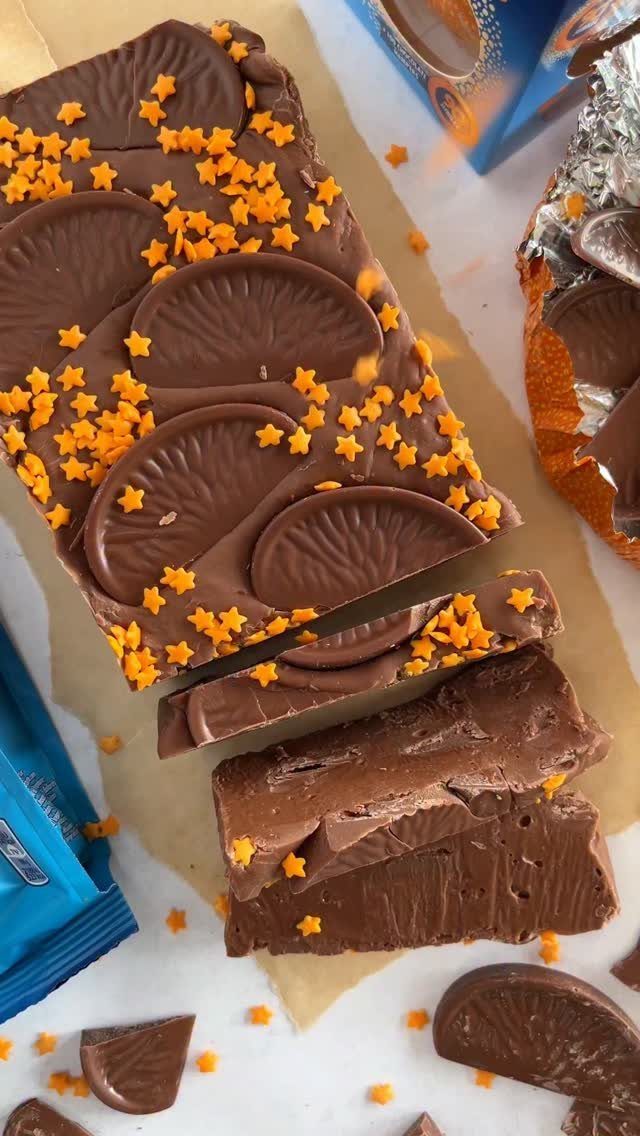
Fudge works as a gift because it keeps for weeks and travels flat. The base method stays the same: chocolate, condensed milk, and butter melted together, poured into a lined pan, chilled until set.
The orange slices add a sharp note against sweet chocolate; I would chop them smaller than shown so each bite gets some. Cut with a warm knife for clean edges.
A batch costs little more than a chocolate bar and fills a small box. Make it a couple days ahead so the texture firms properly.
21. DIY Holiday Dough Bowl Candle
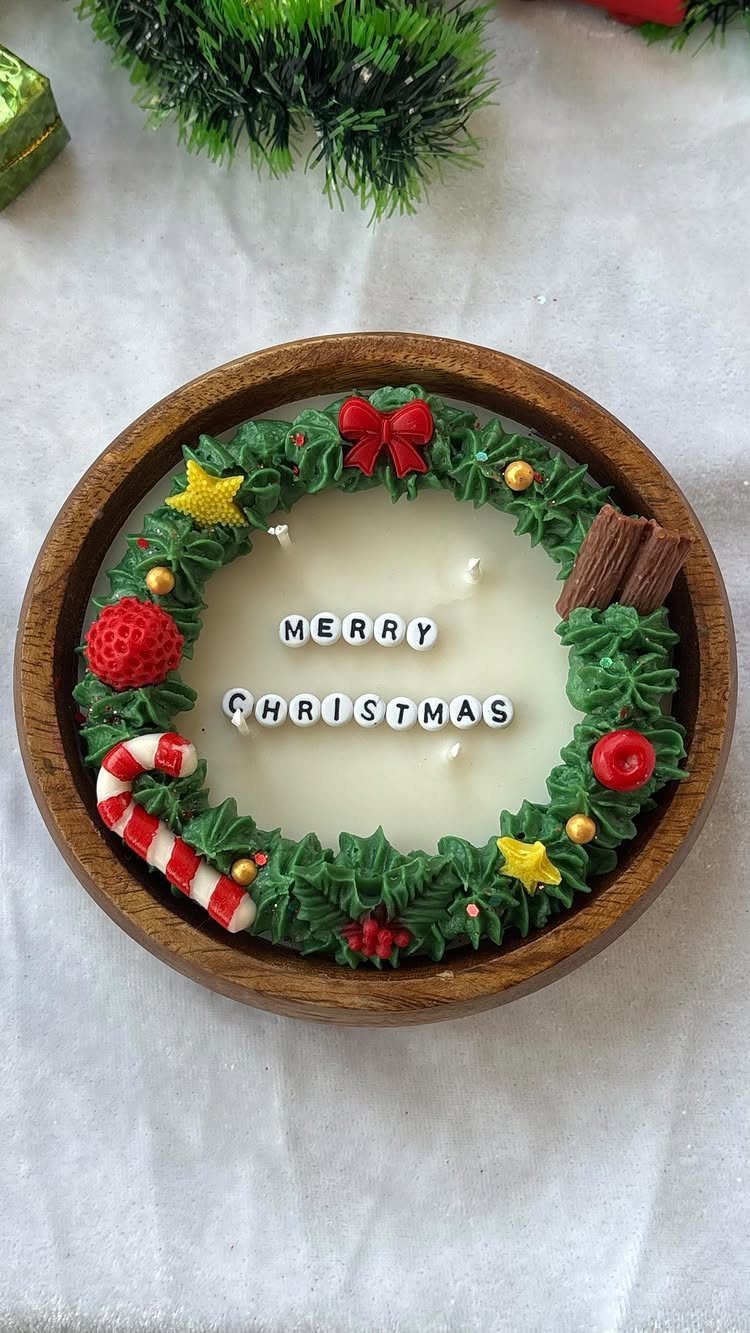
A dough bowl candle spreads its scent across a room better than a jar candle because the wide surface throws more fragrance.
Green wax piped into a wreath shape works well, with small charms and letter beads pressed in while the wax is still soft.
I would keep the decoration to the rim and pour the main wax plain; too many embeds near the wick can clog it.
Use soy or beeswax for a clean burn, and choose a wick sized to the bowl’s width or the center melts a crater while the edges stand. The bowl itself is reusable once the candle burns out.
22. Fabric-Topped Mason Jar Treats
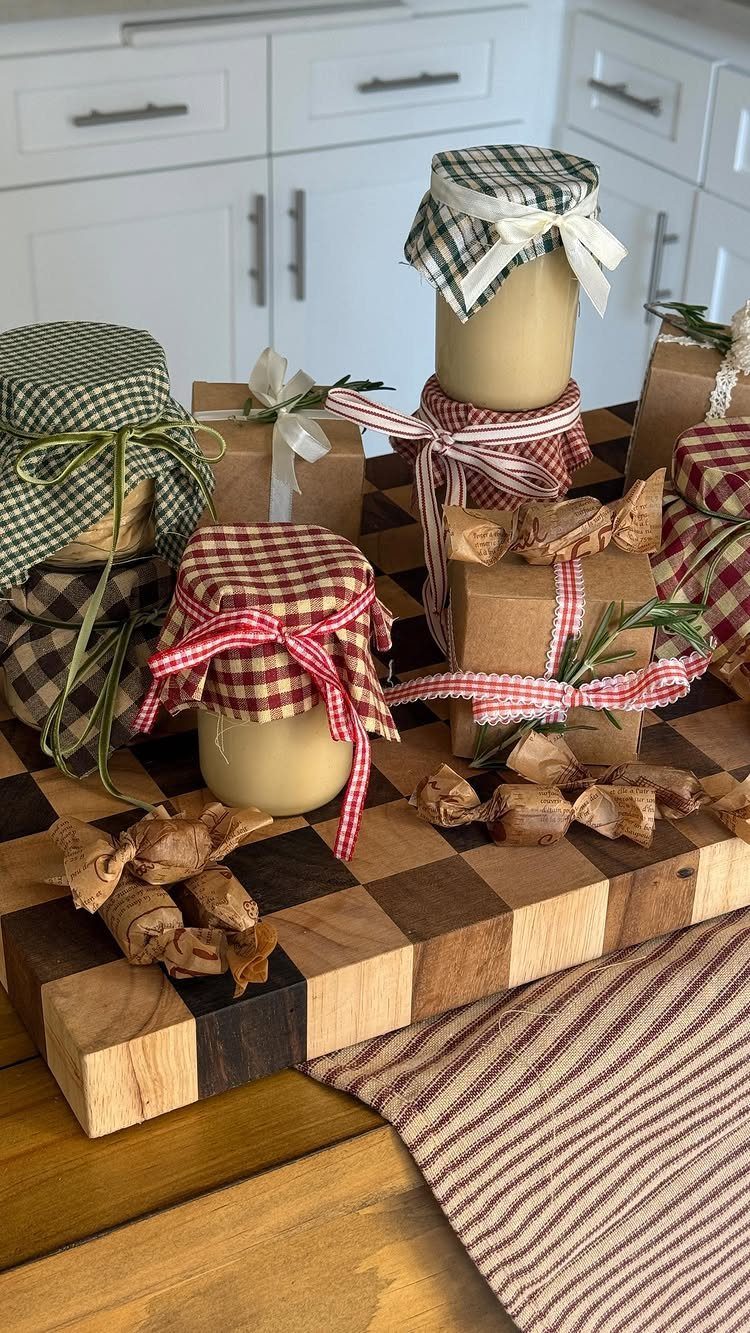
Fabric-topped jars turn pantry staples into presents. Whipped honey spiced with pumpkin and beaten until light and fluffy fills the jar well; the fabric lid keeps it clean.
I would use a tight-weave cotton for the lid cover; loose fabric frays where the ring bites down. Cut circles wide enough to press the edges under and tie with ribbon that survives a kitchen drawer.
The honey itself costs little to make in bulk; the jar and fabric are the presentation. These keep for months, and the recipient reuses the jar.
23. Decorated Gingerbread Ornaments
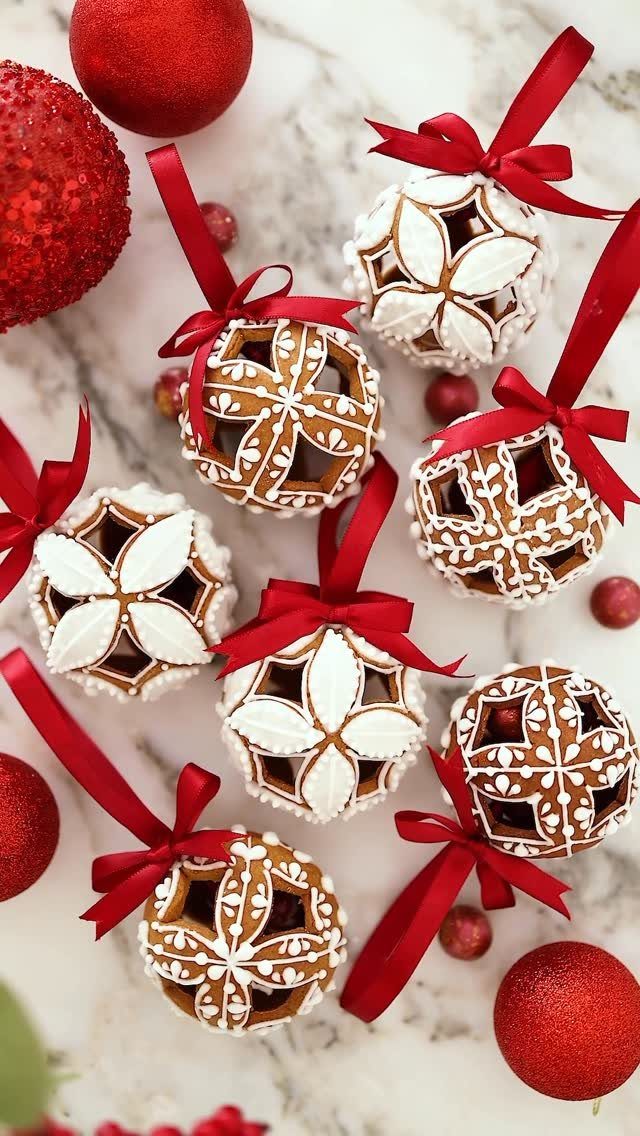
Hollow gingerbread ornaments need a dough that bakes hard and keeps its shape. One maker chills theirs at least 2 hours, rolls to 1/4 inch on parchment, then cuts and bakes until dry through.
Fine lines of white icing pipe best with a small round tip; patience matters more than skill. I would bake a day before decorating so the surface is fully dry; fresh gingerbread grease softens royal icing.
Thread ribbon through before the bake or drill after; clean-cut holes suggest the latter works fine. These keep for years in a tin, not a sealed bag where moisture collects.
24. Homemade Cookies in Gift Bags
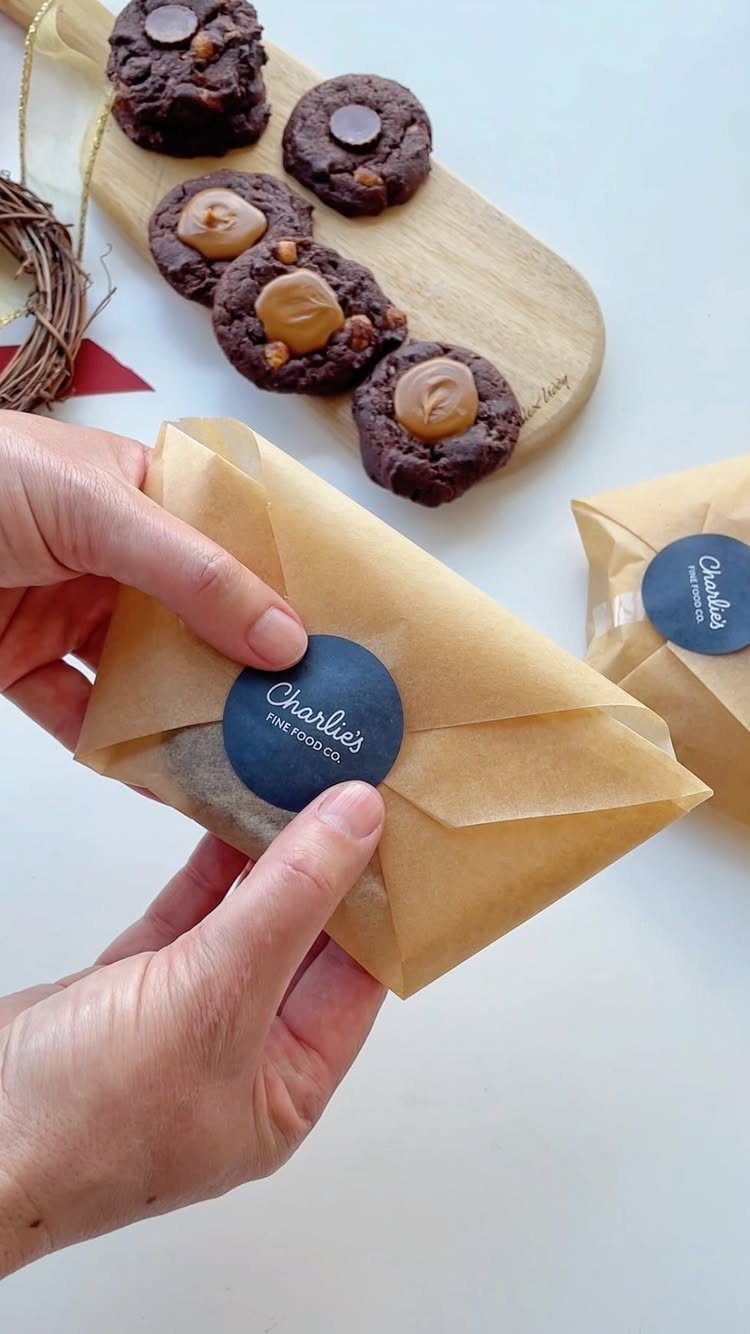
Cookies in sealed paper bags stay crisp better than plastic, which traps moisture. A printed sticker dresses up the bag, and chocolate caramel cookies inside make the gift.
I would bake a day ahead so they set properly; warm cookies steam the bag and turn soft. Parchment paper, folded and sealed with a sticker, costs less than printed boxes and looks more homemade.
Choose a cookie sturdy enough to ship: shortbread, chocolate chunk, or anything without a delicate filling. One batch fills several bags, and the whole project fits an evening of baking and an hour of assembly.
25. Handmade Mason Jar Snow Globe
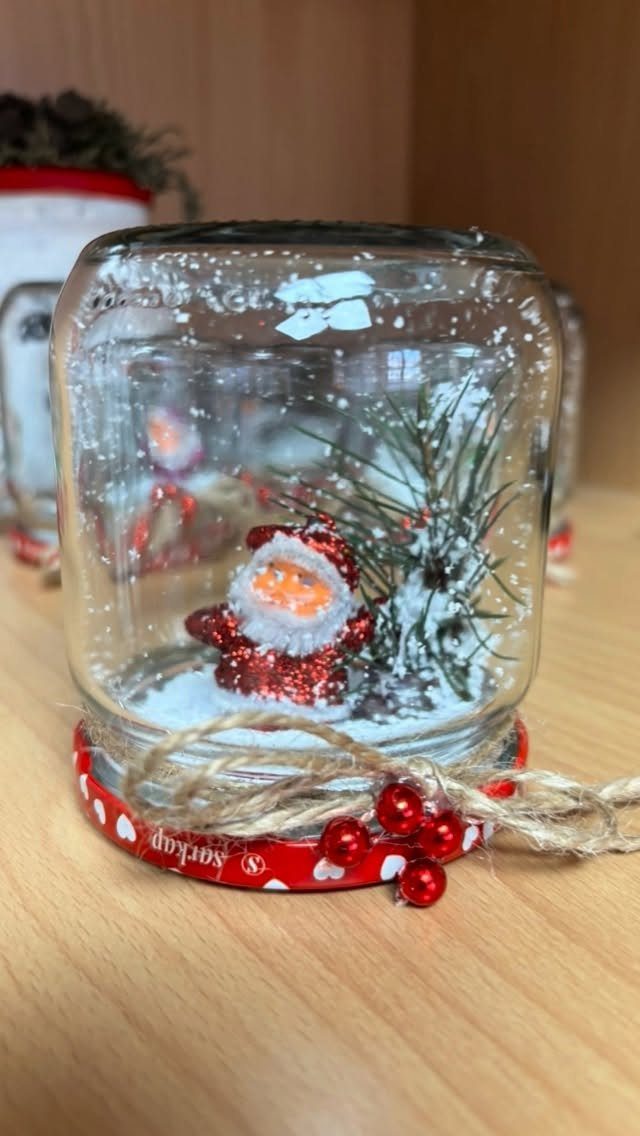
A waterless snow globe skips the glycerin and sealing problems of the traditional kind.
The Santa figurine and pine sprig sit on the jar’s original lid, which becomes the base once you invert the glass. Faux snow clings to the figurine and collects at the glass curve without needing liquid to suspend it.
I would glue the elements to the lid with strong craft adhesive and let it cure overnight before attaching the jar; nothing ruins the gift like a Santa face-down in snow.
Jute twine and berries around the lid edge hide the seam.
26. Embroidered Cloth Dinner Napkins
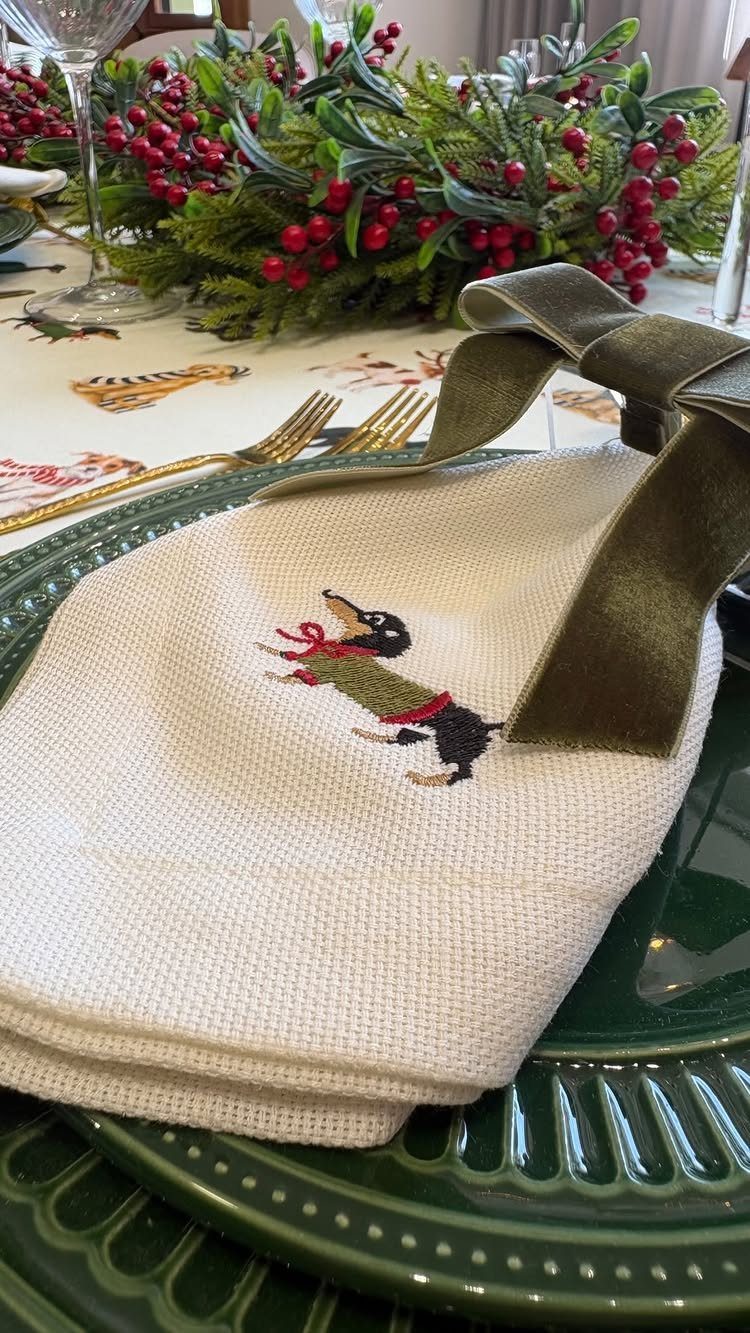
Machine embroidery on a ready-made napkin gets you the hand-stitched look without the hours. The dachshund in its sweater is digitized artwork stitched through stabilizer-backed cotton; the napkin stays smooth because the design density matches the fabric weight.
I would buy a set of plain white dinner napkins rather than wrestling yardage into hems, and test the design placement on scrap first.
After a wash and press, I loop a velvet ribbon around each stack so the pile looks like a present already.
The napkins run on the machine while I cut ribbon; the bow stays loose so whoever gets it can slip it off before the next laundry day.
27. Mini Succulent Terrarium Ornaments
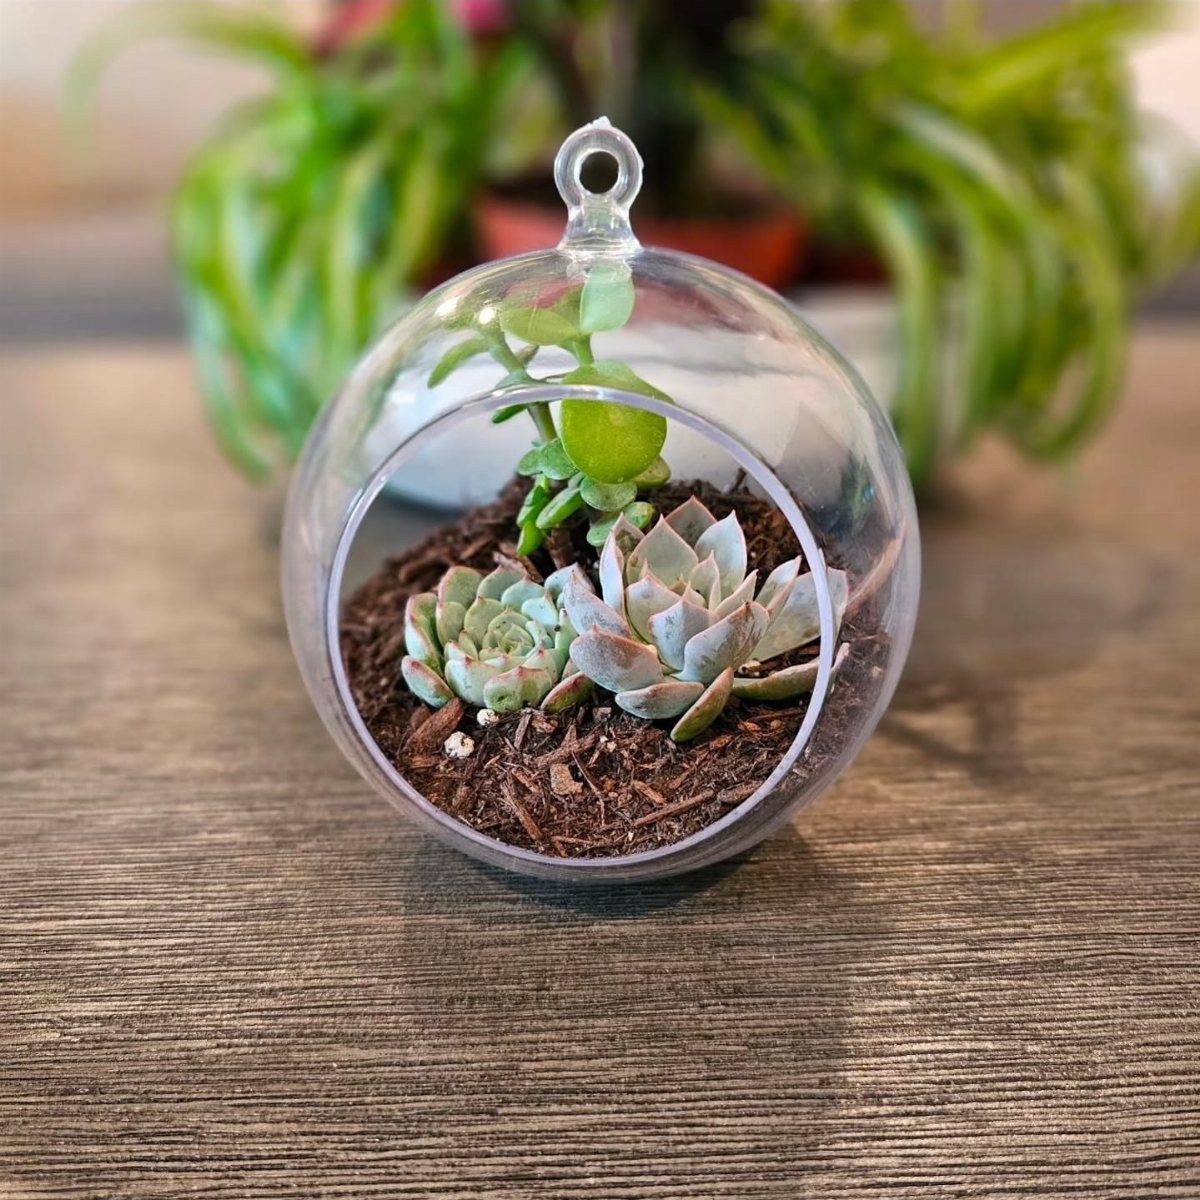
Live succulents in a clear globe ornament need drainage more than they need soil depth.
A layer of gravel at the bottom, then cactus mix, then plants small enough to root in an inch of medium: that is the whole setup.
I would choose cuttings over established plants; they adapt to the shallow space and weigh less on the branch. A small drilled hole or loose cap lets air circulate; sealed globes rot the roots.
Water with a dropper, sparingly. These suit a hostess gift or a desk, not a tree branch that swings when the door opens.
28. Festive White Chocolate Snack Mix
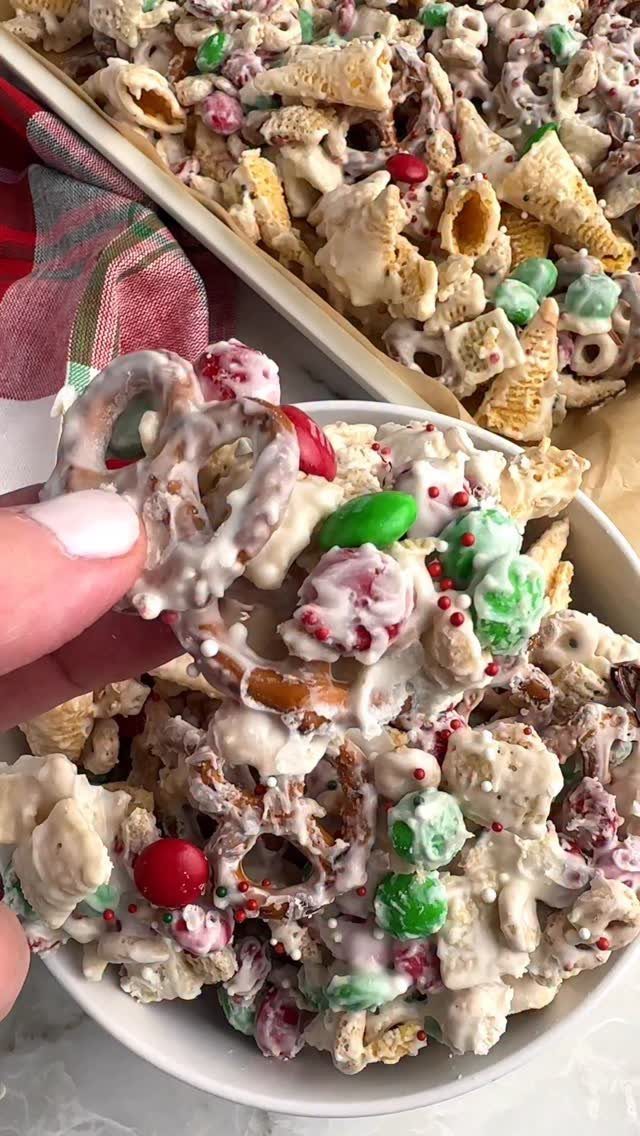
White chocolate binds the mix and sets the holiday color scheme. Melted coating poured over cereal, pretzels, and candy, then tossed until clusters form; the sprinkles go on before the chocolate hardens.
I would use almond bark or candy coating rather than real white chocolate; it sets firm without tempering and handles the moisture from pretzels better.
Spread on parchment to cool, then break into pieces. Keep it cool before gifting or the clusters soften and stick.
29. Fabric Pouches with Button Closures
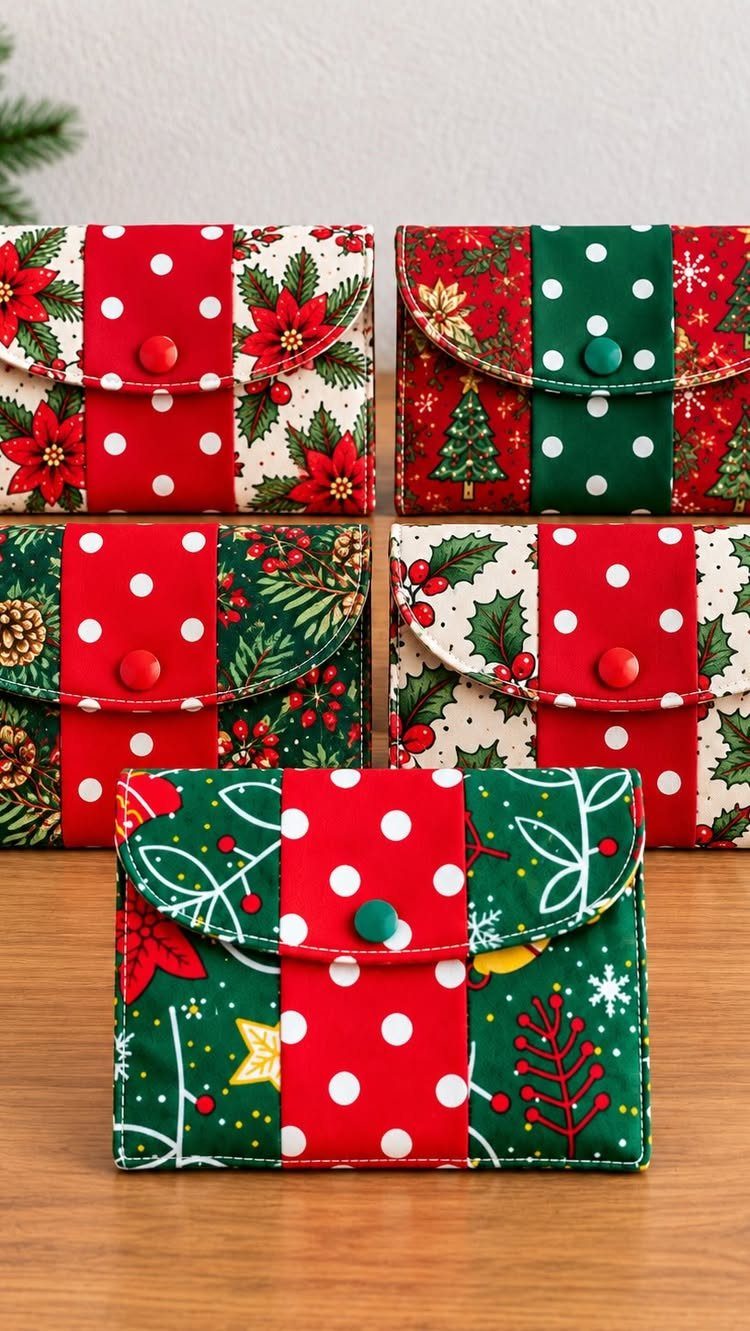
Small fabric pouches with snap buttons replace wrapping paper for gifts that fit inside. 2 rectangles, right sides together, sewn and turned; the button strip is a folded flap that closes over the snap.
I would cut the Christmas prints with the pattern running the same direction on every pouch, and interface the flap so the snap does not tear through after a few uses.
A pouch this size holds jewelry, gift cards, or small candy boxes. They take an hour each once you establish the size, and the recipient reuses them.
30. Boxed Chocolate Tree Treats
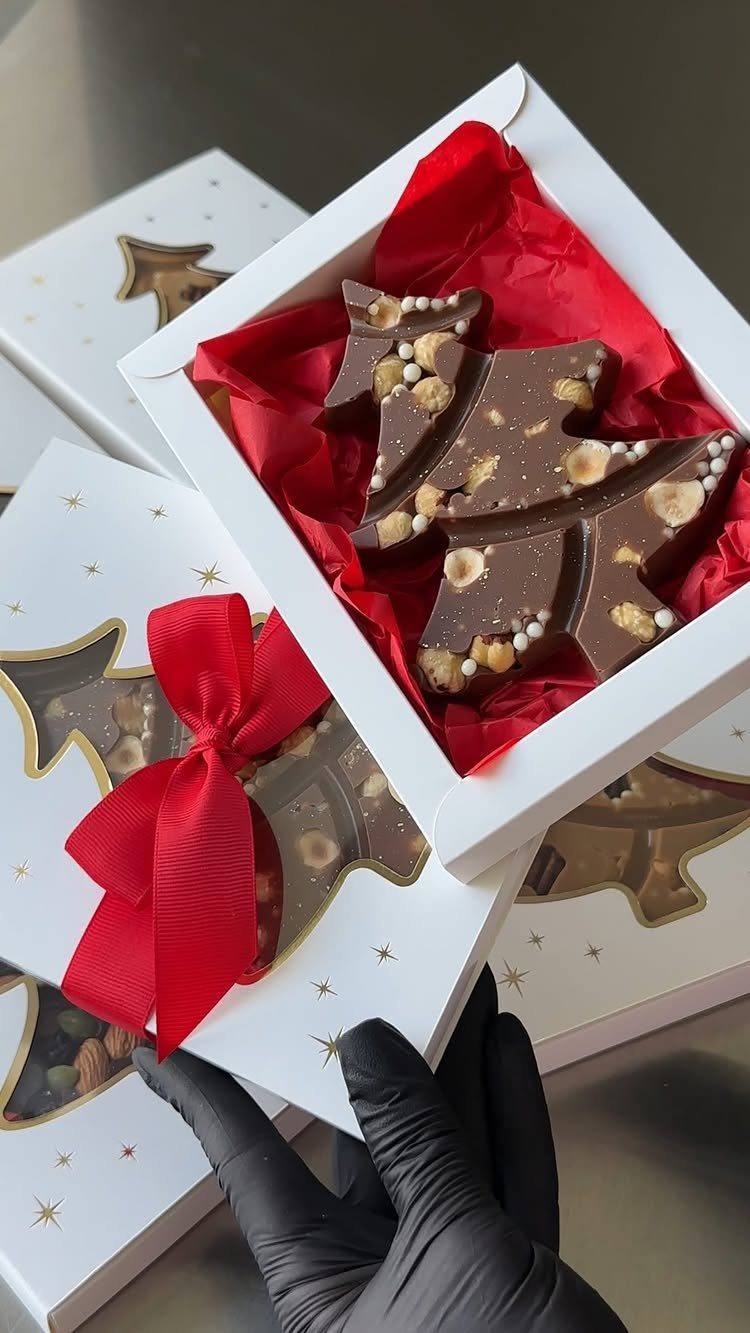
Tree-shaped chocolate bark fills a box with something homemade that looks professional. Tempered chocolate poured into a tree-shaped mold or cut freehand after setting, then studded with hazelnuts and white sprinkles before the surface sets.
I would use a mold for consistent shape; freehand trees look charming until you need six that match. The white box and red tissue are the presentation; the chocolate is the gift.
One batch makes several trees depending on mold size. Temper the chocolate or it blooms gray within days; if you skip tempering, make them the day before gifting.
31. Handmade Snowflake Soaps
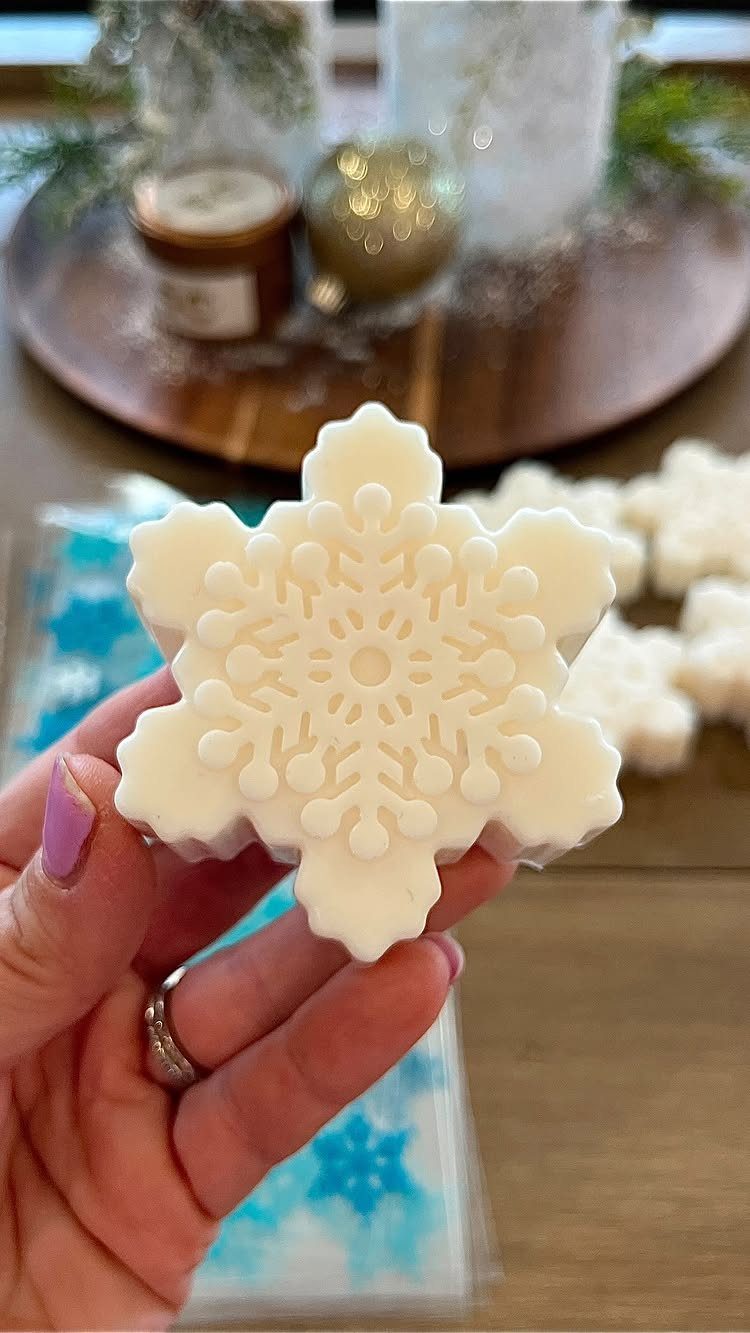
Snowflake soap molds turn a basic melt-and-pour base into a winter guest soap. White glycerin soap with a touch of titanium dioxide for opacity pours clean into a detailed silicone mold.
I would let it set fully before unmolding; half-set soap tears at the points. One batch fills several molds and costs less than a single boutique bar.
32. Curated Holiday Gift Basket
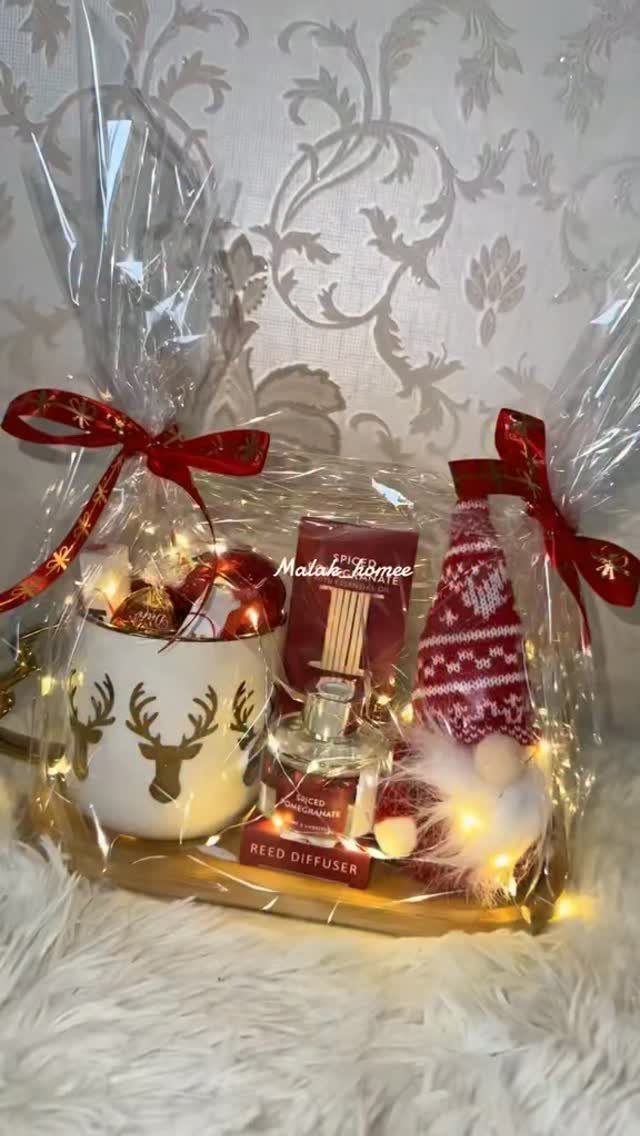
A gift basket works when the items share a mood rather than a theme. A mix of cozy pieces, a deer mug, reed diffuser, plush gnome, fairy lights, reads Nordic without everything matching.
I would build around one anchor, the diffuser or a similar scent source, then add items at lower price points that complement its color. Cellophane and ribbon unify the look; crinkle paper fills the gaps cheaply.
The basket itself is the largest expense. These suit a hostess or a relative you see once a year, and they scale down to a jar or box if the full basket feels too much.
Benefits of DIY Gifts
A batch of materials that cost you an afternoon routinely reads as something pricier because the time you spent carries weight the recipient can feel.
That gap between cost and perceived value is where handmade gifts earn their place; store-bought items rarely close it.
What actually matters is control.
You pick the scent in bath salts, the photo in the ornament, the hardwood in the cutting board. No guessing whether someone already owns it or chose something similar in a different color.
Making rather than buying also changes how December feels. The work itself becomes part of the holiday; I find the repetitive parts, folding bindings or stirring melted wax, settle my nerves better than any shopping trip.
The environmental side matters too: a fabric-topped jar or corked bottle skips the plastic clam-shell and printed cardboard that wrap most retail gifts. You choose whether to reuse, compost, or keep the container.
There’s nothing more thoughtful than a homemade Christmas gift to show someone you really care this festive season.
Tips for Crafting
Start with the recipient list, not the craft.
Match each person to a project that fits your skill level and their actual life: a renter with a strict lease may not need a heavy wreath hanger, and someone who travels light will not thank you for a bulky dough bowl candle.
Batch crafting saves more time than people expect.
Cut all your photo circles at once, mix one large batch of salt dough, bake every ornament sheet together. The setup and cleanup happen once; the flow carries you through.
Craft parties split labor and cost without splitting the credit. One person brings the wine corks, another the wire, and everyone leaves with finished gifts.
I would keep the guest list small enough that everyone has room to work, and choose one project rather than a free-for-all; too many supplies spread across one table creates chaos, not memory.
Eco-friendly Gifting
Handmade gifts let you choose materials that align with what you already value.
Beeswax instead of paraffin, food-grade mineral oil instead of polyurethane, edible glitter instead of plastic: the switch costs little or nothing and removes the hidden waste of conventional gifting.
Packaging is where the real savings show.
A fabric-topped jar needs no wrapping paper; the cloth becomes part of the gift. Corked bottles, parchment-lined tins, and waxed paper all biodegrade or reuse where foil and printed boxes do not.
I would keep a drawer of saved jars and small boxes through the year; they cost nothing and look intentional with a simple label.
The materials themselves can come from what you already have. Wine corks, oats, spare yarn, and craft sticks are byproducts of ordinary life, not new purchases.
Even the greenery for a wreath can come from yard trimmings if you time it right. The environmental case for DIY is not about perfection; it is about choosing better where the choice is easy.
Frequently Asked Questions
What are the top gifts for Christmas?
Handmade gifts beat store-bought trends because you control the materials, the time, and the amount of yourself that goes in.
Mason jars dressed as Santa, homemade hot chocolate stirrers, and hand-painted mugs rank high for me because they cost little, finish fast, and feel personal.
Food gifts like spiced nuts and fudge keep well and travel flat, which matters when you are mailing gifts or handing them out at work.
What are some ideas for homemade gifts for friends?
Hot chocolate stirrers let you give something finished without guessing mug sizes or kitchen space; the recipient handles their own cup and milk. Spiced nuts in parchment-lined tins feel upscale without the specialty shop price.
Hand-painted mugs take an hour each plus bake time, and the right ceramic paint survives the dishwasher. For friends who sew or knit, yarn ornaments in small shapes like mushrooms or houses show skill without demanding hours.