These 17 ideas run from nearly free, using cardboard tubes and saved jars, up to a weekend build with gingerbread and royal icing.
What picks yours is the age of the hands doing the work and how many hours you have, not how much you spend.
A six-strand embroidery floss split to 3 strands, a pencil eraser dipped in red for berries, and a spool of cotton rope that runs out faster than you’d think sit in this list alongside handprints that need cardstock so the paint does not warp the sheet.
1. Paper Straw Christmas Tree
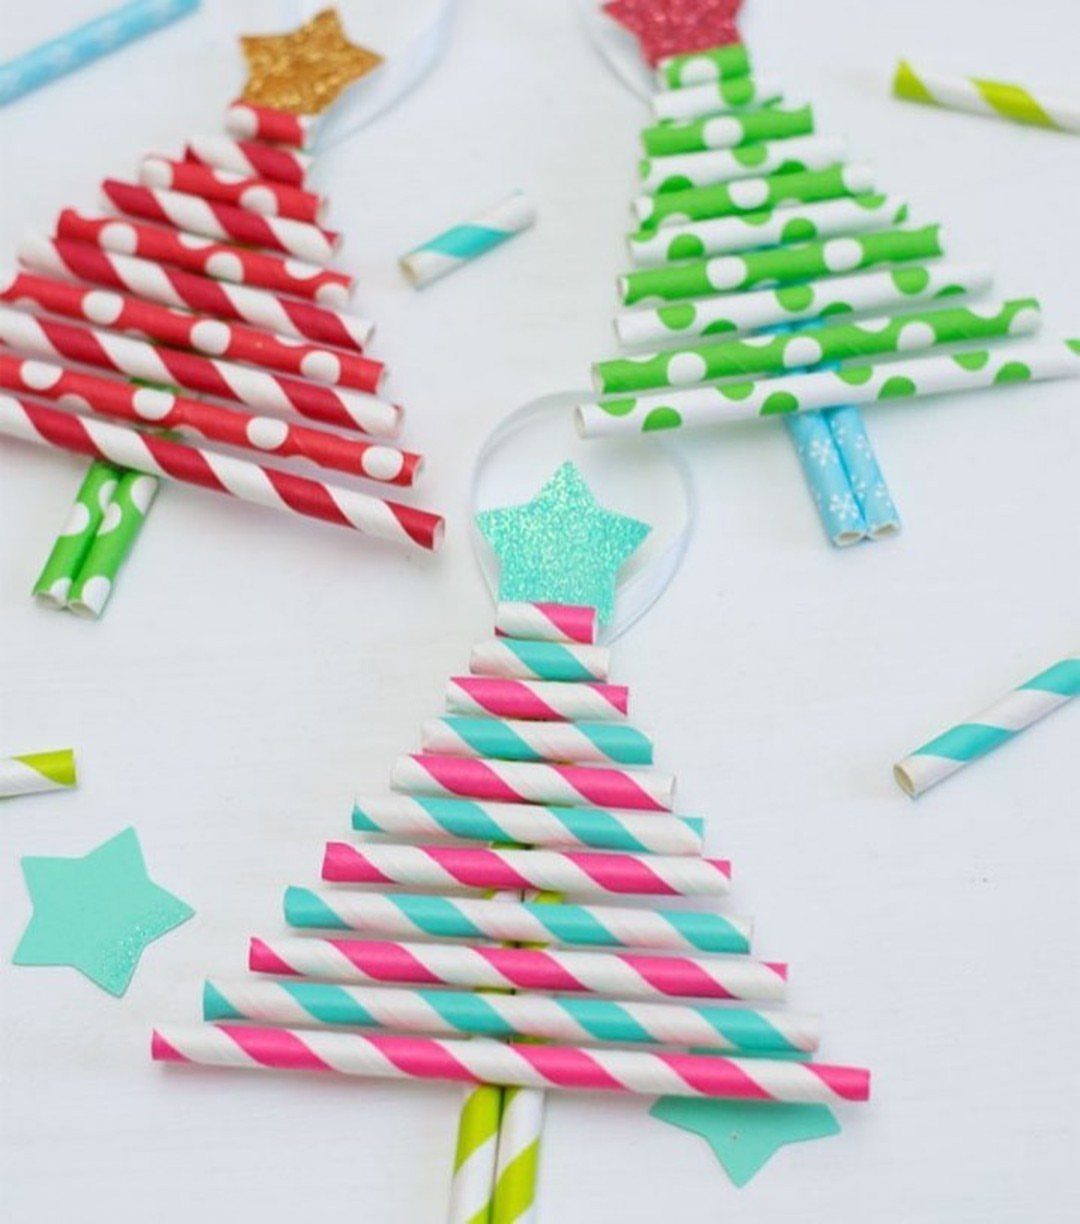
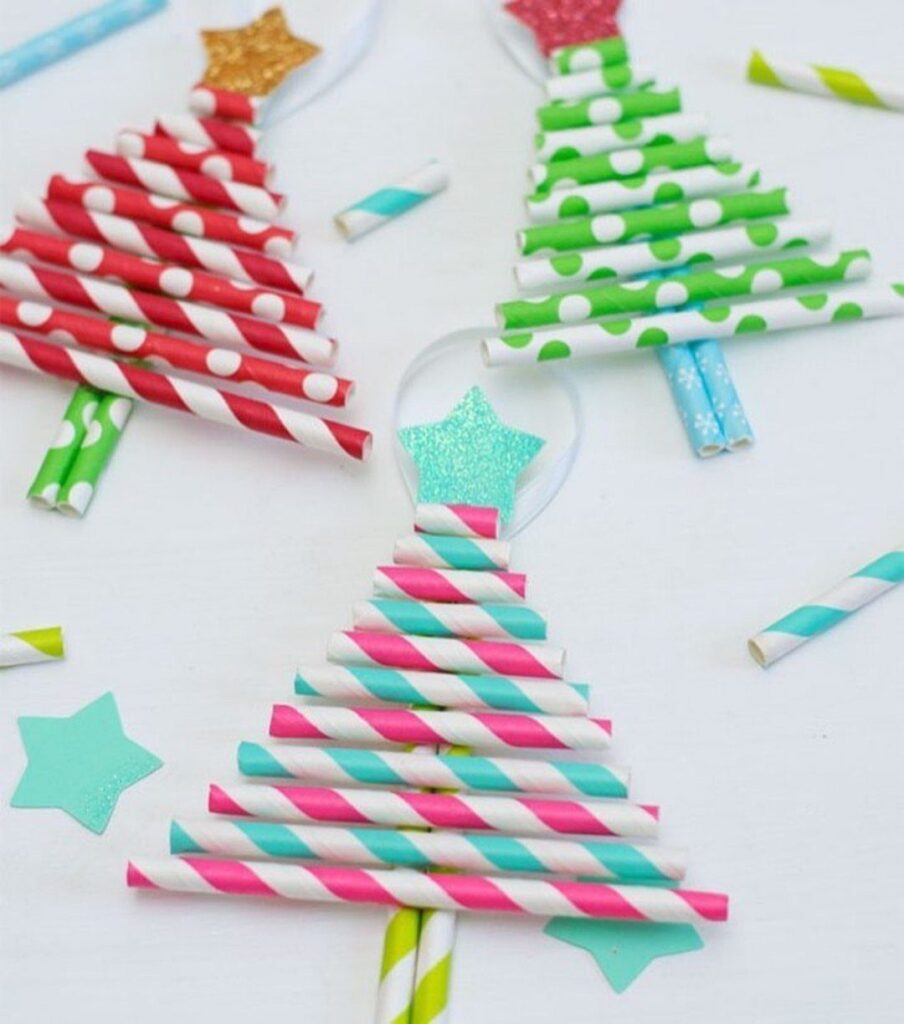
Paper straw trees start with a bundle of cut straws tied at the center, fanned out into tiers and trimmed to a taper.
Solid metallics or matte greens read less busy than patterned straws with glitter stars; pick one finish and stick with it.
Paper straws are cheap enough that you can buy a pack and experiment with a few trees in one sitting.
String loops through the top star make them hangable, or they stand on their own in a jar of salt or sand.
2. Christmas Cookie Art

Royal icing work on a sugar cookie base lets a simple mitten cutter become a canvas; the technique matters more than the shape.
The snowflake pattern is piped white into wet pink, a wet-on-wet technique that lets the colors settle together without lines.
I like this for an afternoon with kids old enough to hold a bag; younger ones get frustrated by the crusting wait between colors.
A batch of dough and 2 icing colors costs little if you already own the cutter, and the results keep well in a tin.
3. Origami Santa
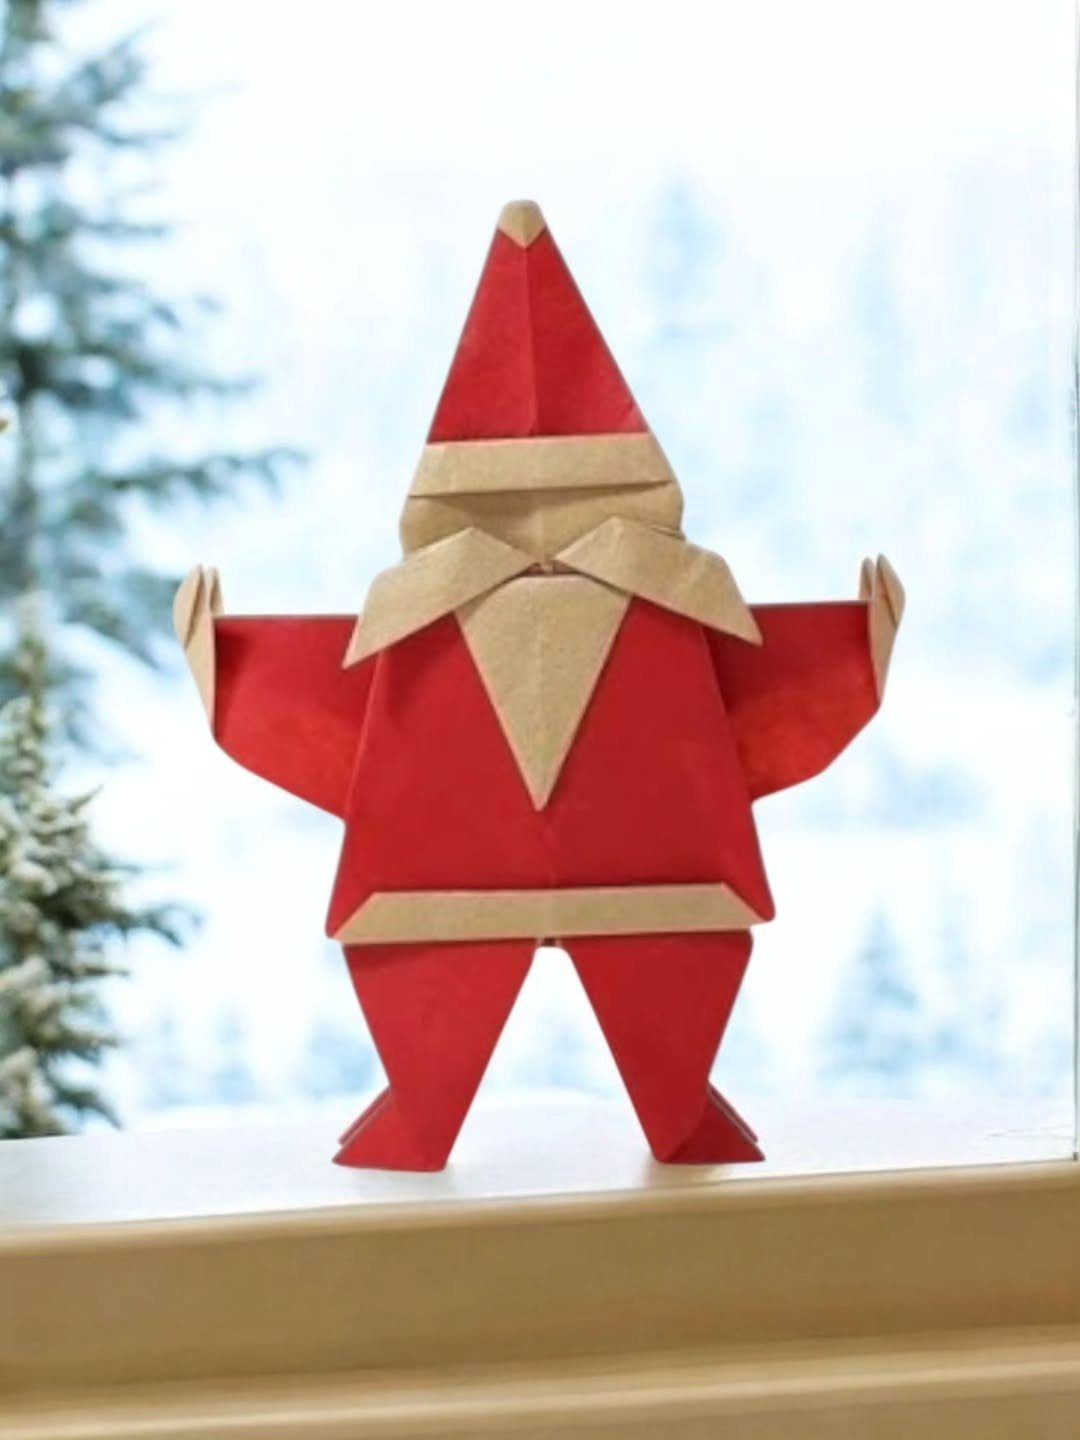
Origami Santa folds from 2 squares, red for the suit and tan for the face, with the color change built into the creases rather than glued on.
The figure stands on its own, which matters more than it sounds; a Santa that needs a prop is a Santa that falls over.
I find modular folds like this easier than one-sheet figures with too many steps. Standard kami paper works fine for this, and one Santa comes together fast once the sequence is in hand.
The window light behind the example shows off the clean edges; a windowsill with afternoon sun does more for display than any craft-store base.
4. Beaded Bow Ornaments
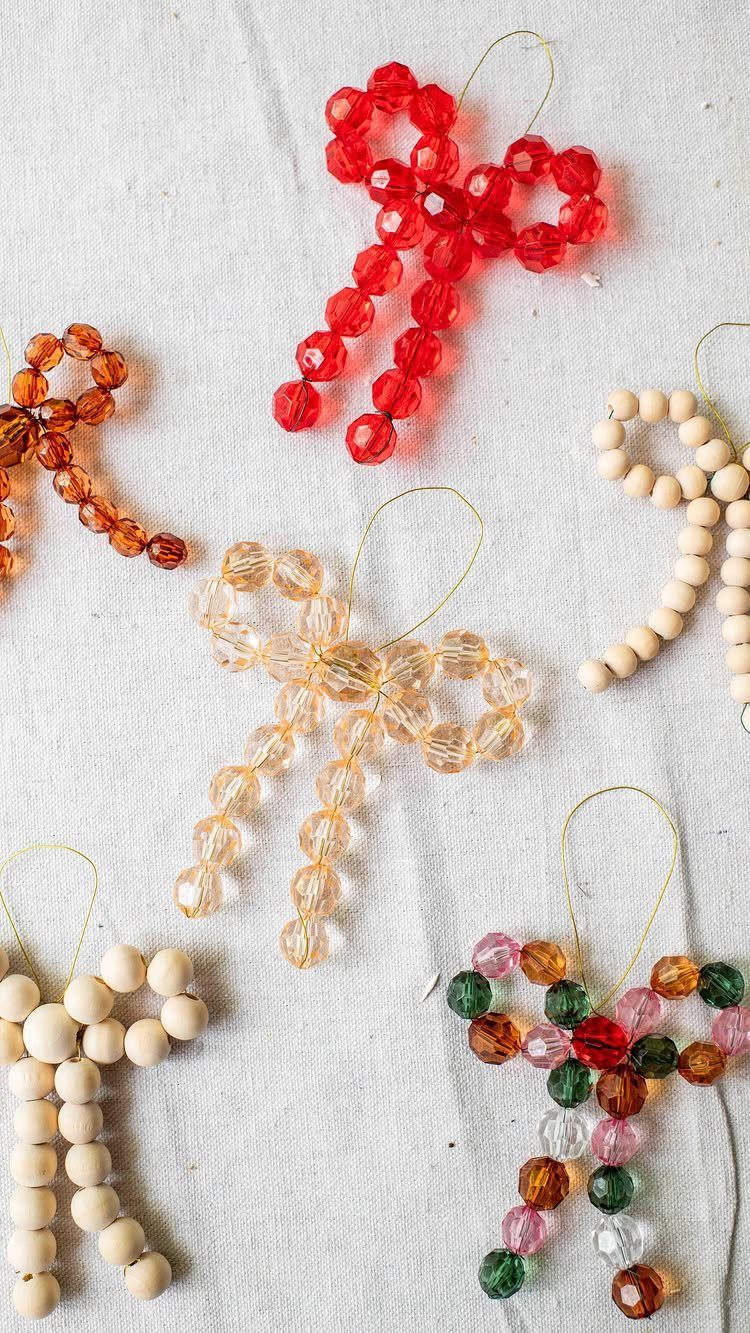
Beaded bows shape wire into loops and wrap each crossing with smaller beads to hold the form. Mixing faceted plastic, glass and wood on the same bow reads messy; one material per bow stays cleaner from a distance.
Wire memory is the trick: craft wire keeps its shape after bending, and a spool costs next to nothing.
Each bow needs a handful of beads and a short length of wire, so a single strand and spool yield several ornaments. Thread the hanger through the center knot, not a loop edge, or the bow tilts on the branch.
5. Paper Chain Garland
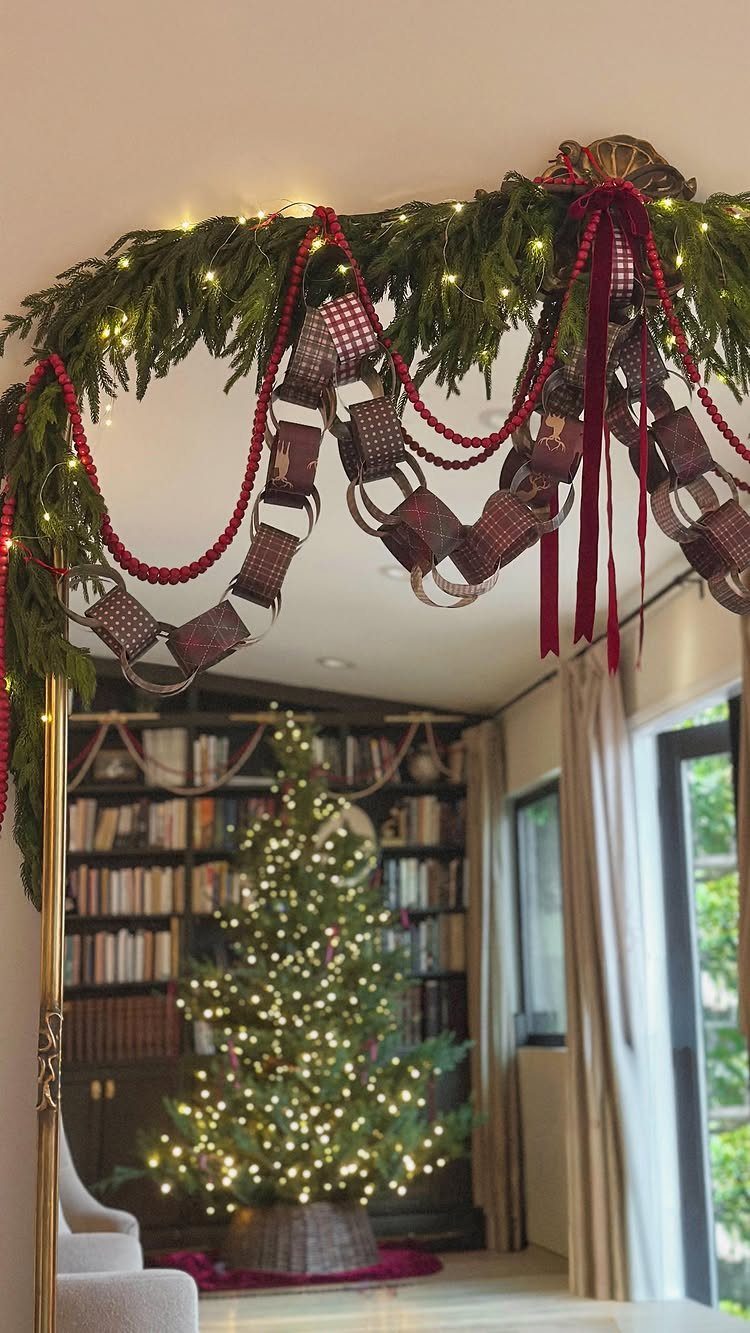
Paper chain garlands at 12 by 12 inches cut into 2-inch strips give you links about 6 inches around, a scale that reads from across a room without dominating it.
I have made these from 1-inch strips for tighter spaces and the math still works.
A single sheet yields multiple strips, so a small stack of craft paper covers a standard doorway with length to spare. Link with tape inside the loop, not staples; staples catch on pine needles and show under fairy lights.
6. Tinsel Wreath

Tinsel wreaths build on a wire or foam base wrapped with garland until no gaps show, then dressed.
Green tinsel with holly, pinecones and a satin bow works, though I would skip the berries and let the tinsel texture carry more of the look, since plastic berries read cheap up close.
A foam wreath form runs a few dollars, and a couple of tinsel garlands cover it with overlap.
The wrap goes fast; the dressing takes a bit more attention. Green tinsel is the traditional choice, but copper or champagne reads more current and hides dust better through January.
7. Handprint Reindeer
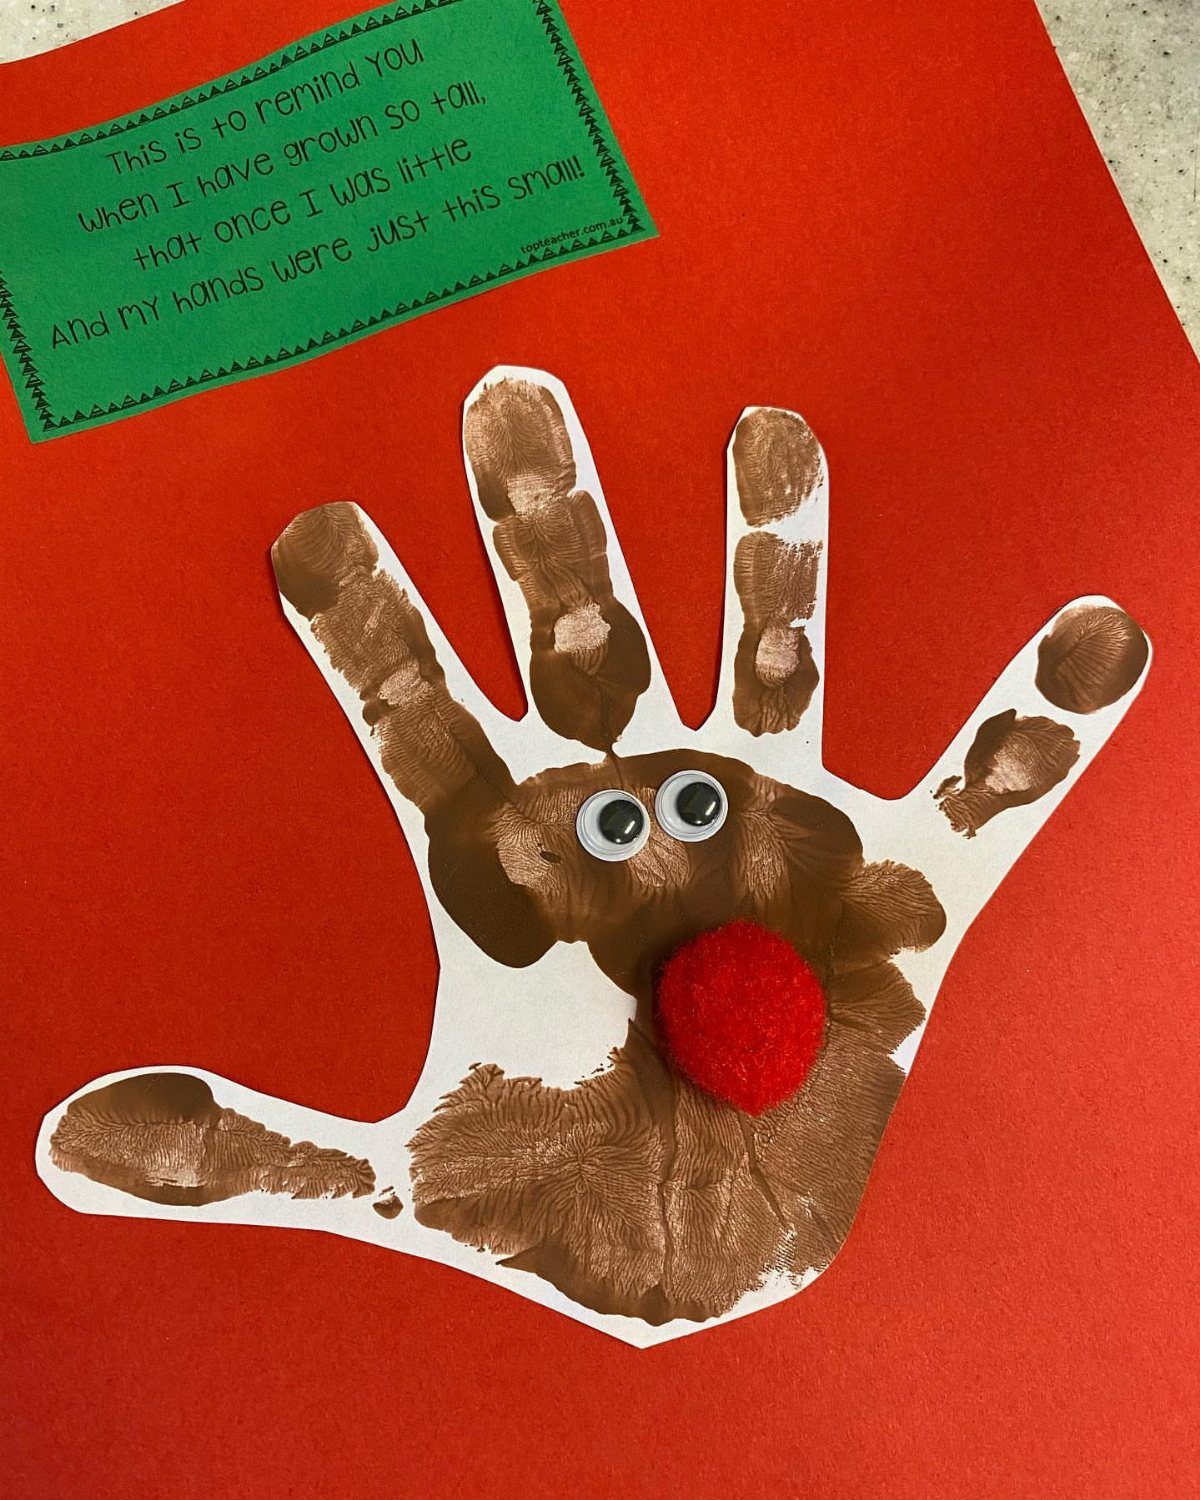
Brown paint on a small palm, pressed to paper or cardstock, gives the antler shape without cutting. Googly eyes and a red pom-pom nose turn the print into a face with a little gluing.
I like this for the age that still fits a hand but can handle a glue stick, maybe 4 to 7.
The poem beside the example is a printable touch; write your own or skip it, the handprint carries the keepsake weight either way. Use cardstock, not construction paper, or the paint warps the sheet as it dries.
8. Toilet Paper Roll Ornaments
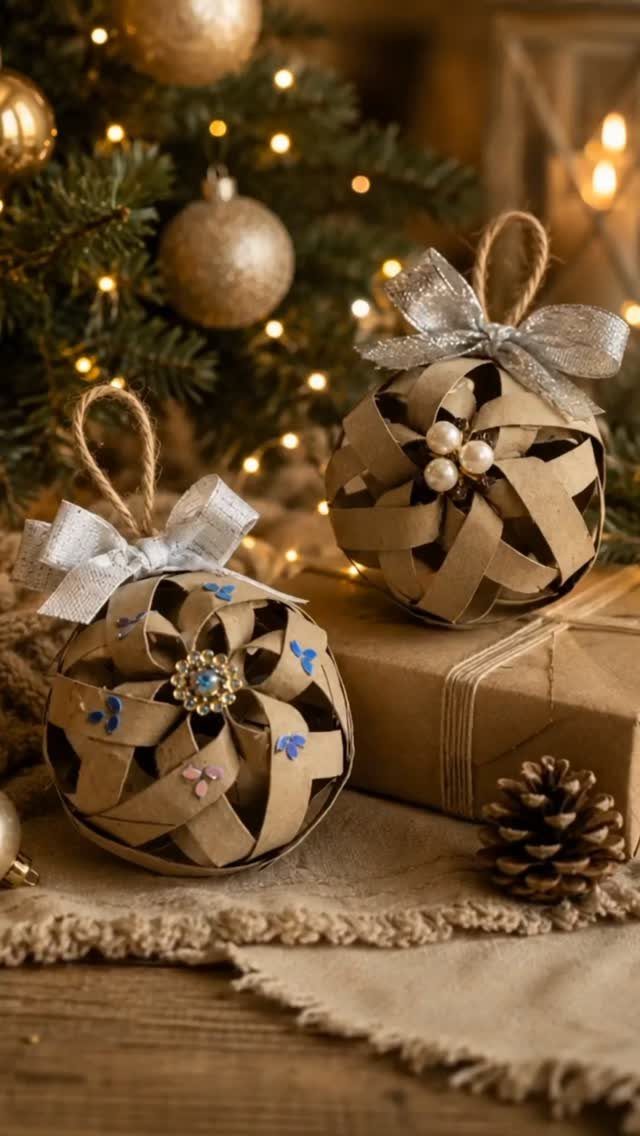
Cardboard tubes cut into narrow rings, woven through one another into a sphere, make an ornament that reads as woven wood from a few feet back.
Ribbon and bead trim dress it up; the example uses thin satin and small pearls.
A single roll yields enough rings for 2 or 3 ornaments, so this is nearly free if you have been saving tubes.
The weave looks tricky but holds itself once you start; the first one takes patience, the second goes faster. I would make these with kids old enough to pinch the rings without crushing them, maybe 8 and up.
9. Paper Strip Snowflake Ornament
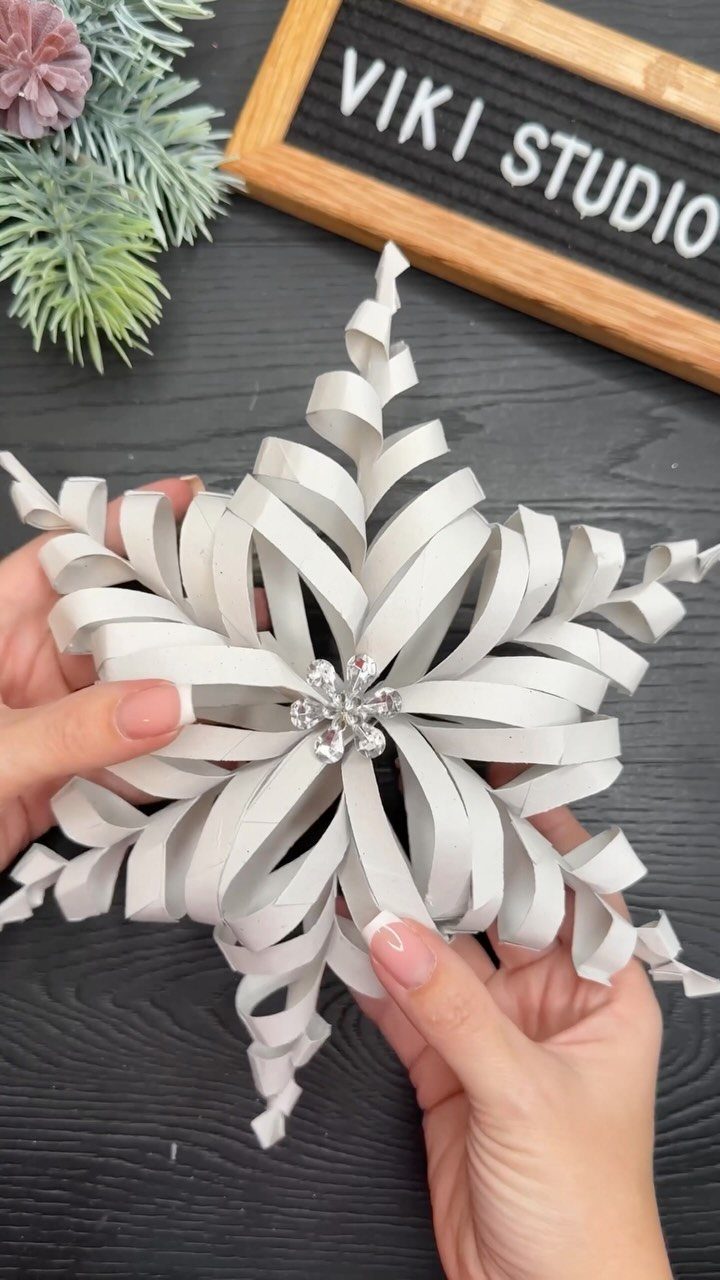
Paper strips looped and pinned or glued at the center spread into a snowflake radiating from a rhinestone flower. White paper keeps it crisp; the rhinestone does the color work.
Standard printer paper cut to half-inch strips works, though slightly heavier card stock holds the loops open better.
The center join is the fussy part; a dot of hot glue sets fast but needs adult hands, while craft glue means waiting between steps.
I think this suits someone who wants one delicate piece rather than a batch, since each takes attention.
10. Embroidered Felt Ornaments

Felt shapes, tree and snowflake, carry running stitch outlines and scattered sequins or beads that catch the light. Tassels on the tree bottom add movement; the snowflake stays flat for crisp silhouette.
Wool-blend felt holds embroidery better than the acrylic sheets sold in craft cubes, and the difference shows after a season of handling.
A six-strand embroidery floss split to 3 strands gives finer line work without the bulk of full strand. These need a evening of quiet work, not a quick craft-night project, and I think they reward the time.
11. Glitter Paper Star Ornaments
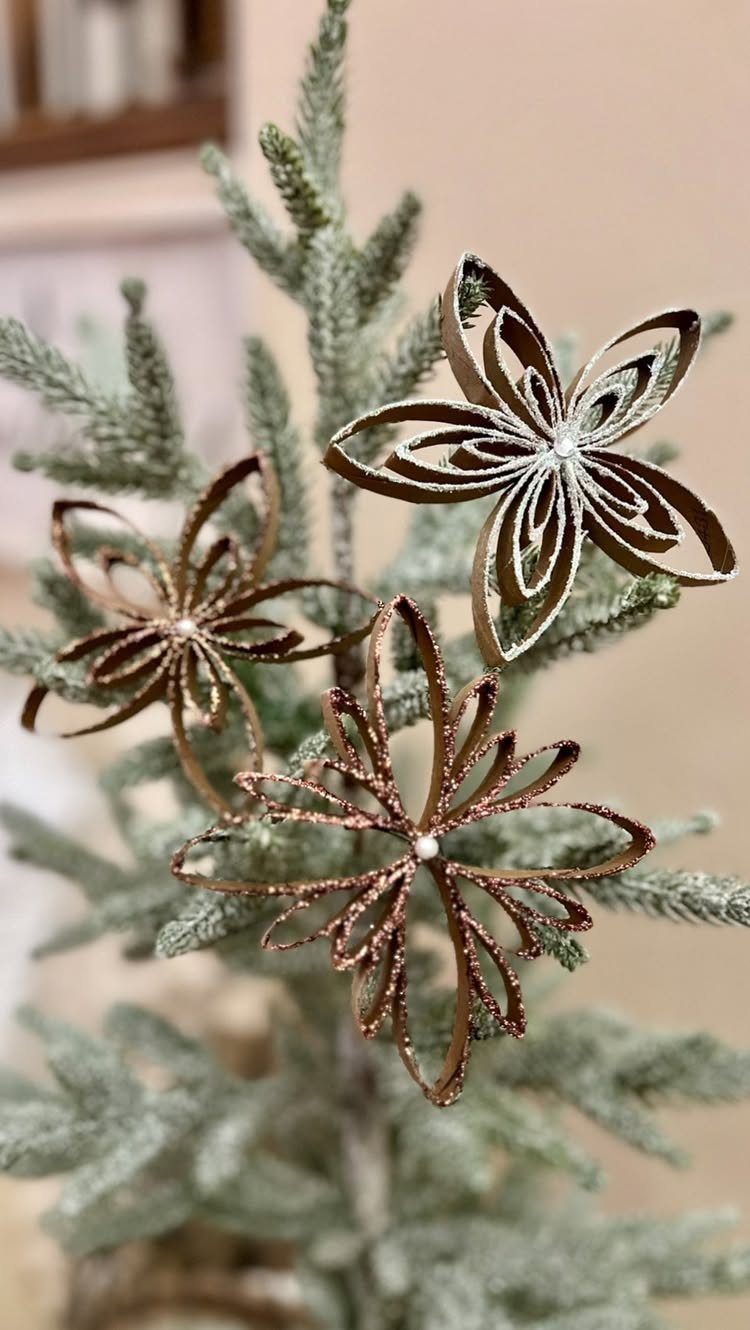
Cardboard tubes, pinched flat and cut into short strips, curl into points that cluster into stars. Glitter lines the inside curve; pearls center each one.
Kraft paper makes a warm brown base against gold glitter that avoids the school-project look of brighter cardboard. I would make these with a glue that dries clear, since white glue residue shows on brown kraft.
One tube yields several stars, and the assembly is simple enough to batch. They hang light, good for thin branches that sag under glass.
12. Lace Angel Ornament
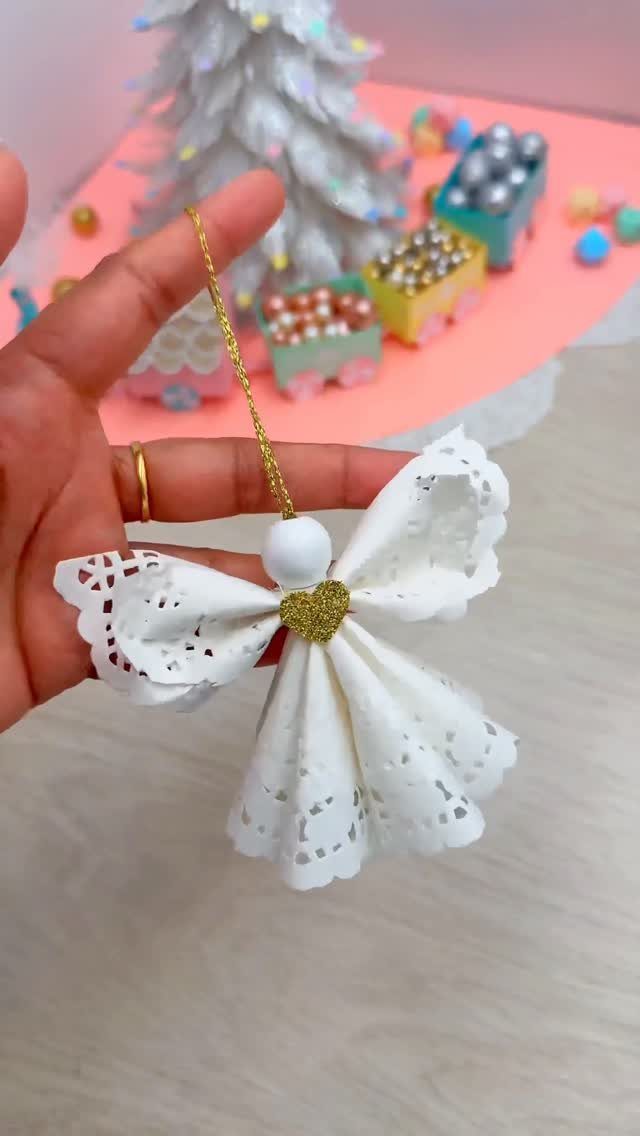
Paper lace, the kind sold in doily packs, folds into an angel body with a gold glitter heart at center chest. The loop at top is functional, not decorative; it needs to hold the weight without tearing the lace.
I find paper lace more forgiving than fabric for crisp folds, though it creases permanently so the first try is the final shape. A toothpick or thin wire inside gives the body structure if the lace alone flops.
This is a quick one once the pieces are cut, and the delicacy suits a gift tag or a single special branch rather than a whole tree.
13. Rope Christmas Tree
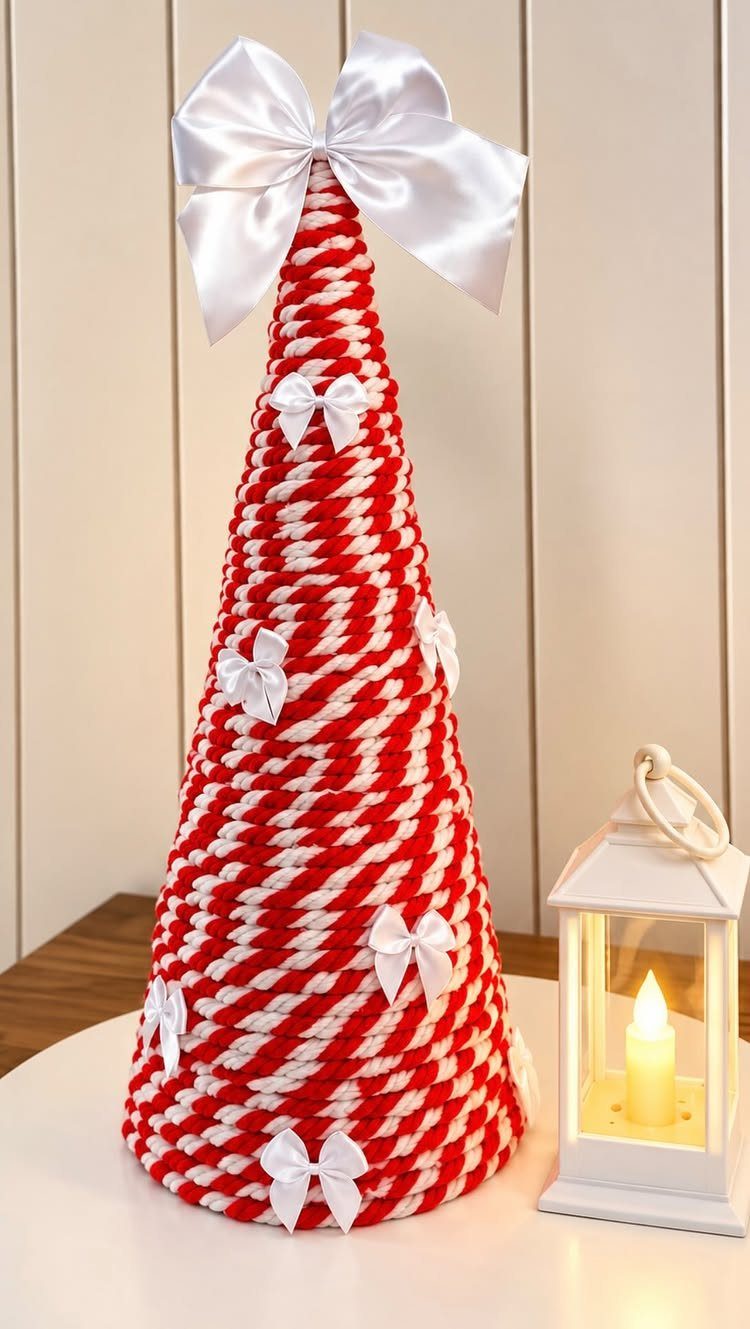
Thick cotton rope in red and white wraps a foam cone in coils, secured with hot glue at the back seam. Small satin bows pin in at intervals; a larger bow at top hides the spiral end.
A small cone takes more rope than you’d think, so buy the spool rather than by the yard. The rope texture reads nautical as much as holiday, which carries through January without feeling dated.
14. Fabric House Ornaments

Gingham and plaid scraps cover cardboard house cutouts with glue, edges folded to the back like wrapping a present. Twig roofs hot-glue on top; miniature wreaths pin to the front door with a dab of craft glue.
The fabric choice matters more than the shape.
Small-scale prints read as texture from a distance, while large buffalo checks overwhelm a house this size. I like these grouped in odd numbers on a shelf or hung as a cluster, since one alone looks lost.
15. Gingerbread Church Centerpiece
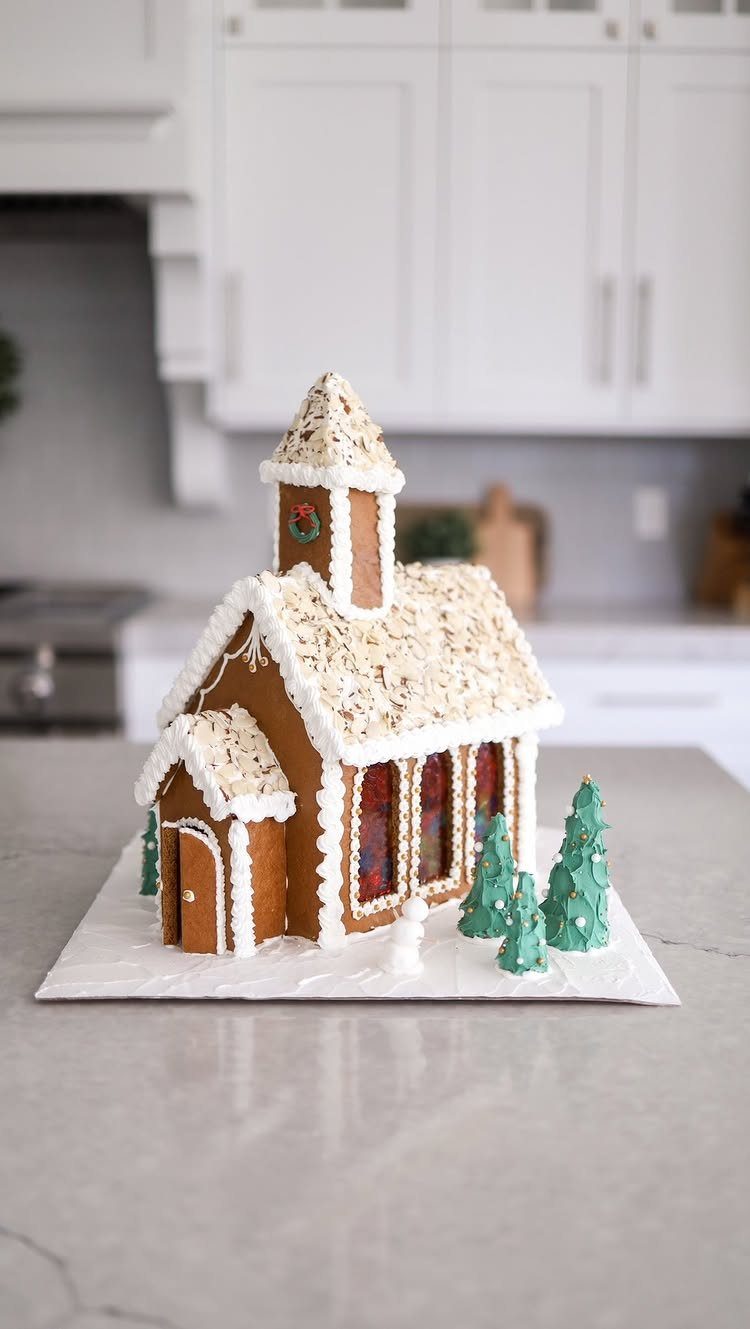
A gingerbread church builds from slabs baked over template shapes, assembled with thick royal icing that dries hard as mortar. Almond slices tile the roof; crushed hard candy melts into stained glass windows.
This is a weekend project, not an afternoon one. The structure needs drying time between walls and roof or the weight slumps.
Unlike cookie gifts, this sits out through December and still looks right. Skip the tiny snowman if you lack patience; the church alone carries the scene.
16. Hand-Painted Wreath Canvas
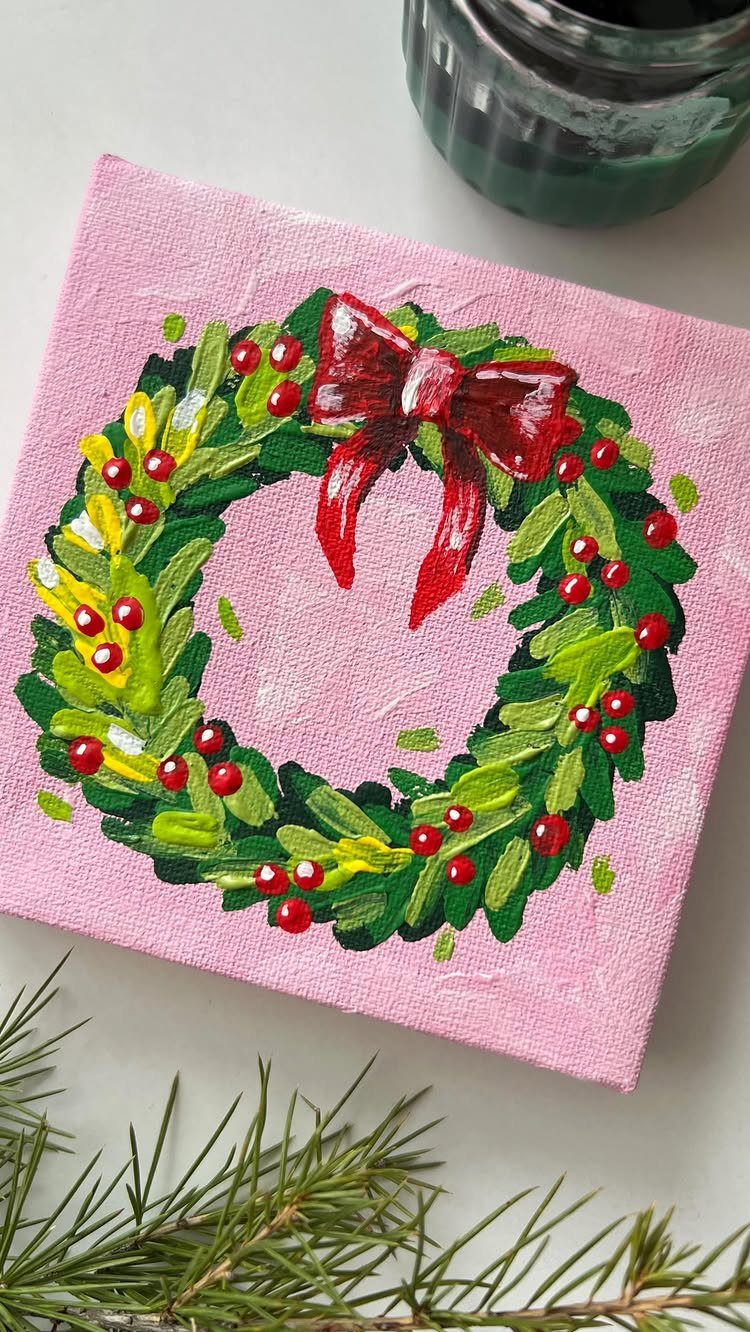
Acrylic paint on a 6-inch canvas lets a wreath shape carry the whole composition. Sage or cream would read more traditional, though I like the pink against green for a kitchen or a kid’s room.
A flat brush loads two colors, green and dark green, for leaf variation in one stroke.
The berries dot on with a pencil eraser dipped in red. One canvas and a few tubes of craft paint cost less than a store-bought sign, and the result is permanent enough to store and bring back yearly.
17. Decorated Holiday Glass Jars
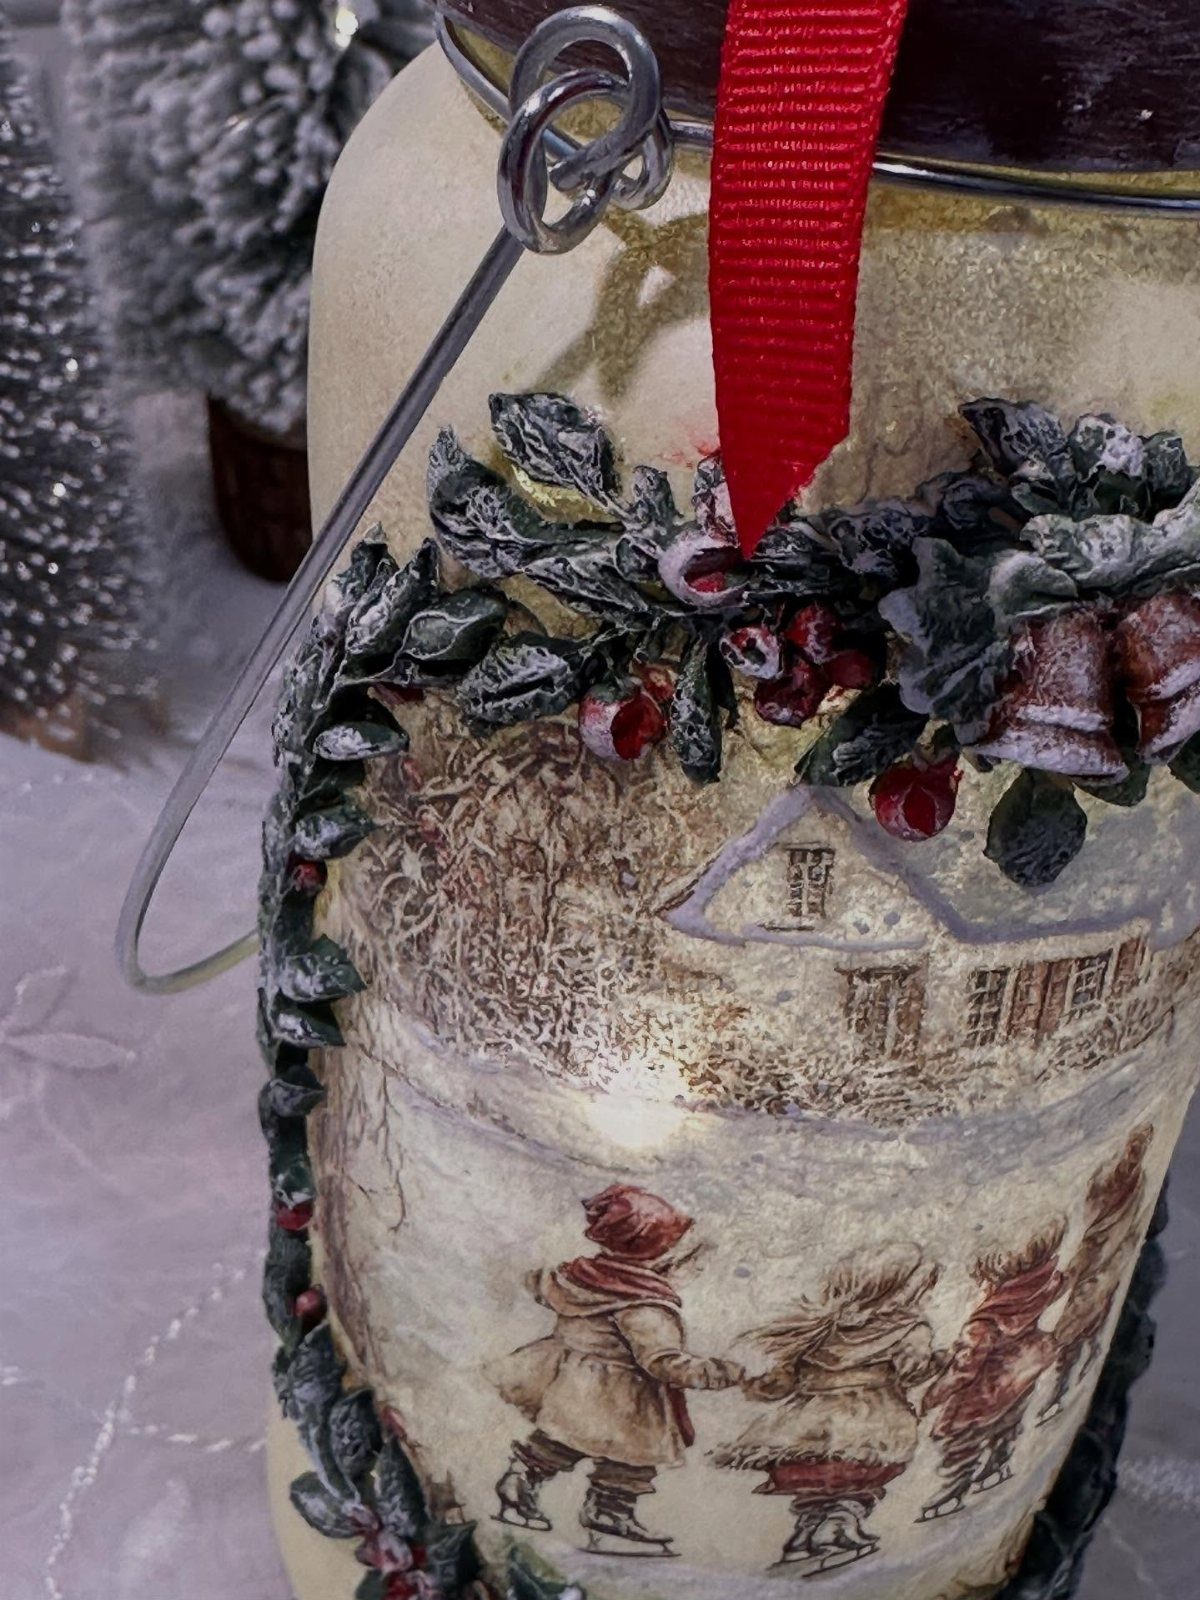
A clean jar becomes a winter scene with a vintage print decoupaged to the front, trimmed to fit the curve. Faux berry garland wraps the neck, wired in place; a red ribbon bow covers the mechanics.
The wire handle turns this into a lantern carrier, though I would skip it for shelf display and save the hardware for versions meant to move.
Any jar with straight sides works; wide-mouth canning jars are free if you have them, and their glass is clearer than most purchased options. The vintage print sets the tone, so choose one you would hang on a wall.
Frequently Asked Questions
What are some easy homemade Christmas decorations I can make?
Paper straw trees work well for a quick afternoon: a bundle of straws tied at the center, fanned into tiers and trimmed to a taper.
For something even simpler, the handprint reindeer needs only brown paint, a small palm, and googly eyes with a pom-pom nose glued on after.
How can I decorate my house for Christmas cheaply?
Most of these projects run on materials you already have or can buy for a few dollars.
Toilet paper roll ornaments are basically free if you have been tossing cardboard tubes in a drawer; one roll gives you enough rings for 2 or 3 finished pieces.
Paper chain garlands need only craft paper and tape, with one small stack covering a standard doorway.
The tinsel wreath uses a foam form and a couple of garlands, with the wrap going fast so the dressing is where your time goes, not your money.