The 20 ideas below range from free pinecones collected after a windstorm to a few dollars for plastic beads or heavy-duty foil, with most asking only for what is already in the house: popsicle sticks, egg cartons, cereal-box cardboard, or a 2×2 inch wood scrap.
The one that belongs on your tree is the one your own hands can finish in the hours you actually have, whether that is a half-hour with a child before they lose interest or an afternoon alone with a bin of water and enamel paint.
I lay out the hydro-dipping step that wraps purple and gold around a bauble in a single dip, because that swirl is the detail that proves this list was built for makers, not shoppers.
1. Popsicle Stick Ornaments
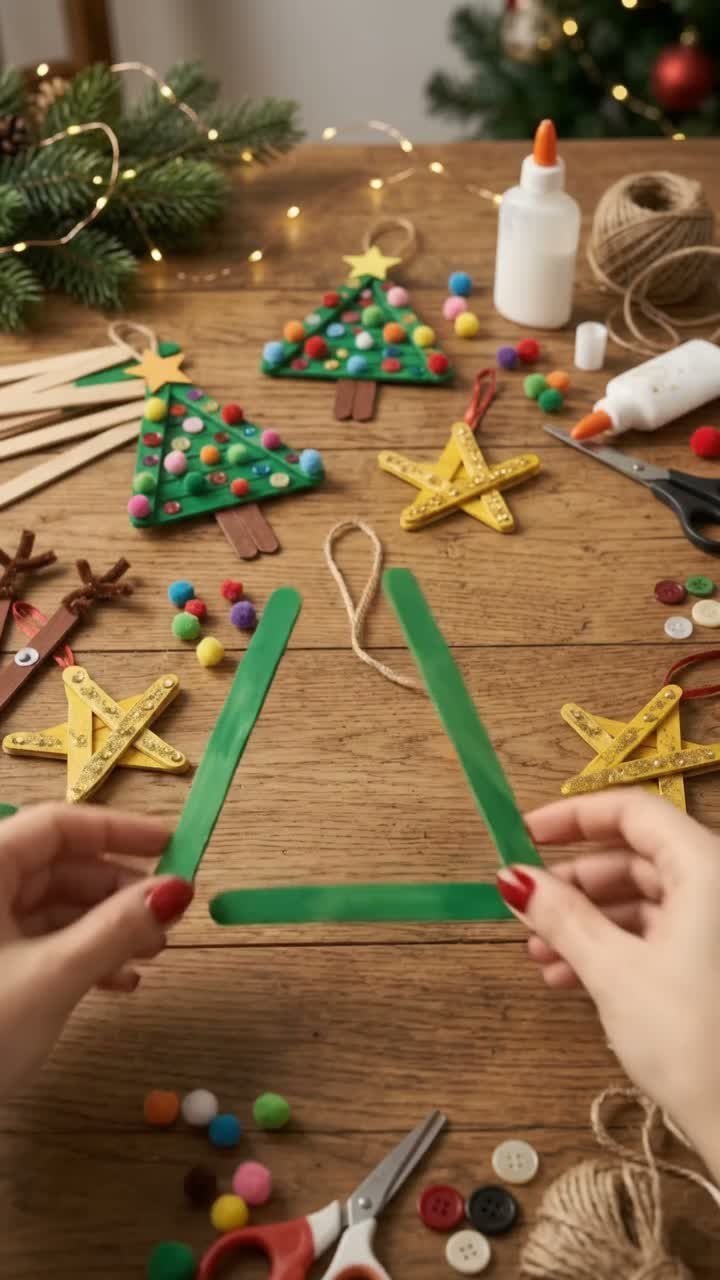
Popsicle sticks laid into a triangle make the fastest Christmas tree shape I know for small hands. 3 sticks, a line of glue down each seam, and the structure holds while a child presses on sequins or a paper star.
I like that the raw wood takes marker, paint, or washi tape equally well, so the same batch of sticks becomes whatever theme the maker wants.
A loop of twine hot-glued to the back turns it into a hanger while the glue sets.
2. Salt Dough Ornaments
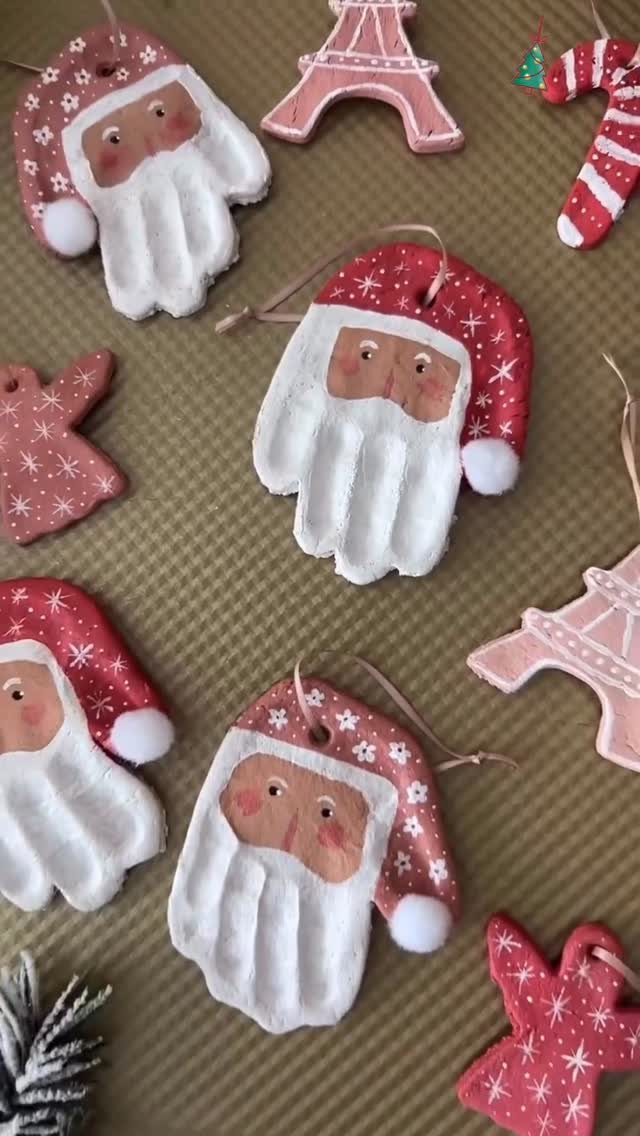
Salt dough asks for flour, salt, and water in a two-to-one ratio, mixed until it feels like stiff cookie dough.
I roll it thin, cut shapes with whatever cutter I have, and poke a hole near the top with a straw before baking low and slow until hard.
The surface takes acrylic paint and cheap craft varnish afterward. What I watch for: too thick and the middle stays soft; too thin and it warps in the oven.
3. Handprint Ornaments
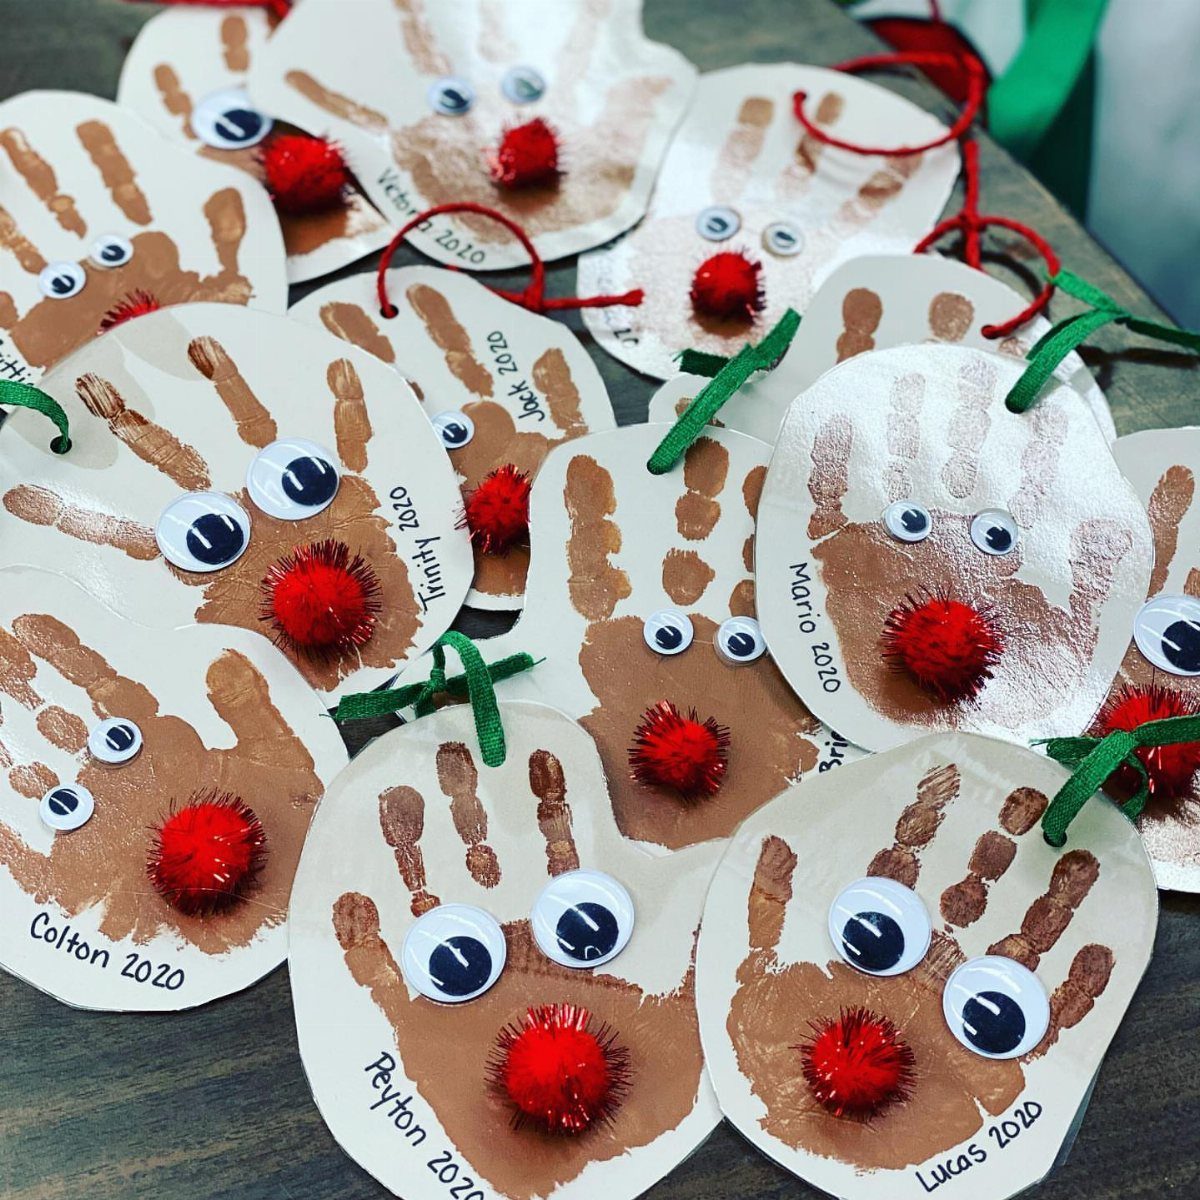
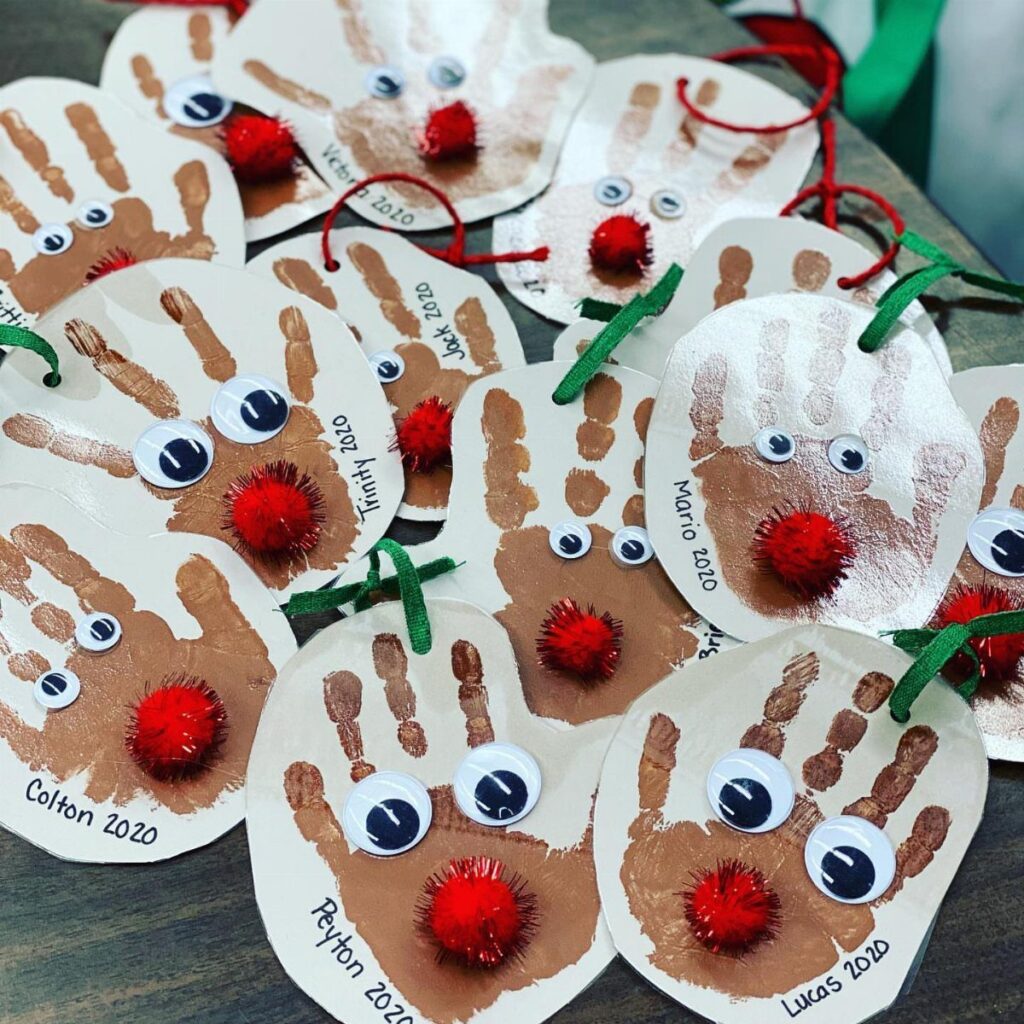
A traced handprint with the fingers pointing down becomes the reindeer’s antlers in one cut.
I brown the palm and fingers with paint or marker, then glue on a red pom-pom nose and 2 googly eyes where the thumb meets the palm.
Adding the child’s name and year in marker turns it into the kind of ornament a parent keeps past the years the hand actually fit that outline.
Cardstock holds up better than paper, though construction paper works if you laminate it after.
4. Beaded Ornaments
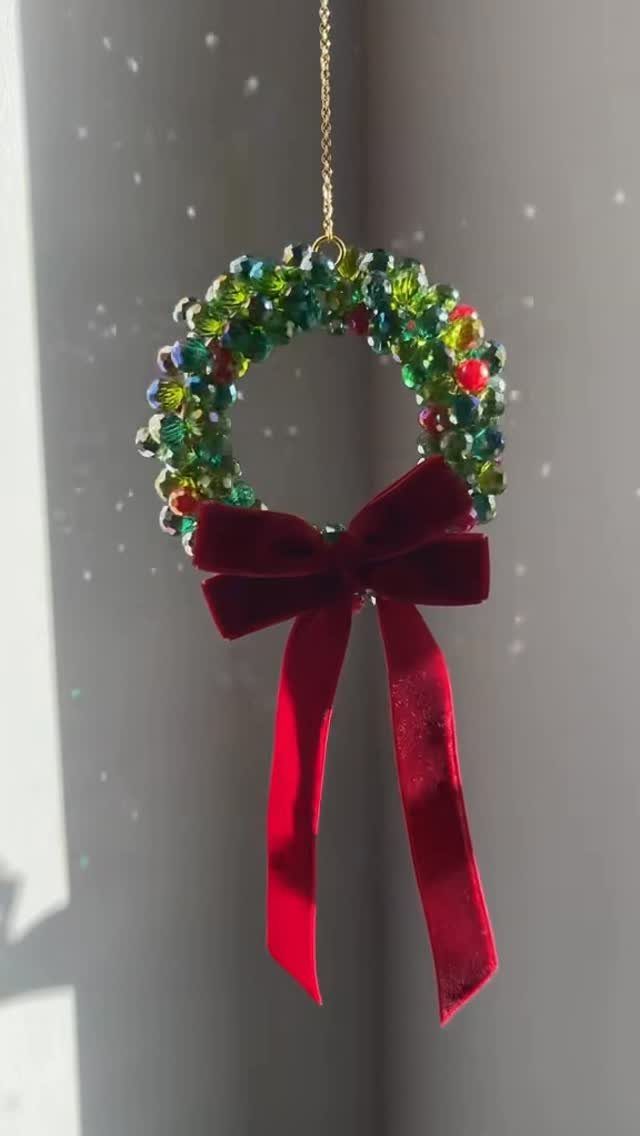
A wire wreath form from the floral aisle becomes the skeleton for a beaded ornament that reads as fancy from a distance.
I thread faceted plastic beads onto 24-gauge wire, wrap it around the form, and finish with a cluster at the base or a velvet bow.
The weight stays light enough for a paper tree branch. What costs: the beads run a few dollars for enough to cover one wreath, less if you buy a mixed bag and sort by color yourself.
5. Pinecone Ornaments
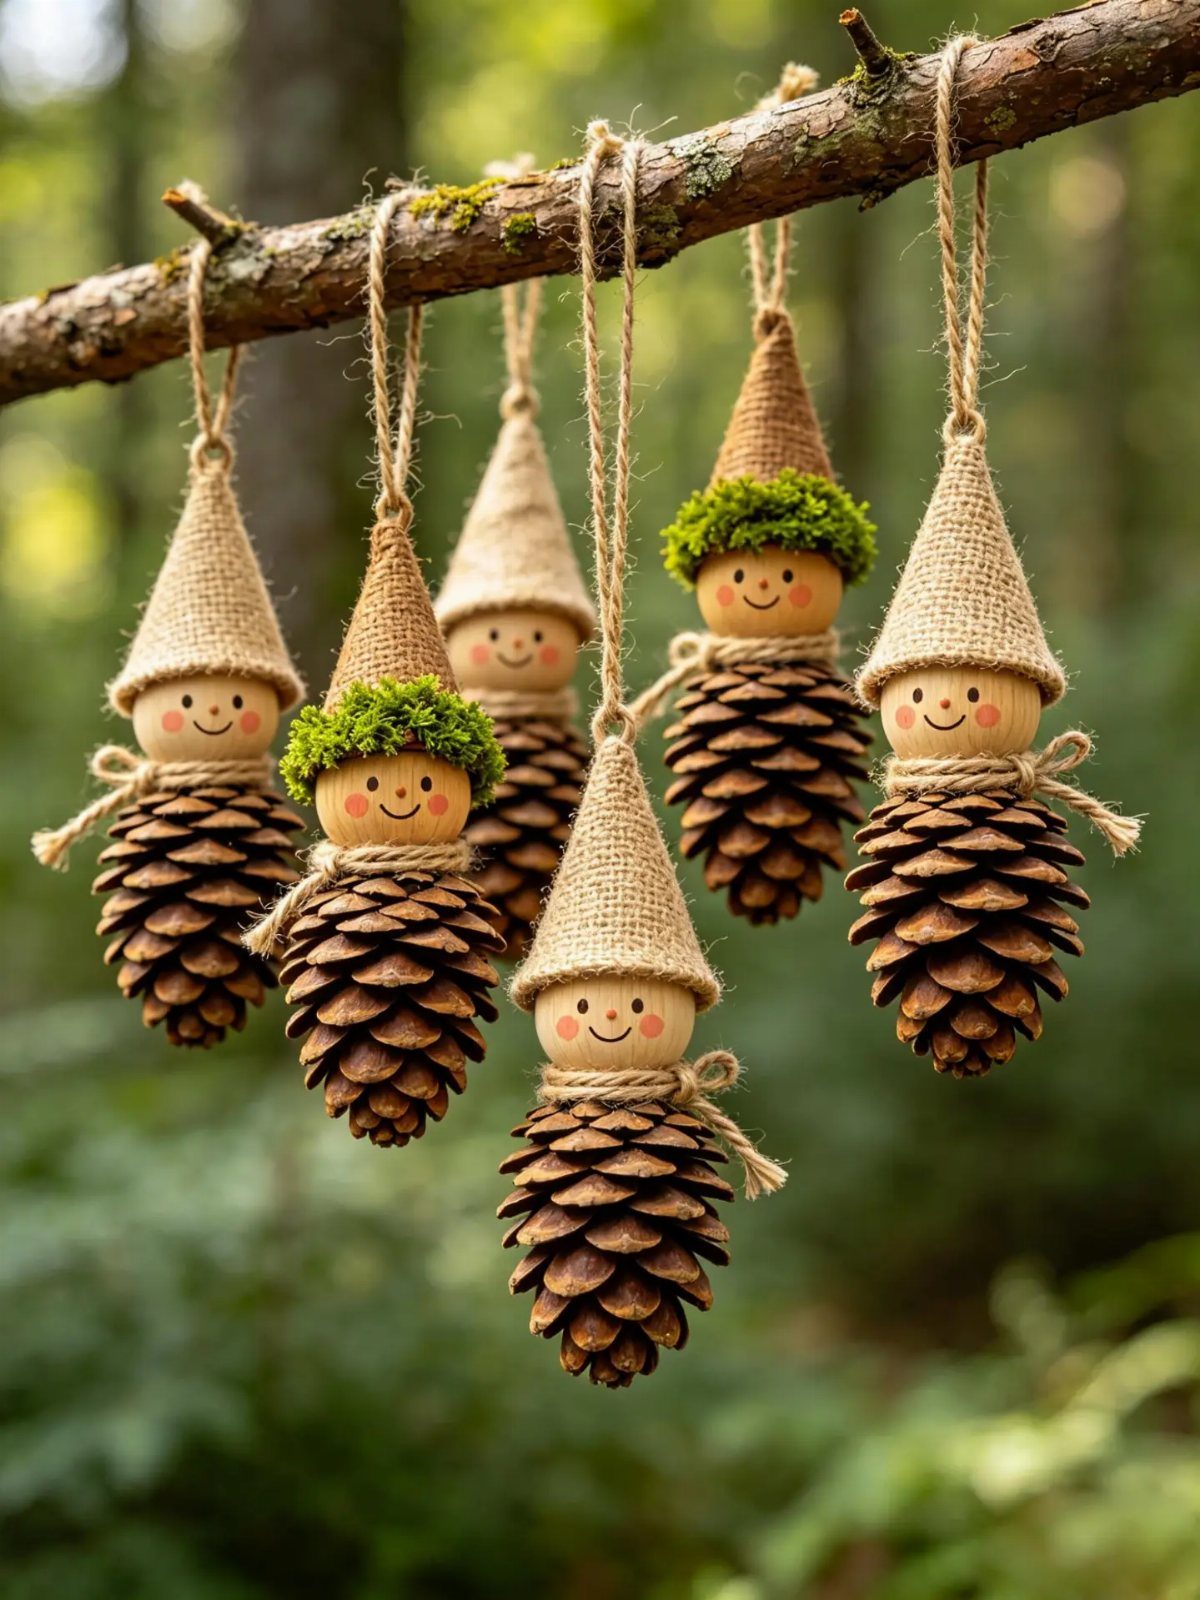
Pinecones collected on a walk need time on a baking sheet at low heat to drive out sap and any insects; I line the sheet with foil for the mess.
After cooling, a wooden bead glued to the small end makes a head, felt cut into a triangle makes a hat, and a loop of twine at the top turns the whole thing into a hanger.
The scale varies with the cone: a small cone fits a small bead, while a large cone needs a larger bead or the proportions look wrong.
6. Cinnamon Ornaments
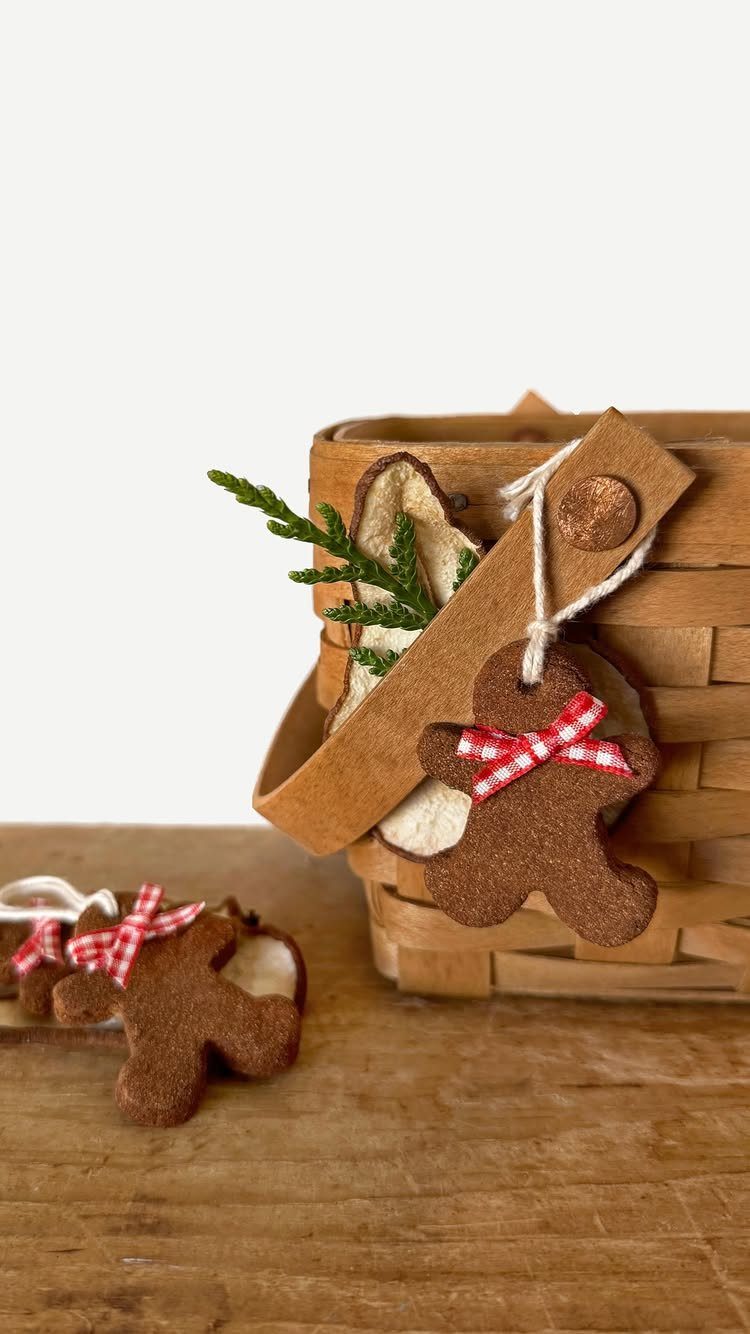
Cinnamon dough ornaments fill a room with scent for weeks, which I find worth the extra ingredient cost over plain salt dough.
The recipe I use replaces half the flour with cinnamon, adds applesauce for pliability, and bakes the same low and slow.
Red-and-white checkered ribbon ties at the neck dress up a simple gingerbread man cutout without any painting. The surface stays porous, so I store these in a paper bag, not plastic; sealed storage grows mold in humid climates.
7. Egg Carton Ornaments
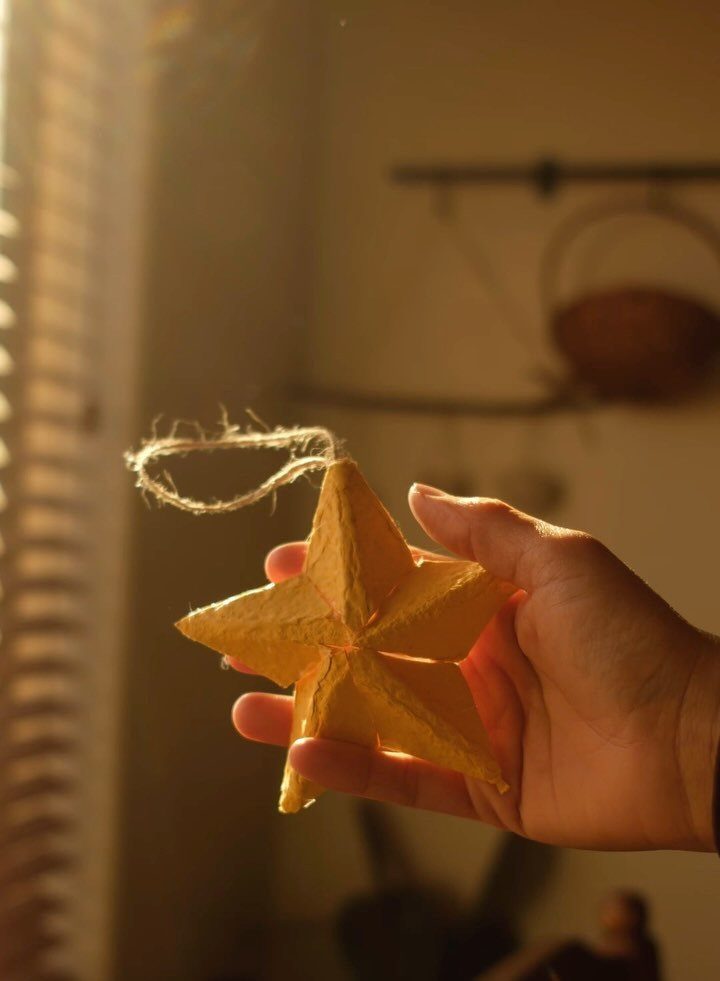
An egg carton cut into cups and shaped with scissors becomes a star or flower with enough depth to catch light. I trim the edges, paint with acrylics, and punch a hole for twine while the cardboard is still flat.
A standard egg carton yields enough cups for a small garland or a handful of tree ornaments. The texture reads as rougher than store-bought, which I like for a handmade tree.
8. Yarn-Wrapped Ornaments
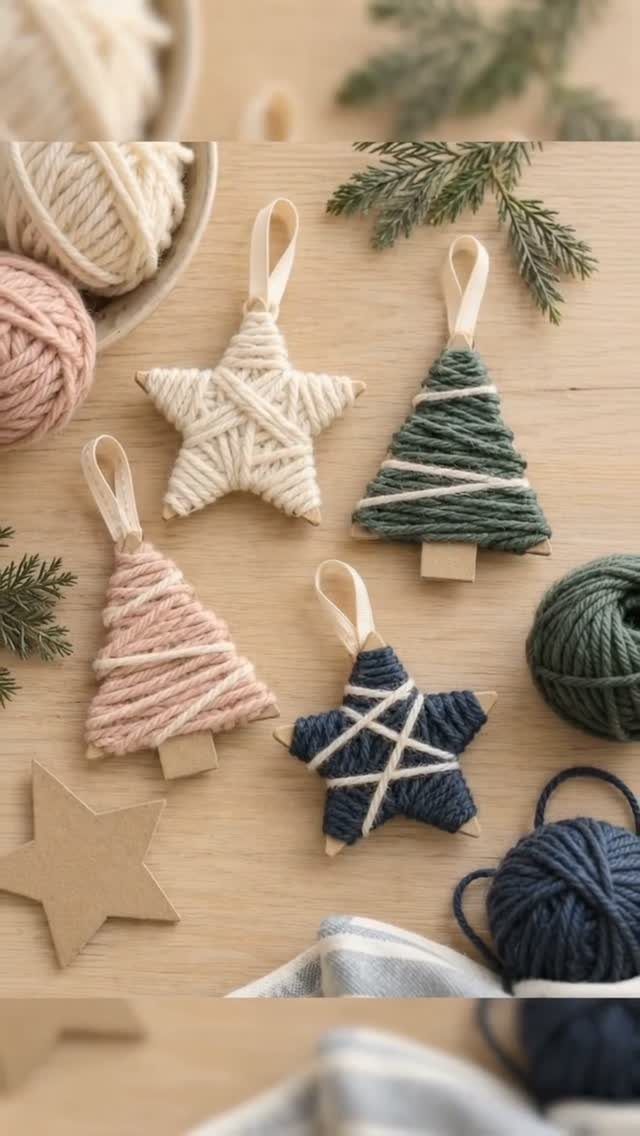
Cardboard cutouts from cereal boxes gain weight and color from yarn wrapped tight around the shape. I tape the loose end to start, wrap until the cardboard disappears, and tuck the finish under the last loop.
Variegated yarn does the color work for you; solid colors need a second shade wrapped in stripes to look finished. The result is soft-edged and light enough for any branch.
9. Gnome Ornaments
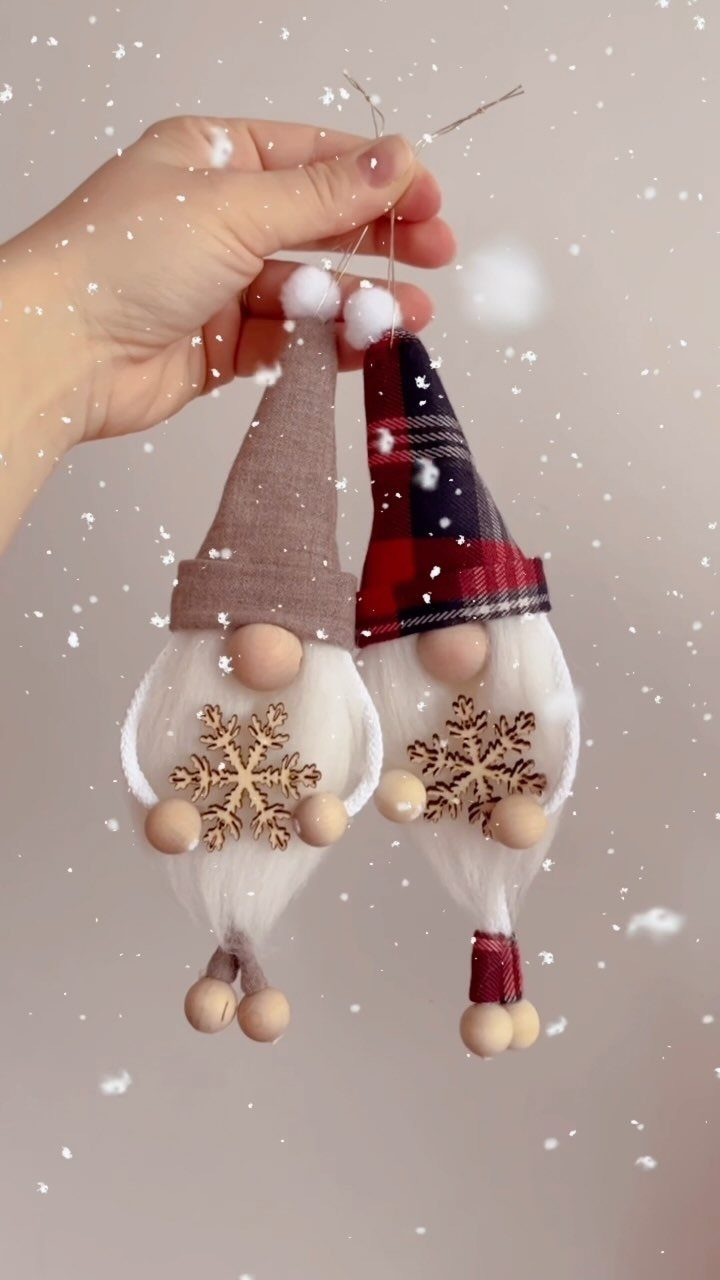
A wooden bead nose and a triangle of fabric for a hat turn a plain body into a gnome with personality. I glue faux fur across the lower half for beard, letting it overlap the nose to hide the seam.
The hat gets a wire inside if you want it to bend, or stays floppy for a softer look. Scale matters: a small bead suits a compact body, larger and the nose dominates.
10. Fabric-Wrapped Ornaments
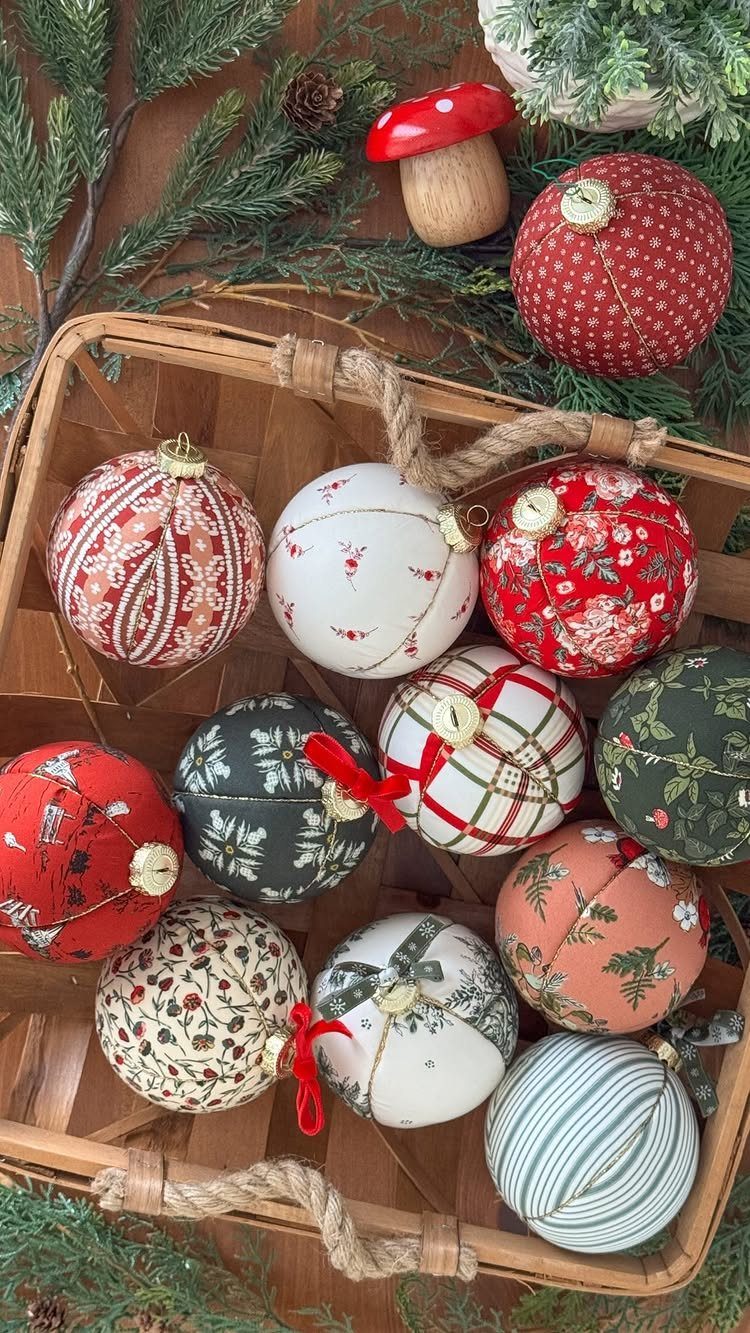
Styrofoam balls wrapped in fabric scraps make ornaments that read as high-end at a distance. I cut fabric on the bias, pin one end, and wrap in overlapping strips like a bandage, tucking the finish with a pin.
A bottle cap or purchased ornament cap at the top hides the raw edge and gives a place for ribbon. Small prints and plaids work better than large-scale florals on a ball this size.
11. Candy Cane Ornaments
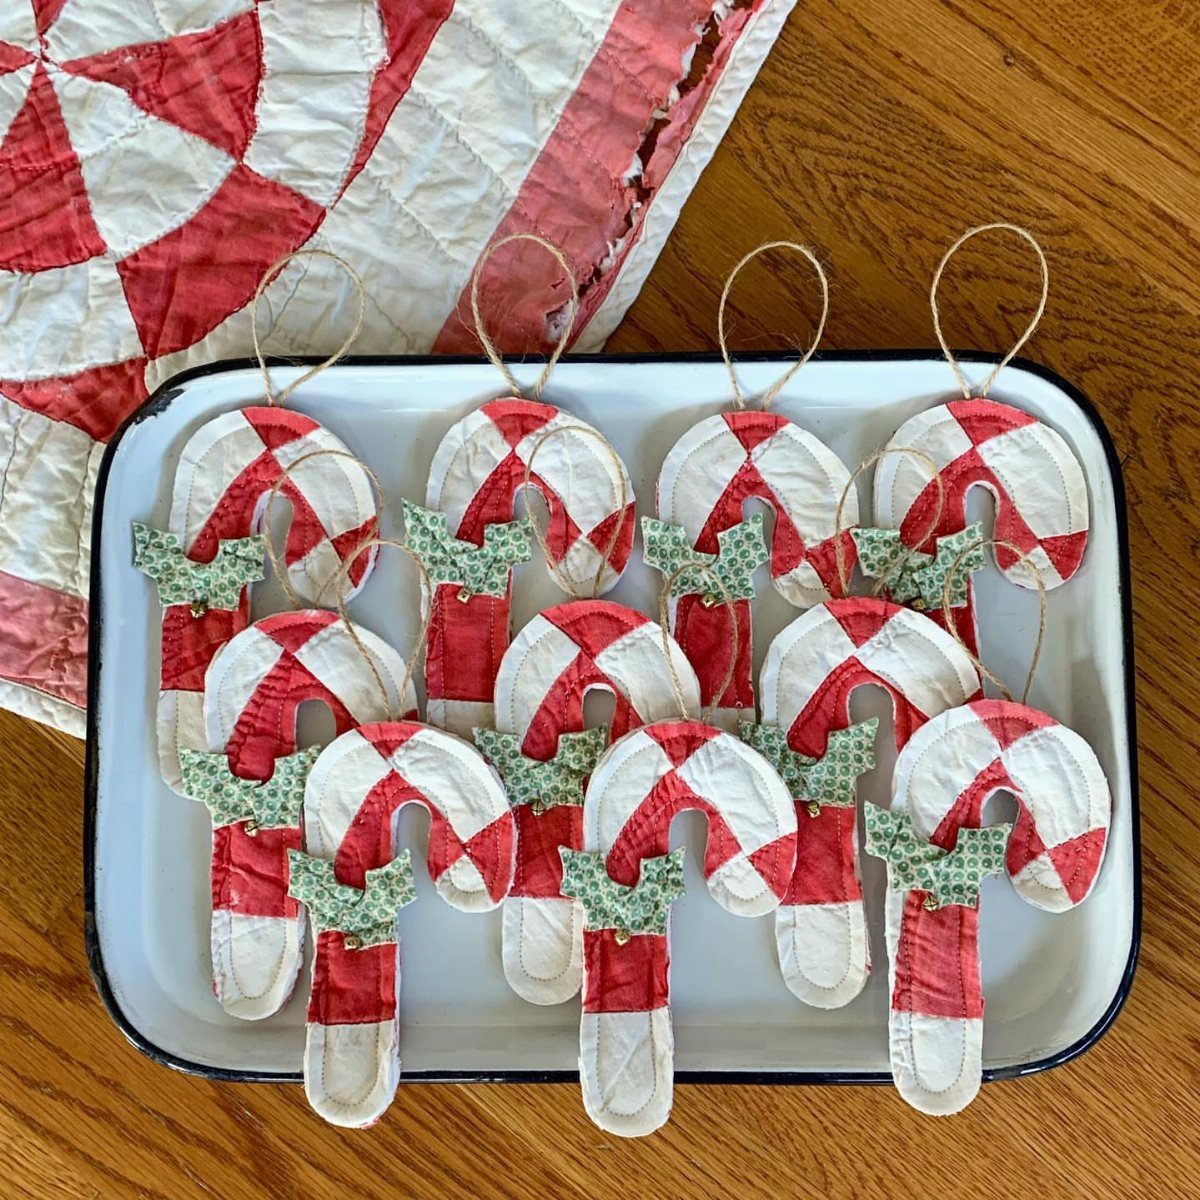
Quilted fabric cut into candy cane shapes, sewn, and stuffed forms a soft ornament that holds its hook. I sew or glue the strip into a tube, turn it right-side out, and stuff lightly before wrapping around the pipe cleaner.
A jingle bell at the curve adds sound; green felt holly at the base adds color against red-and-white. These pack flat for mailing, which I find useful.
12. Photo Ornaments
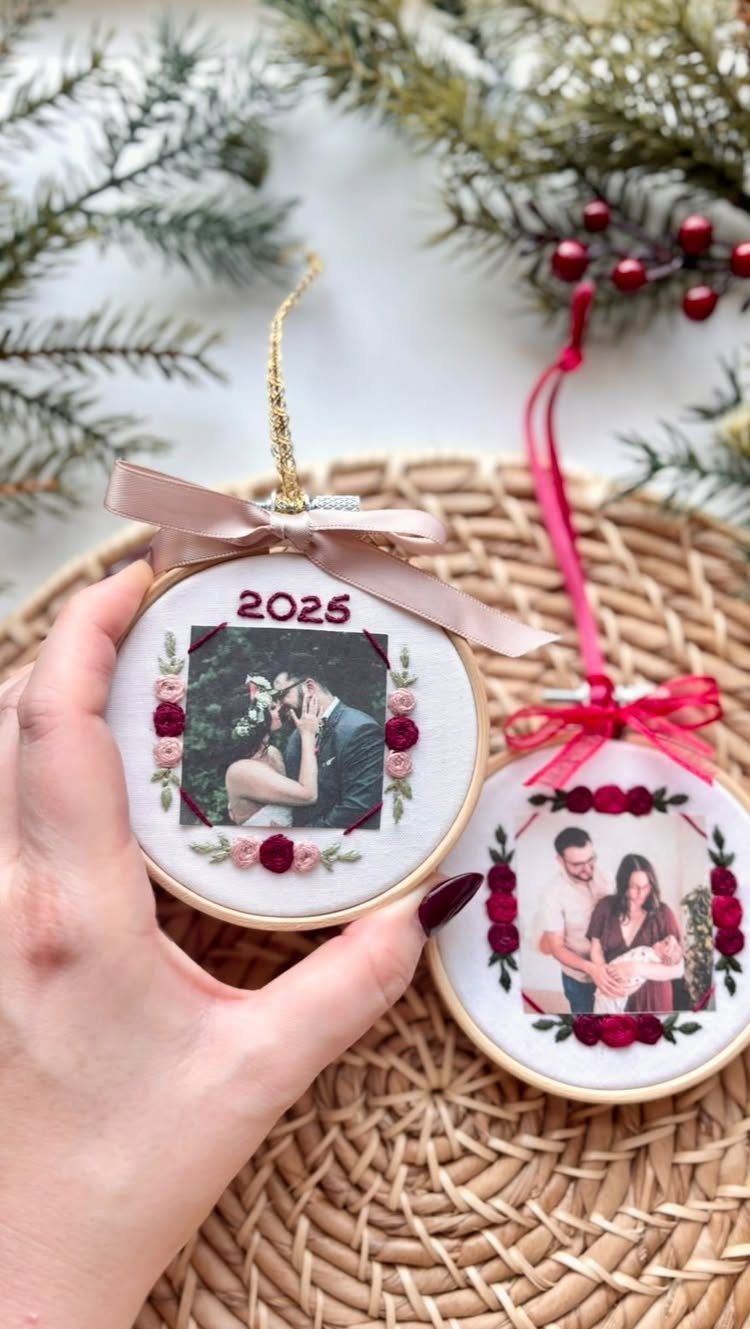
An embroidery hoop frames a photo with a handmade border that beats any store-bought frame for sentiment. I print the image slightly smaller than the inner hoop, stretch fabric behind it, and trap both between the inner and outer rings.
The wood shows, or I wrap it in ribbon. Stitching the year or a name above the image takes minutes and turns a gift into a record.
13. Tin Foil Ornaments
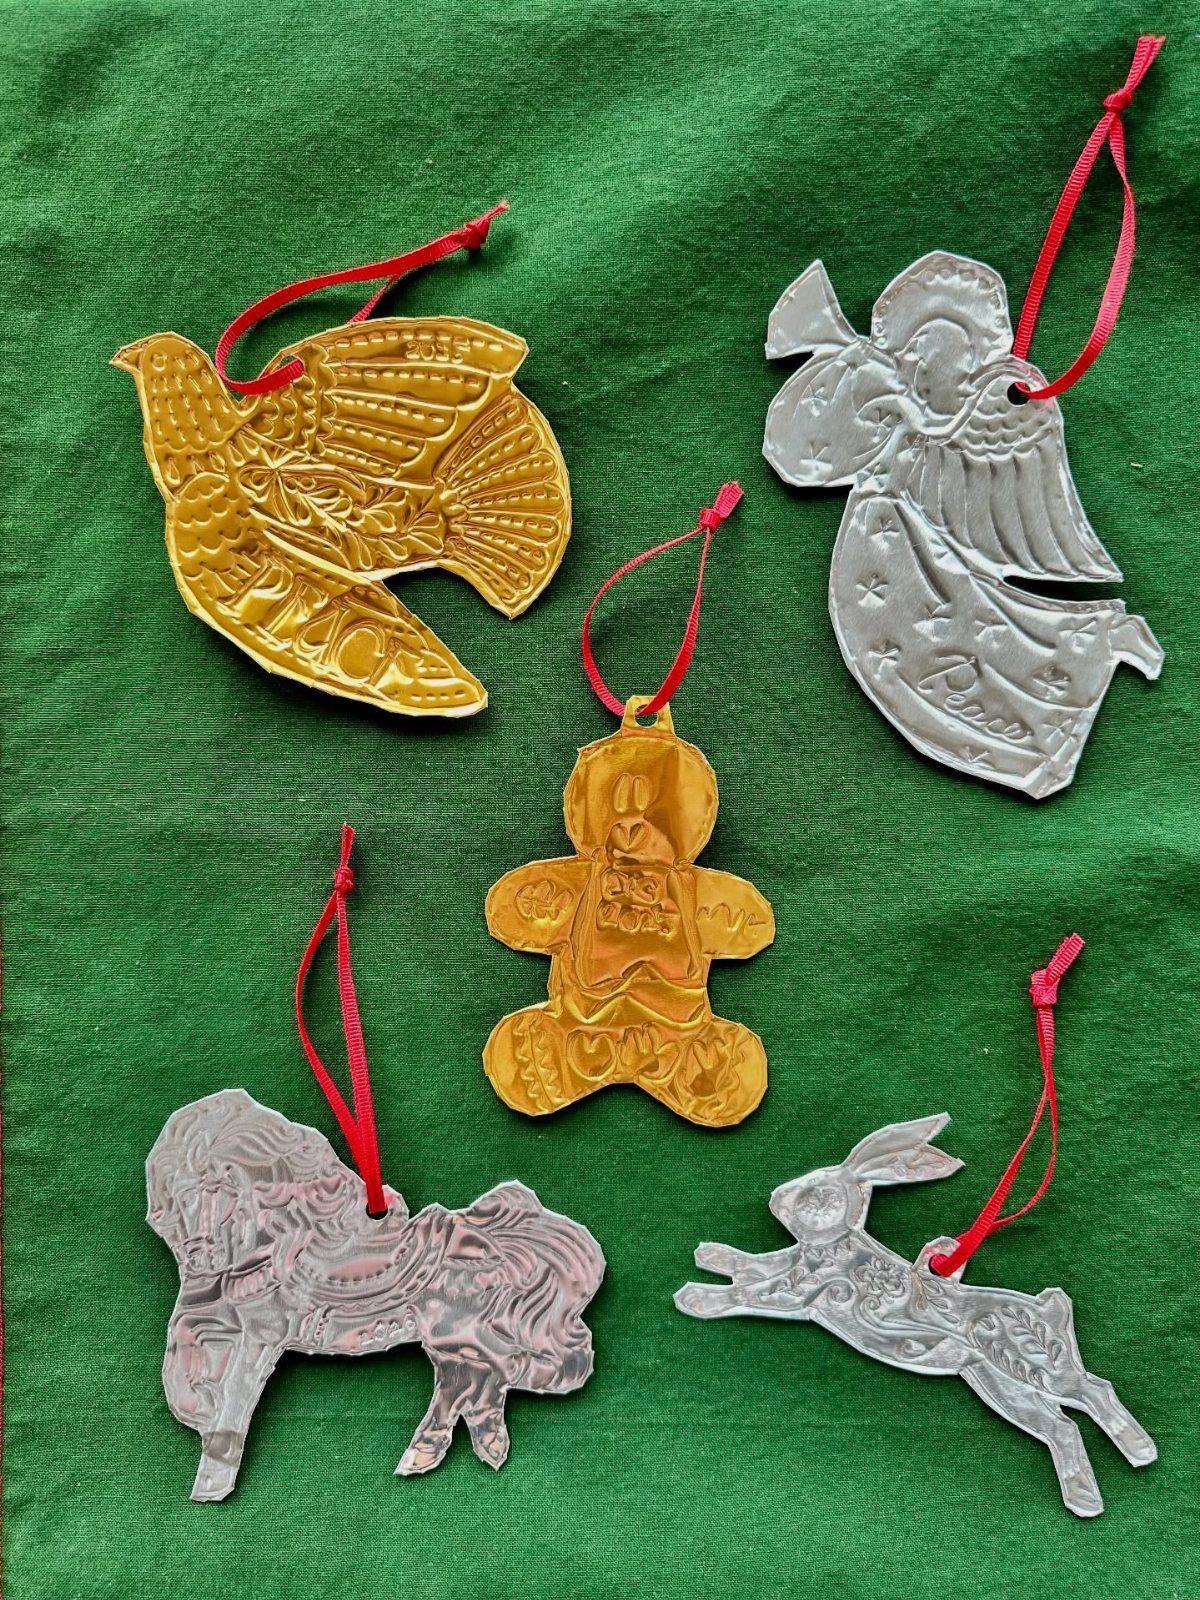
Heavy-duty foil holds an embossed pattern pressed in with a blunt pencil or the end of a paintbrush.
I work on a soft surface like a magazine so the relief pushes through. A cookie cutter traces the outline; the tool does the interior detail.
2 layers glued back-to-back keep the shape stiff and hide the reverse impression. I punch the hole before embossing, not after, so the metal does not tear at the edge.
14. Paper Honeycomb Ornaments
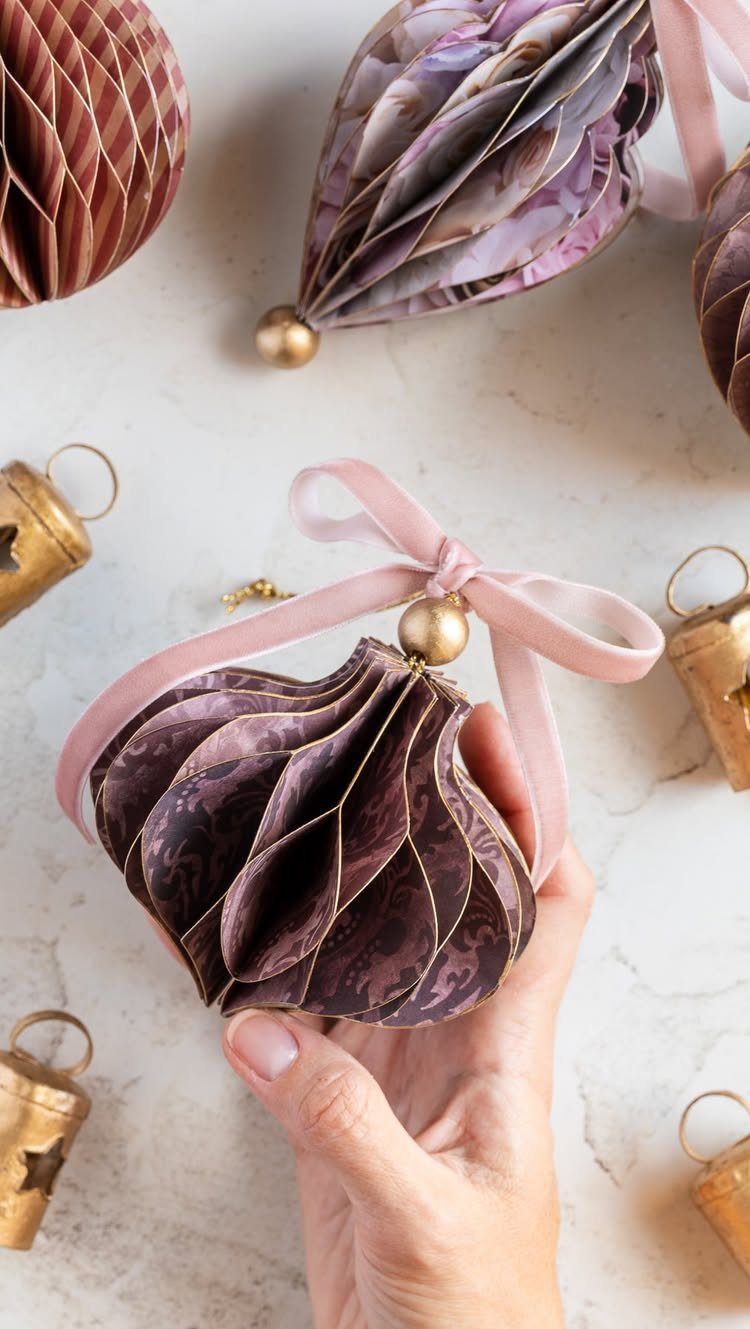
A honeycomb ornament expands from flat storage into a three-dimensional ball with a pull.
I buy the honeycomb paper by the sheet or in pre-cut ornament kits; the glue lines are already machine-applied in the right pattern. A ribbon bow at the hanging point covers the seam where the 2 halves meet.
The weight is almost nothing, which I like for a paper tree or an overhanging branch that cannot take glass. Store flat in a book between seasons.
15. DIY Sweater Ornaments
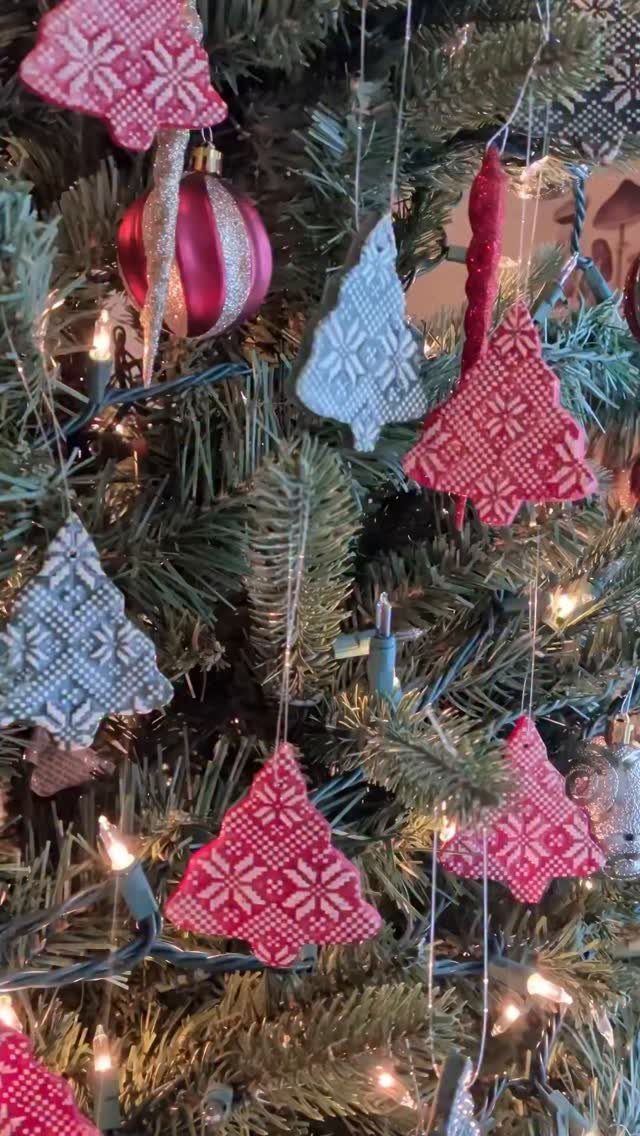
Felted wool sweater scraps do not fray, so the cut edge stays clean without a hem.
I trace a simple shape, tree or heart, and cut through both layers to get a front and back. A line of glue three-quarters around, a pinch of stuffing, then close the gap.
The knit texture reads as intentional craft, not mistake. Small-scale patterns work better than large ones; a cable knit or fair isle stripe looks like you planned it, because you did.
16. Twig Reindeer Ornaments
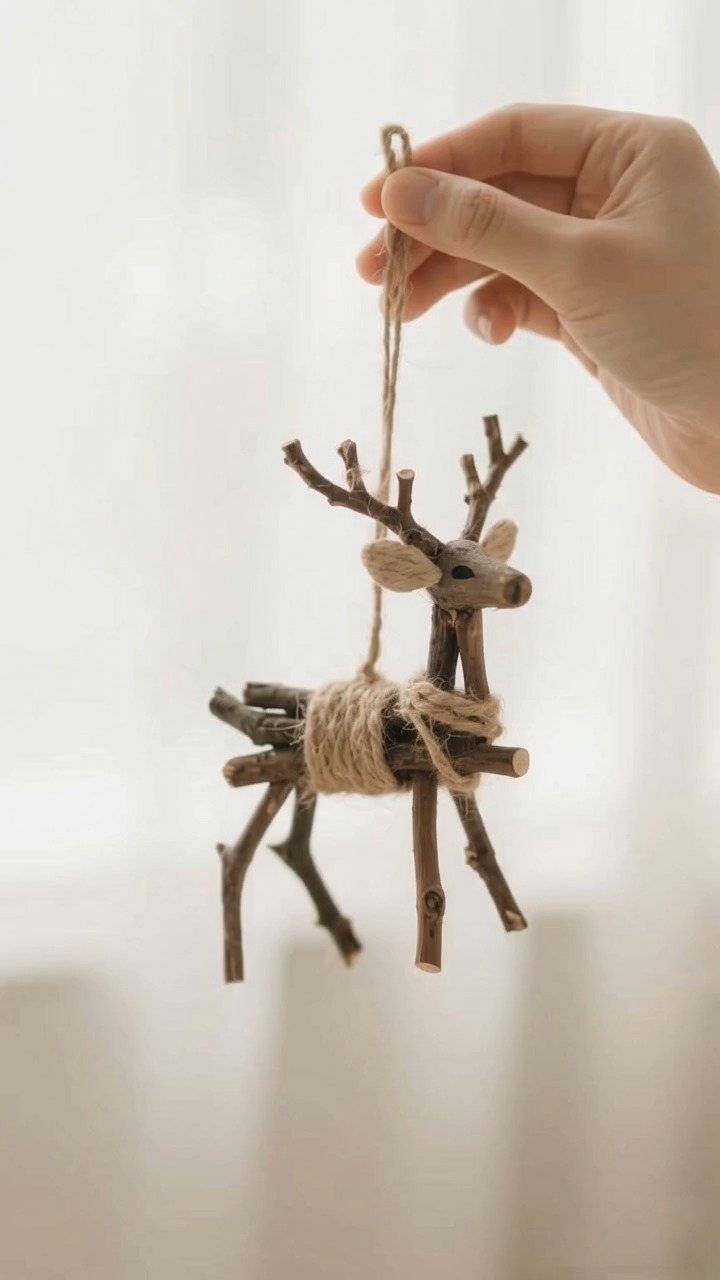
Twigs in a Y shape form the reindeer’s head and antlers; a shorter crosspiece tied below becomes the snout.
I use waxed twine or florist wire for the binding, wrapping tight where the joints meet so nothing wobbles. The scale stays small or the twigs sag under their own weight.
A red bead nose and a loop of jute at the top finish it. Collect twigs after a windstorm; they are already dry and the bark holds better than green wood.
17. Wood Block Reindeer Ornaments
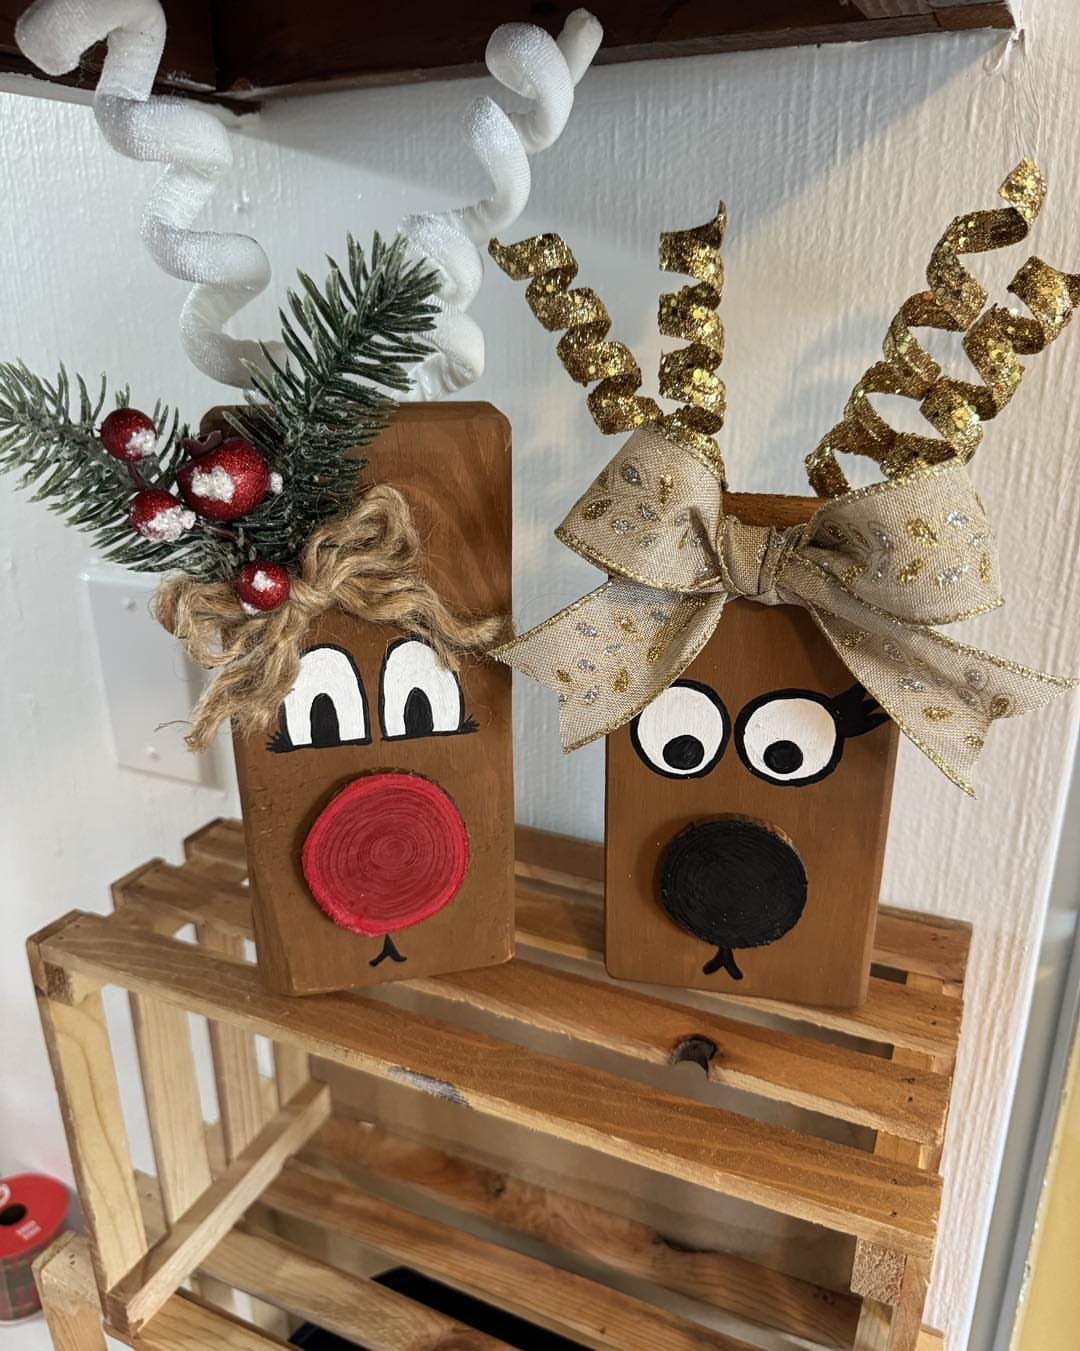
A 2×2 inch wood scrap cut to length becomes the body; a smaller block glued at an angle becomes the head. I paint both before assembly so the edges stay clean.
Antlers from wire or twigs drill into the top; a ribbon scarf hides the neck joint. Sand the cut faces smooth; splinters turn a child craft into a hazard.
18. Paper Snowman Wreath Ornaments
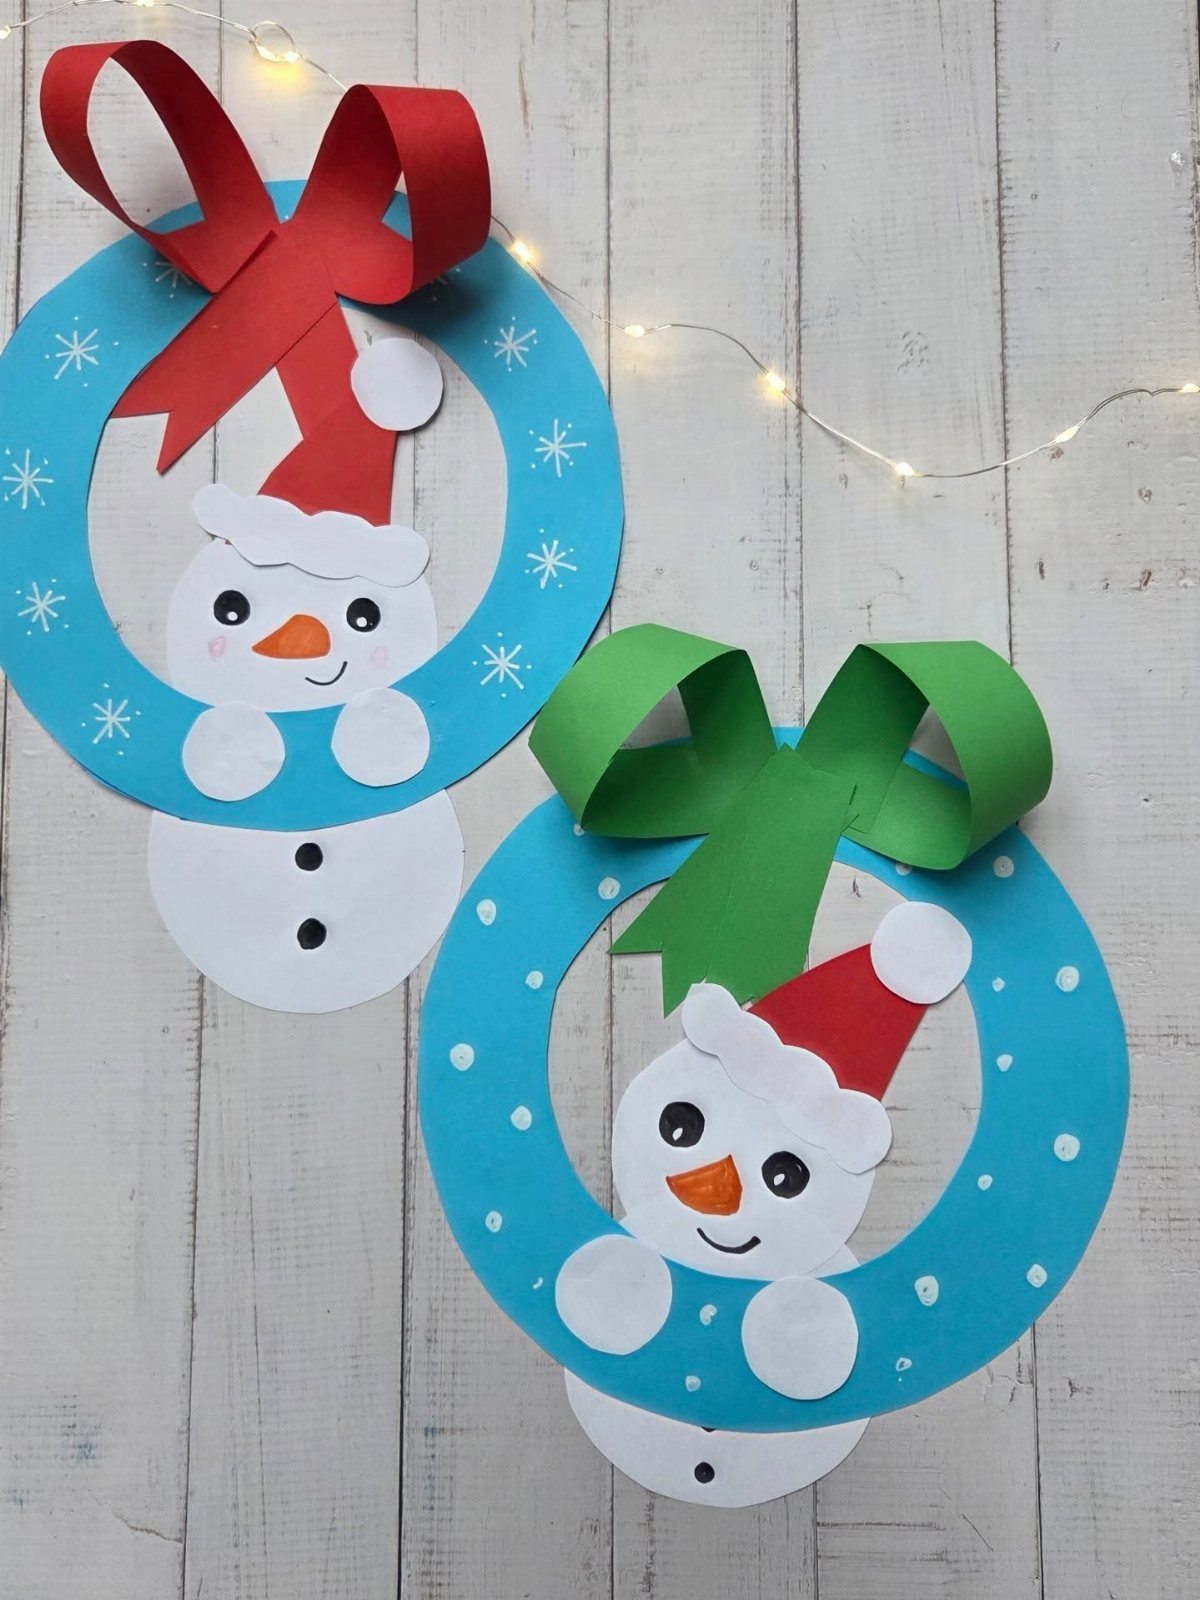
Two paper wreaths, one slightly smaller, stack to make a frame with depth.
I cut the snowman from white cardstock, dress him in a paper hat, and glue him to the center of the smaller wreath. A bow at the bottom balances the composition.
Construction paper works for the bow; the loops hold their shape if you crease each fold hard with a fingernail. I keep the color scheme to two or three colors so the snowman reads against the wreath ground.
19. Hydro Dipped Swirl Ornaments
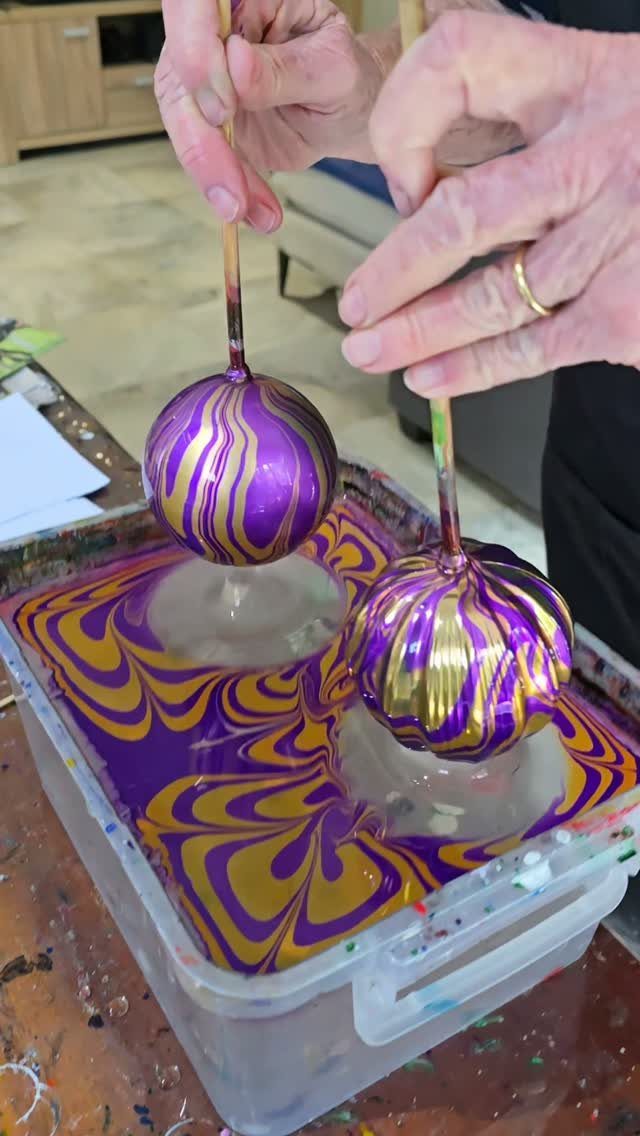
Hydro dipping lays paint on water first, then transfers the skin to an ornament in one dip.
I fill a bin deep enough to submerge the whole bauble, spray enamel paint in thin lines across the surface, and drag a stick through to marble the colors.
The ornament goes in on a wire hook, straight down and out in one motion; the pattern wraps around without a seam.
Purple and gold read as richer than primary colors, and metallic enamel catches light the way craft acrylic will not. Lay newspaper for yards around; splatter is part of the process.
20. Macrame Cinnamon Stick Ornaments
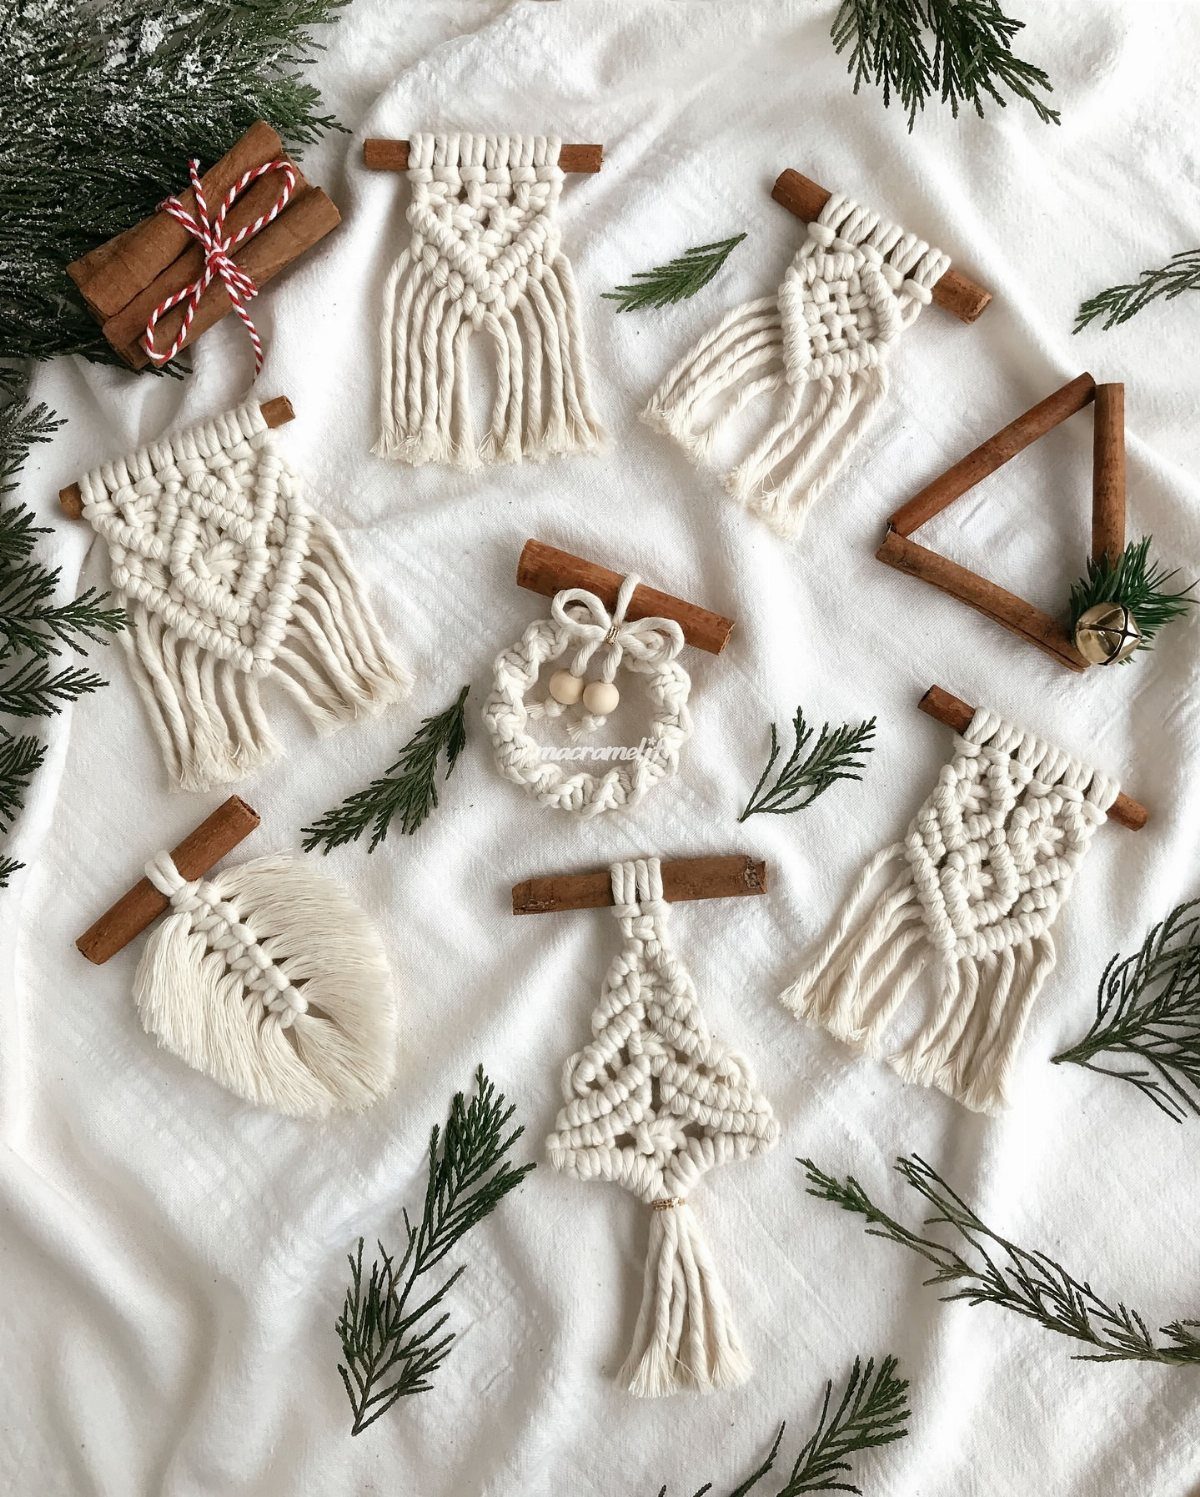
Cinnamon sticks give a macrame ornament its backbone and its scent.
I cut cord to twice the hanging length I want, fold it over the stick, and knot square knots or half hitches down each side until the stick is dressed.
Cream cord against brown bark looks deliberate, not unfinished. A 4-inch stick suits a tree ornament; longer and the weight pulls the branch down.
The bark holds cord better than smooth dowel, and the cinnamon oils release when the room warms. These last one season as fragrance, longer as look.
Tips for Crafting with Kids
Set up the materials before the kids arrive. I lay out the popsicle sticks, sequins, and glue on a tray so the project starts the moment they sit down, not after rummaging through a supply closet.
The handprint reindeer works best if I trace the hand first, then let them paint and place the pom-pom nose. I keep baby wipes within arm’s reach for marker on fingers and glue on tables.
A project a child can finish before they lose interest beats one that drags on; the popsicle stick tree and the handprint cutout both hit that mark.
I finish with the hot glue or the laminating myself, after they have moved on.
Using Everyday Materials
I start with what is already in the house. I have also bought quilt squares in packs for variety without the commitment of yardage.
Paper plates, foil, and leftover pipe cleaners already do the structural work; the craft budget goes toward beads, paint, or ribbon that changes the look. I sort mixed bead bags by color myself rather than buying single-shade tubes.
Creating Keepsakes
I write the date in permanent marker, not pencil; future holidays are humid and pencils smear.
I have seen clear glass baubles with photos slipped inside; the image floats, which is its own effect, though I prefer the hoop’s border. Acrylic paint and sealer on the handprint version keep it from fading season to season.
The record matters more than the perfection; I stitch the year above the image in the hoop even if my stitching is uneven, because the unevenness marks when it was made.