A full Candyland build can run from a few dollars in poster board and pool noodles to something closer to a hundred if you spring for an electric balloon pump and glass stands.
The deciding factor is how much vertical space you have to work with: a corner or a wall behind the table calls for a single giant lollipop or a balloon garland, while open floor space lets you place the taller props like candy cane pipes and conical towers where guests walk around them.
I would hot-glue Dum-Dums to a foam ball and set it on a thrifted gold candlestick before I would scatter 10 small items across every surface.
1. Giant Lollipops
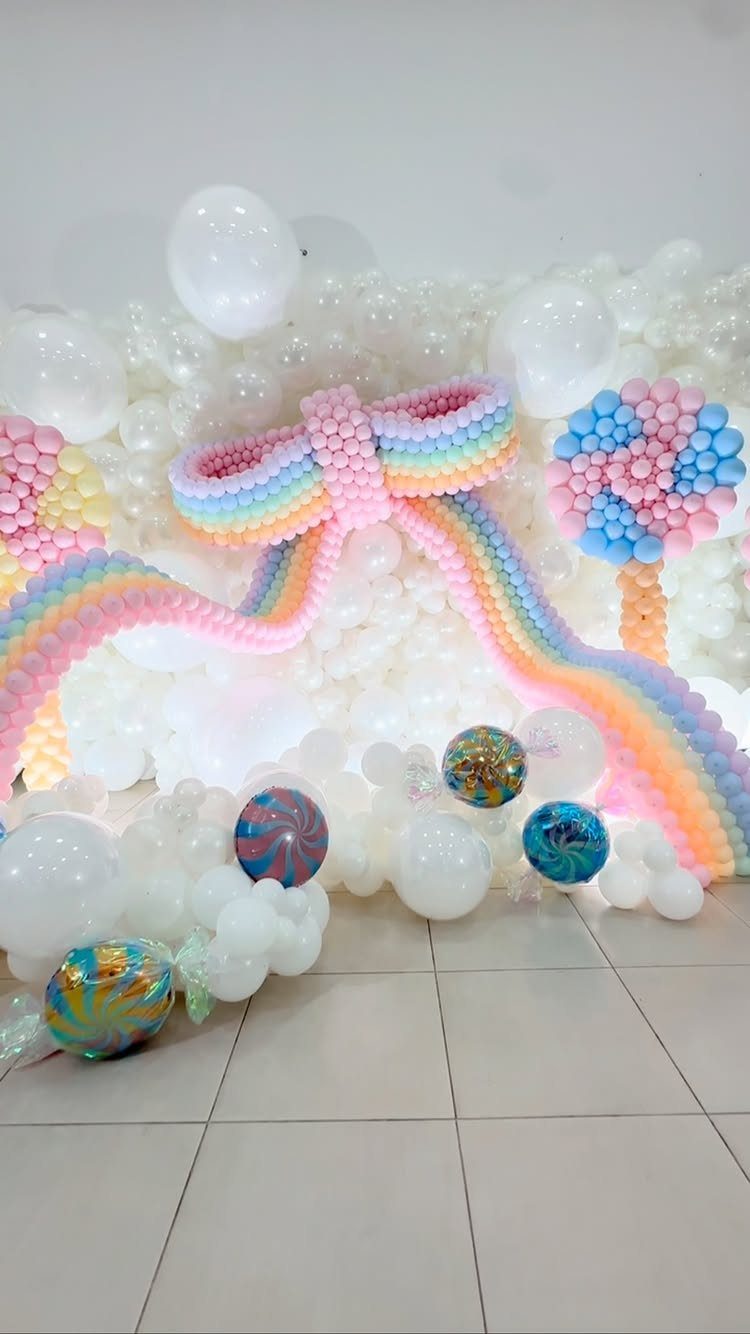
A single giant lollipop can anchor a whole corner of a room. The visible version uses a balloon-sculpted spiral on a stick, sized to stand on the floor and read as candy from a distance.
I like this approach because one finished piece gives you the whole theme in a glance.
The balloon work takes practice if you are new to twisting, so a first-timer should buy the spiral balloons pre-shaped and focus on the stick, the base, and the bow.
Ribbon in a wide satin reads richer than thin curling ribbon.
2. Balloon Garlands
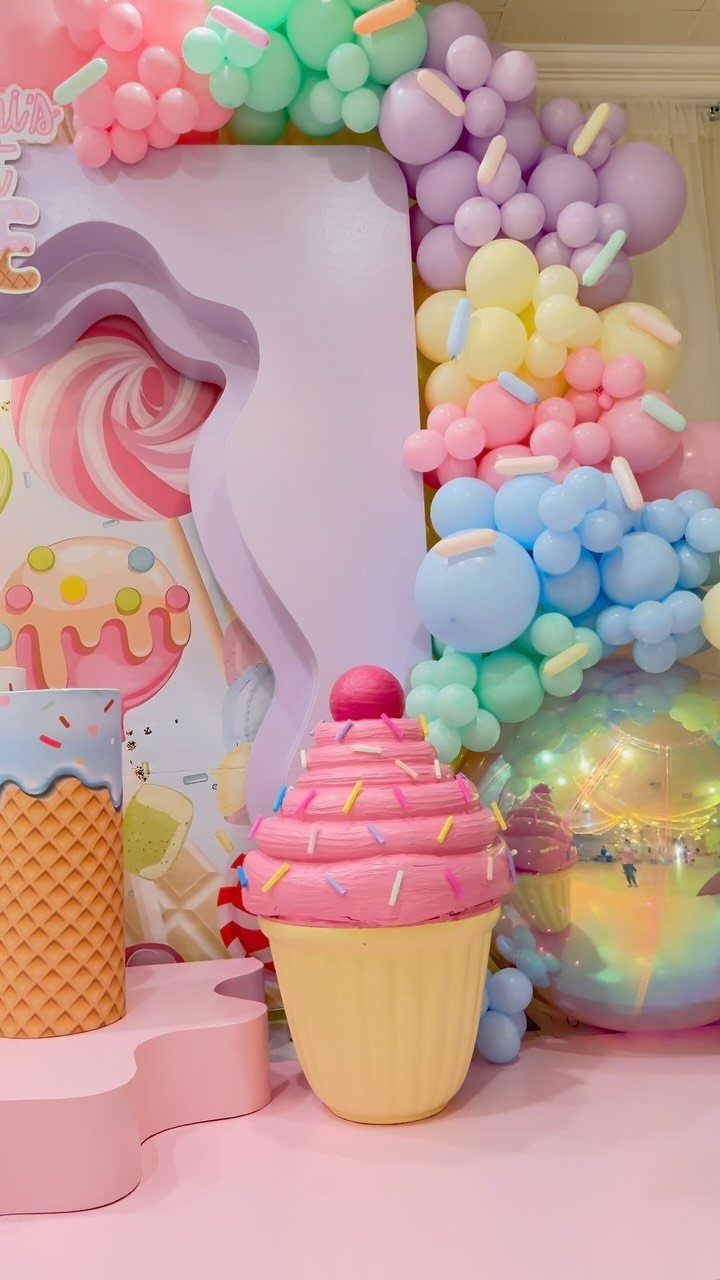
Balloon garlands fill wall space faster than any other DIY here. The visible version runs pastels with paper sprinkles clipped in, hung behind a dessert table where it does double duty as photo backdrop.
I would build this on a strip rather than stringing freehand; the strip keeps the curve even and the spacing tight.
Plan for stuffing and twisting time, plus inflation time. An electric pump pays for itself on the first garland this size.
3. Candy Sprays
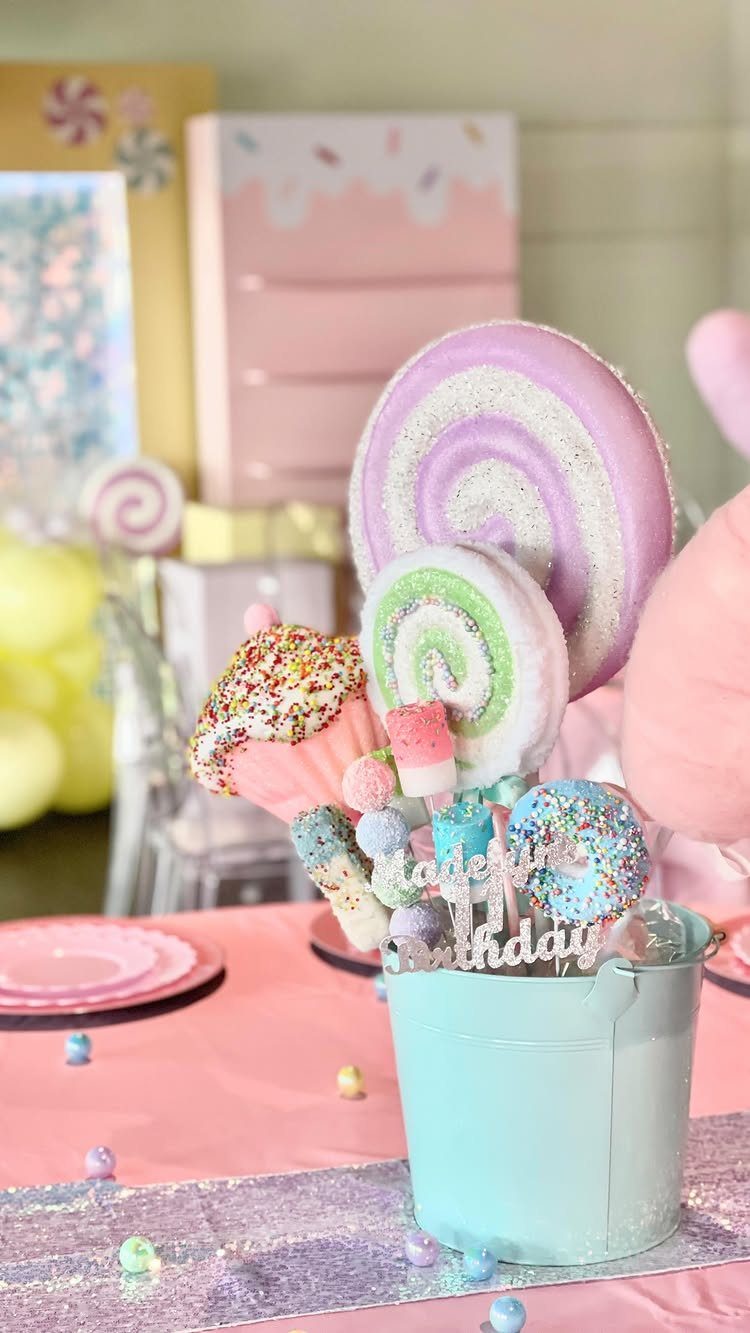
The visible version sits in a painted pail with a name tag, which turns a generic prop into a birthday centerpiece fast.
These work anywhere you need height without width.
I use them to fill gaps between larger pieces, or as table markers if you write names on the sticks. The picks themselves are widely available; the craft is in the grouping.
4. Candyland Scene Backdrops
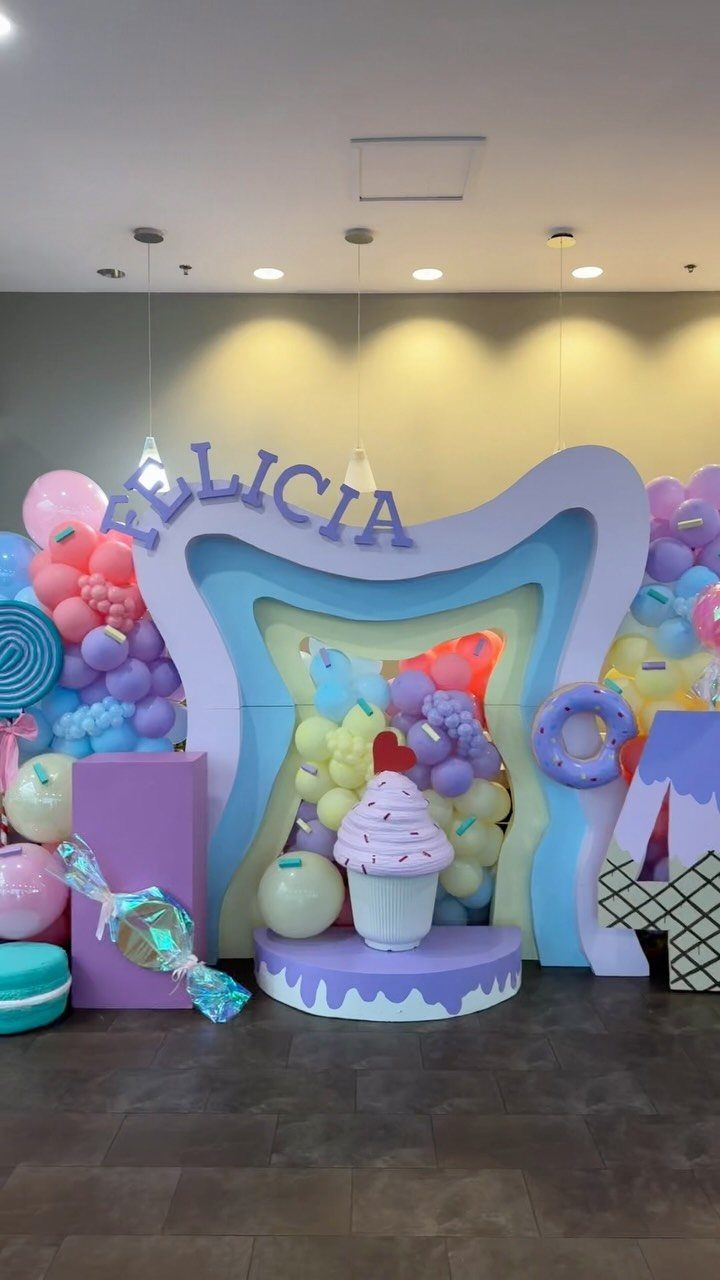
A full backdrop turns any wall into the Candyland board itself. The visible version layers pastel cutouts, oversized props, and balloon garlands against purple, with a name banner overhead.
The maker of that piece used handmade foam props for the cupcake, donut, and candy shapes, plus a number 4.
Foam cuts cleanly with a serrated knife and takes acrylic paint well; seal it with a quick spray if the piece will travel to another event.
I would build the props flat against the wall rather than freestanding; the depth reads the same in photos and the build is half the work.
5. Whimsical Entrance Decorations
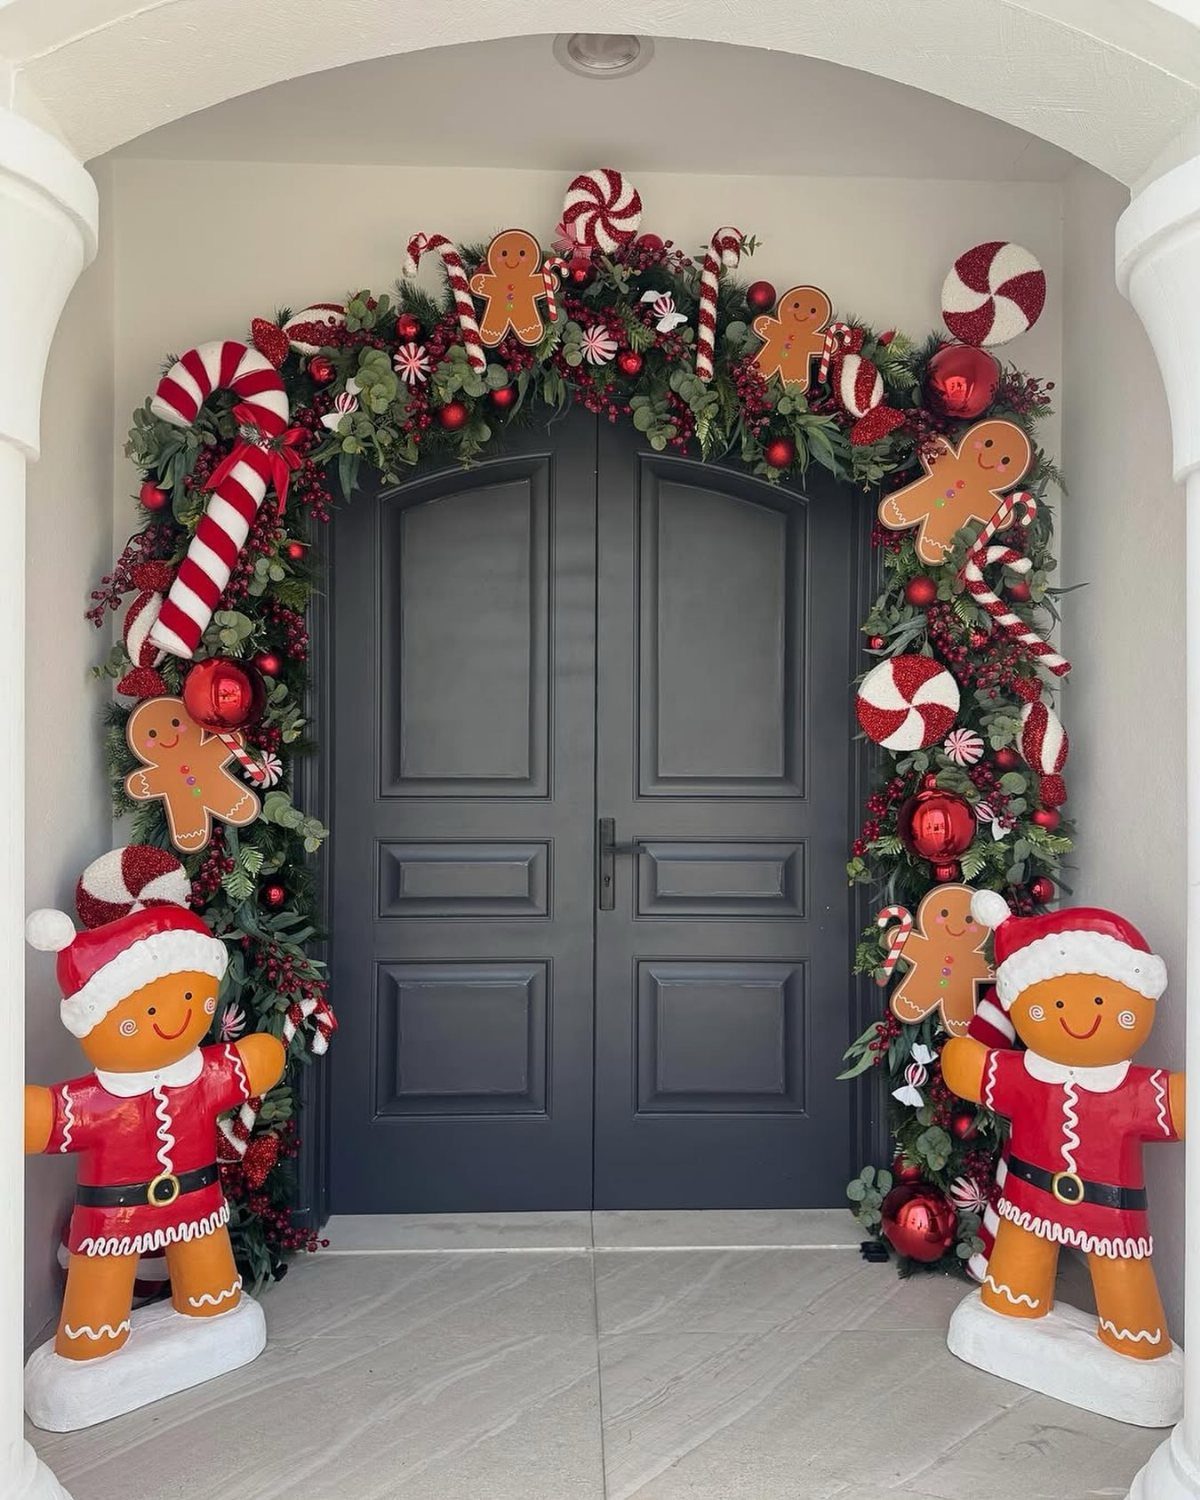
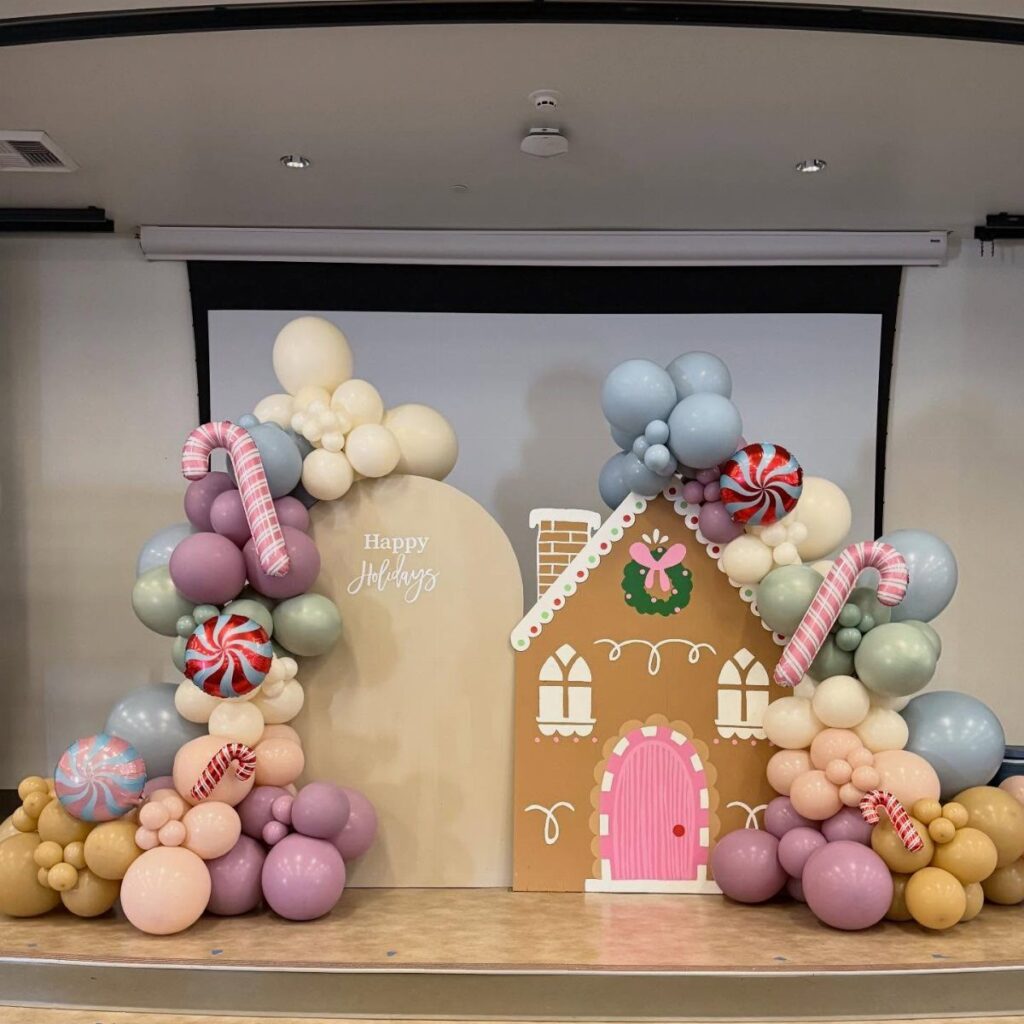
An entrance garland sets the theme before guests step inside.
This is the one entry here that reads as Christmas specifically, not just candy.
I would adapt the same structure for a birthday by swapping the gingerbread for lollipops and gumdrops, keeping the garland form and the 2 flanking pieces. The symmetry is what makes it feel designed.
6. Wrapped Candy Topiary
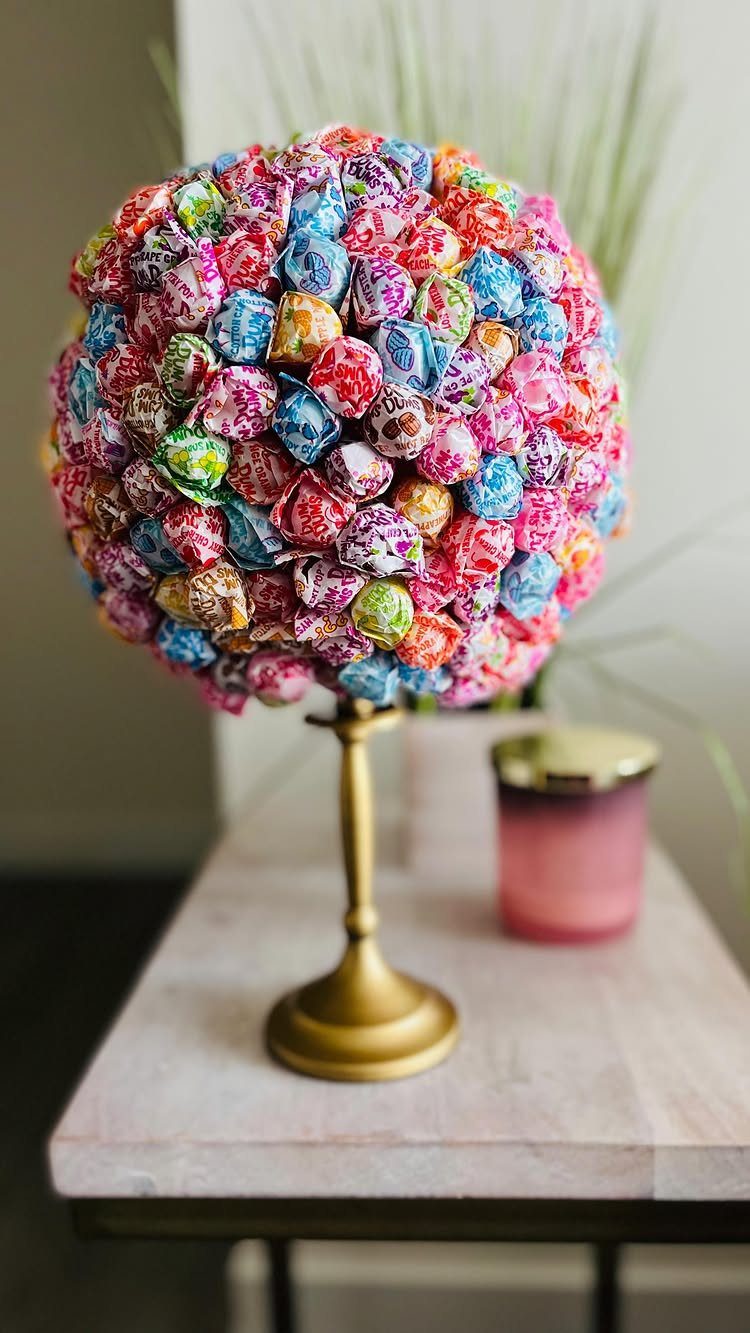
A wrapped candy topiary is exactly what the name says: hard candies, still in their wrappers, covering a sphere. The visible version uses Dum-Dums on a gold pedestal, which keeps the look elegant despite the bright colors.
I would hot-glue the wrappers directly to a foam ball, working in rows from the top down so the pattern stays even.
The gold stand elevates the piece literally and visually; a plain bucket would read as craft project, while the pedestal makes it table-ready. Replace any eaten candies from the back and the piece lasts for years.
7. Conical Candy Centerpiece Towers
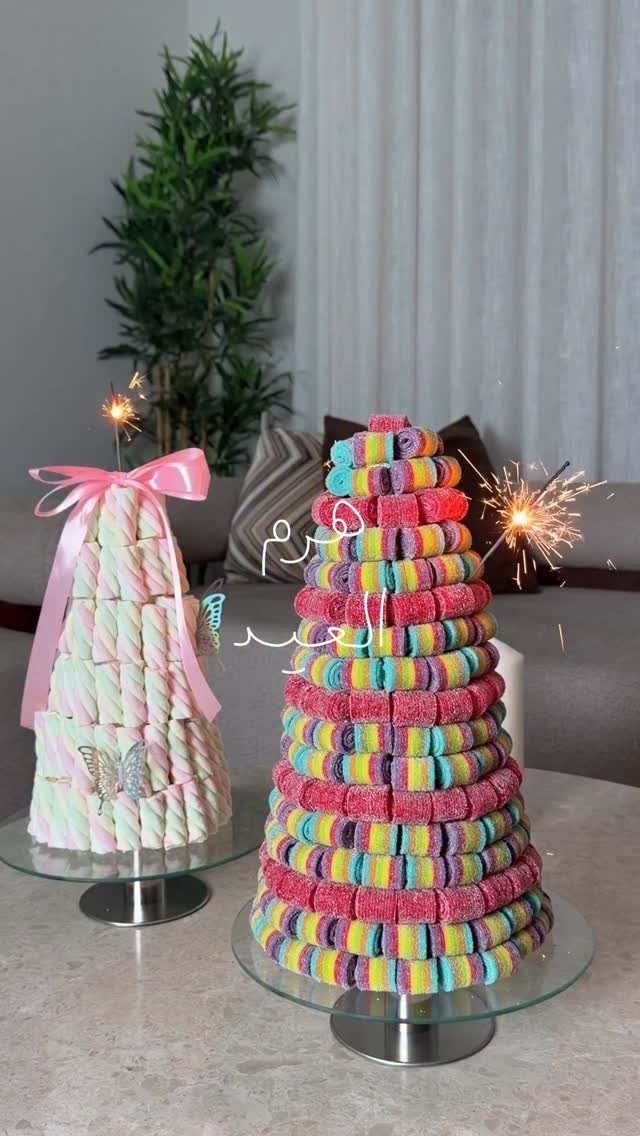
Marshmallow cones and gummy-ring cones sit tall without eating up table space. The glass stands lift them to eye level, which matters on a buffet where everything else spreads flat.
I would build on foam cones from the craft store, hot-gluing the candy in tight rows.
Battery tea lights are the safer swap for a kids’ table, though sparklers work for a birthday moment. Either way, the cone shape does the visual work; the candy is just color.
8. Giant Cupcake Prop
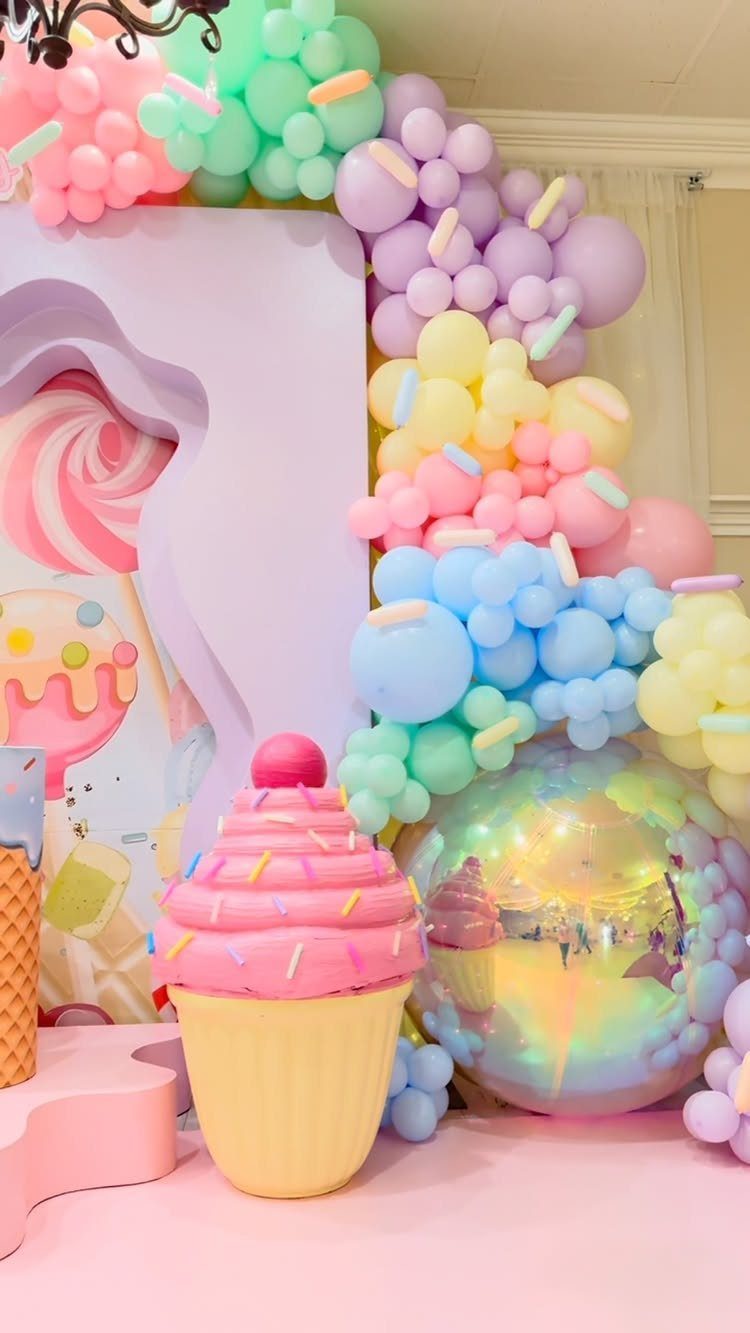
A cupcake this size reads as the theme’s mascot. The pink base with sprinkles and a cherry hits every Candyland cue at once, so it photographs well even when guests are milling in front of it.
I would build the shape from chicken wire and papier-mâché, or buy a base prop and decorate.
This piece needs a balloon garland behind it, or a wall of streamers, or it can feel small. Place it where the backdrop shows.
9. Oversized Candy Cane Prop
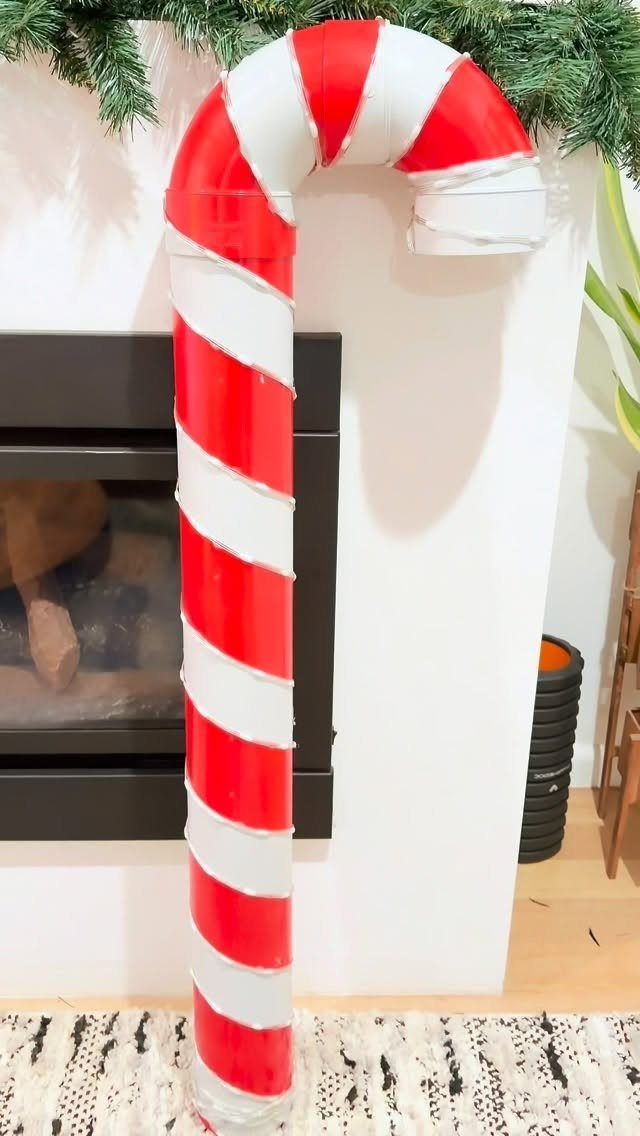
Duct pipe and red-white electrical tape, and you have a candy cane taller than a first grader. The stripes read from across the room, which is the whole point of a prop this size.
I would weight the base with a plywood disk and sandbag; the pipe is light and will tip on carpet.
A fireplace gives it scale and a seasonal frame. For a birthday, the same build in pink and white, or rainbow, keeps the form and loses the Christmas read.
10. Custom Candyland Favor Boxes
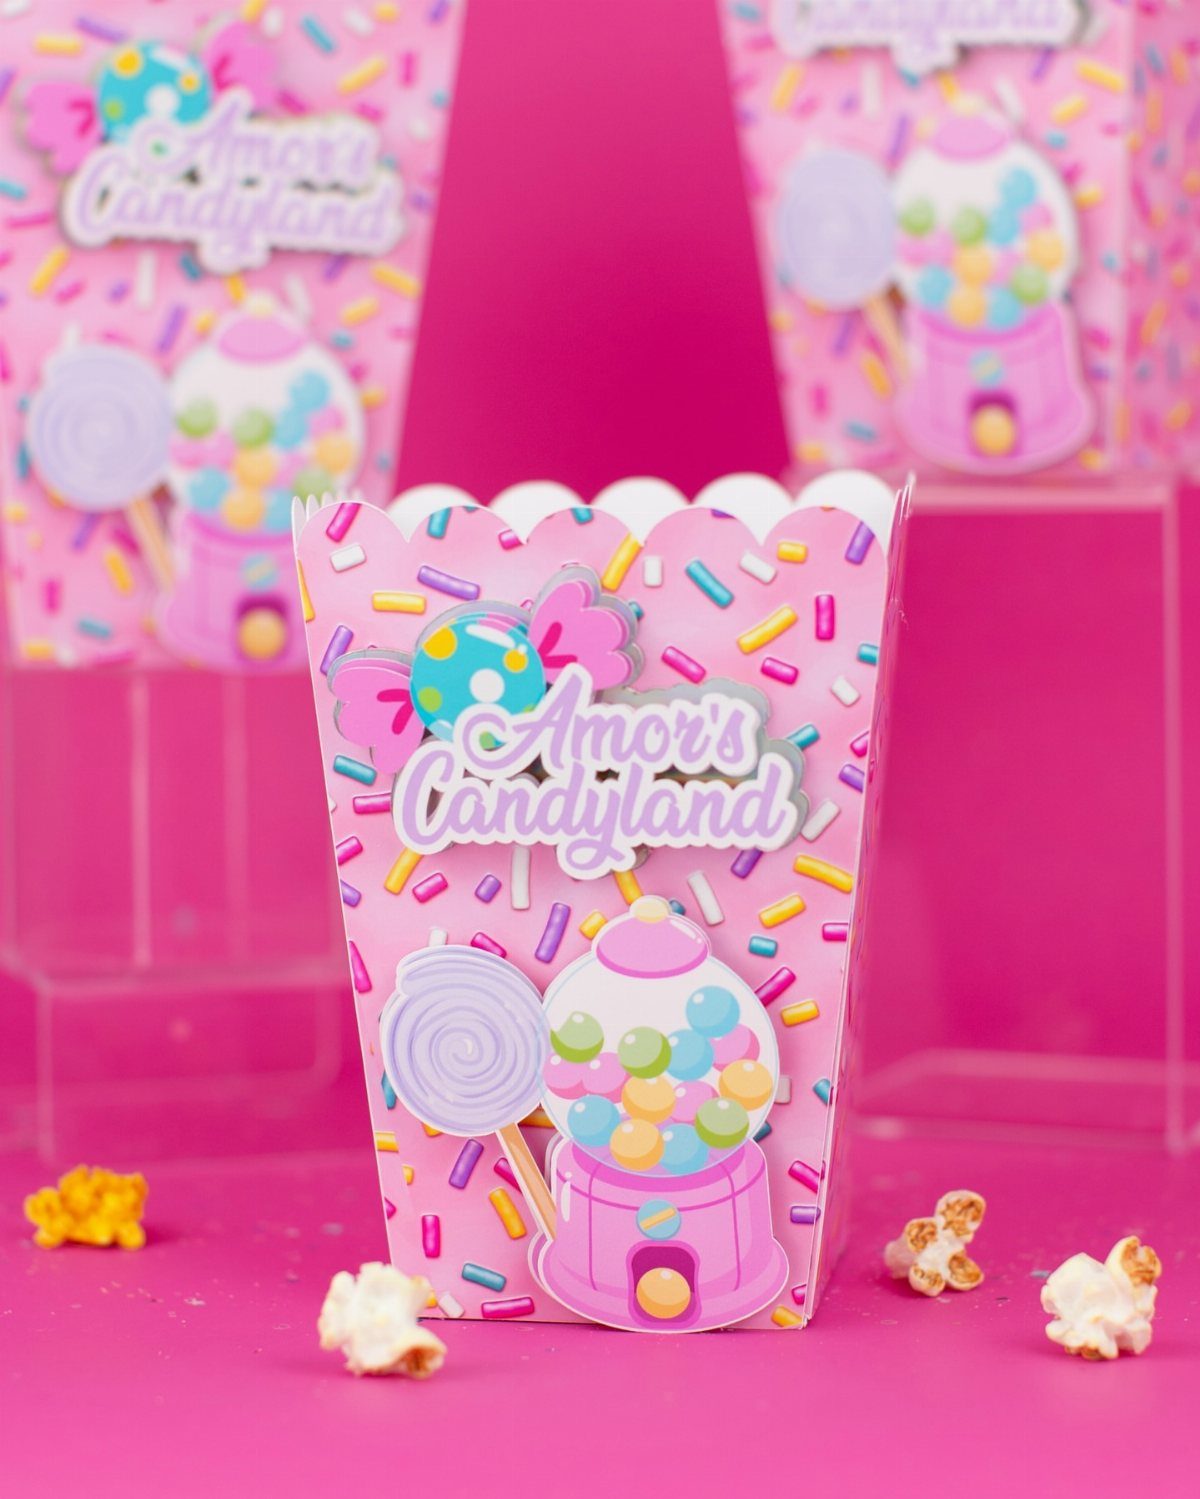
A favor box carries the theme home. The popcorn box shape here is a smart pick; it stands open on a table, it holds volume without fuss, and guests fill it themselves.
I would print the graphics on label paper and stick to plain pink boxes rather than wrestling a full custom print.
The sprinkles on top seal the candy look; a dot of glue keeps them from scattering in transit. One box per guest, assembled the night before, and the cleanup is zero.
Budget-Friendly Tips
Poster board, pool noodles, balloons, and wrapping paper are the backbone of a cheap Candyland build.
I would pick two of these as my main materials and buy them in bulk at a dollar store rather than mixing in everything and buying retail.
One statement piece beats scattering decorations across every surface. A giant lollipop in the corner or a balloon garland behind the table does the visual work of 10 small items, and the small items are what push a budget over.
For the prop bases and stands, I shop thrift stores before craft stores. A gold candlestick from Goodwill lifts a candy topiary the same way a store-bought pedestal does, and it costs a fraction of the price.
The dollar store also carries the electrical tape for oversized candy canes, plus the ribbon and curling supplies that finish them.
Recycled cardboard from large boxes becomes the backing for cutout props; it takes spray paint and holds its shape for one party.
I keep a flat storage bin and layer the finished pieces between sheets of tissue, so the set rebuilds in an hour next year.
Frequently Asked Questions
What are some easy DIY decorations for a Candyland party?
Giant lollipops, balloon garlands, and candy sprays are the easiest builds. A single giant lollipop anchors a whole corner, a balloon garland fills wall space fast, and candy sprays in painted pails give you height without width.
I would start with one statement piece rather than scattering small items everywhere. Poster board, pool noodles, and balloons from a dollar store keep the budget under control.
How to make giant fake candy props?
Pool noodles wrapped in red and white tape become candy canes, foam or cardboard circles on dowels become lollipops, and foam balls covered in hot-glued candy wrappers become topiaries.
A lollipop that stands on its own needs a stick with some heft behind it.
I use PVC pipe or a hardwood dowel, bolt it to a plywood disk at the bottom, and pile on a sandbag or two so a gust from the door does not send it rolling across the room.
The bow is just wide satin ribbon, nothing fancier. For pieces that travel, seal painted foam with a quick spray of clear coat.