These Cricut Christmas ornaments run from flat paper snowflakes that take one pass on the machine to shaker frames with moving parts inside, and the materials shift just as much: cardstock, felt, leather, acrylic, wood, and glass each show up somewhere on the list.
What picks one over another is whether it needs to survive a cat, a child, or the mail: felt takes the claws, the character bell takes the drops, and gingerbread house blanks store flat for shipping.
I use the rotary blade on felt and the engraving tip on leather, but a beginner can start with scored cardstock and no curved surface to fight.
1. Paper Snowflake Ornaments
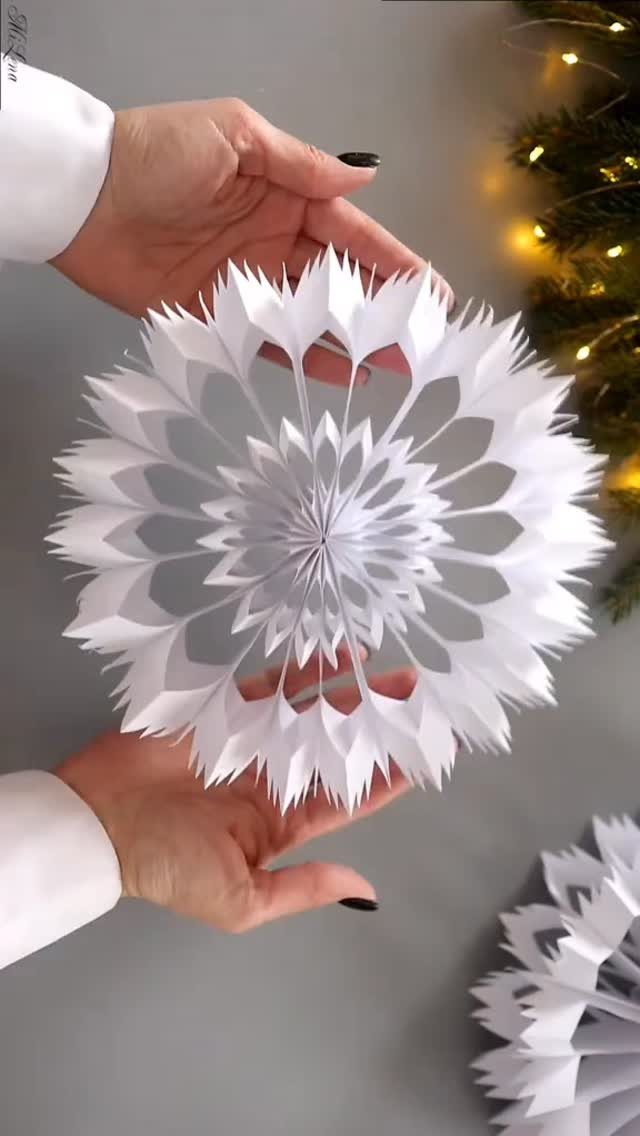
Paper snowflakes from a Cricut cut cleaner than any pair of scissors I have managed to hold steady.
The machine scores the fold lines and cuts the pattern in one pass; what used to take me an hour with an X-Acto now runs while I sort ribbon.
I use medium-weight cardstock for ornaments that keep their shape on the tree, or vellum if I want the lights behind them to glow through the cutouts.
A single sheet yields several snowflakes depending on the complexity you pick in Design Space. String them with clear thread and they look like they are floating.
2. Personalized Wooden Ornaments
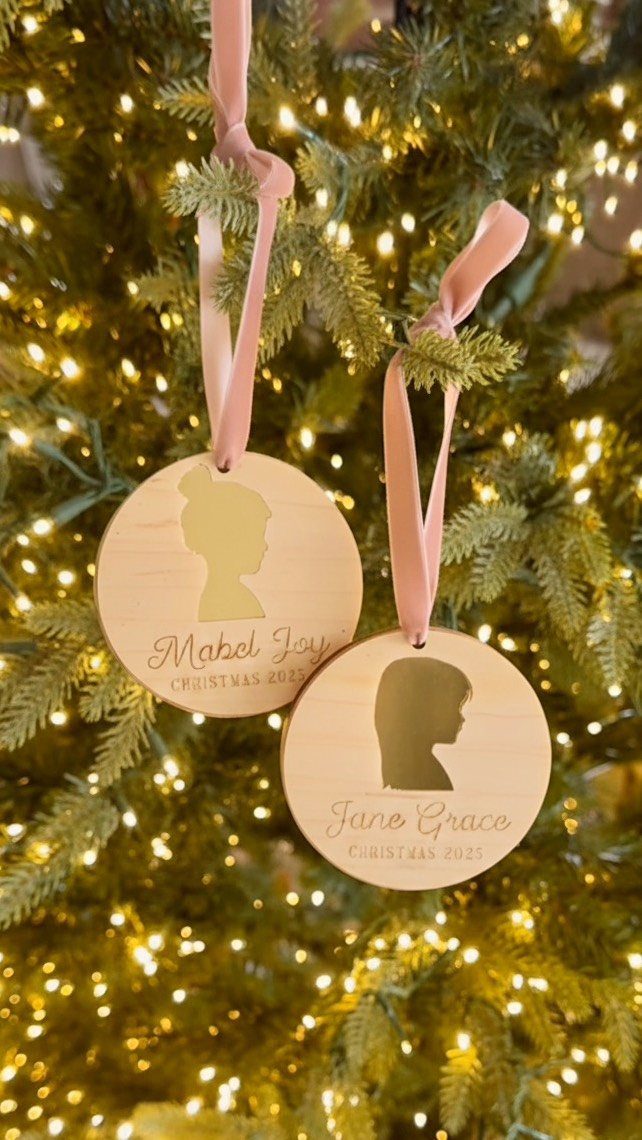
Round wooden blanks take vinyl portraits better than painted surfaces, which is why I keep a stack of small birch slices from the craft store on hand from October onward.
The grain hides small application errors that would show on acrylic or glass.
I cut the silhouette from permanent vinyl in one color and the name and date in a second, weed carefully around the lettering, and press with a scraper rather than an iron so the wood does not scorch.
A velvet ribbon through a drilled hole at the top beats twine for hanging; it does not twist and the knot stays flat against the branch.
3. 3D Glitter Ornaments
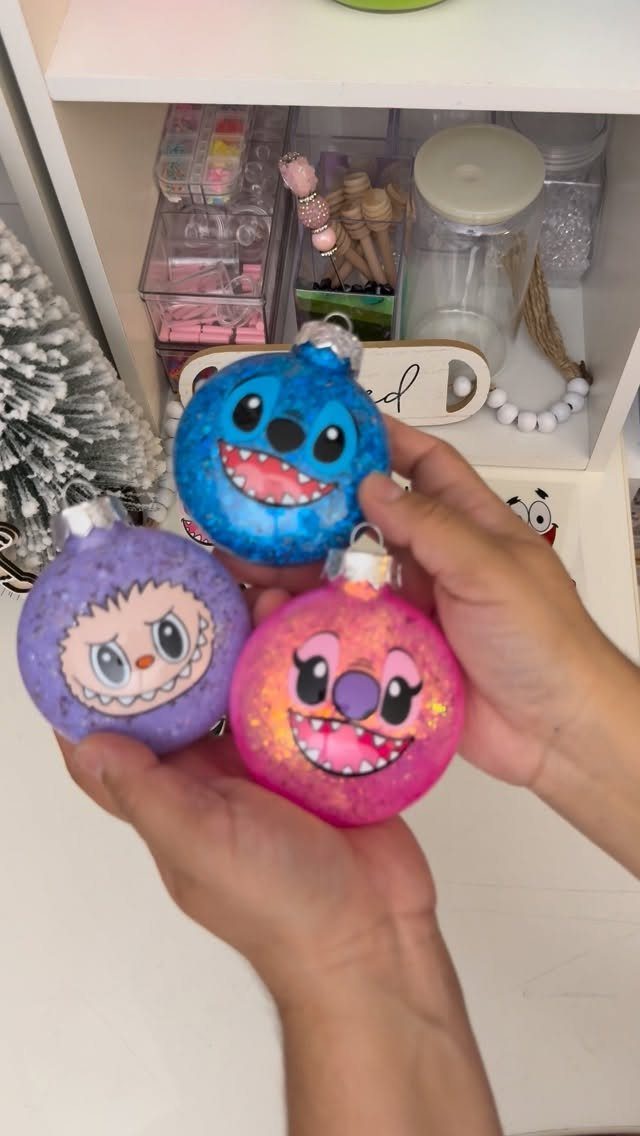
Glitter ornament blanks look like the craft store threw a party in the spherical aisle, and a Cricut gives them faces that read from a distance.
I buy the plastic bulbs pre-filled; cutting a vinyl decal to wrap around a curved surface is easier than trying to coat the inside evenly myself.
Size the face slightly smaller than you think, letting the curve fill it out.
I apply transfer tape in sections, smoothing from the center outward so the vinyl does not pucker at the cheeks. A small bulb takes only a short stretch to dress once the cut is done.
4. Santa Cam Ornament
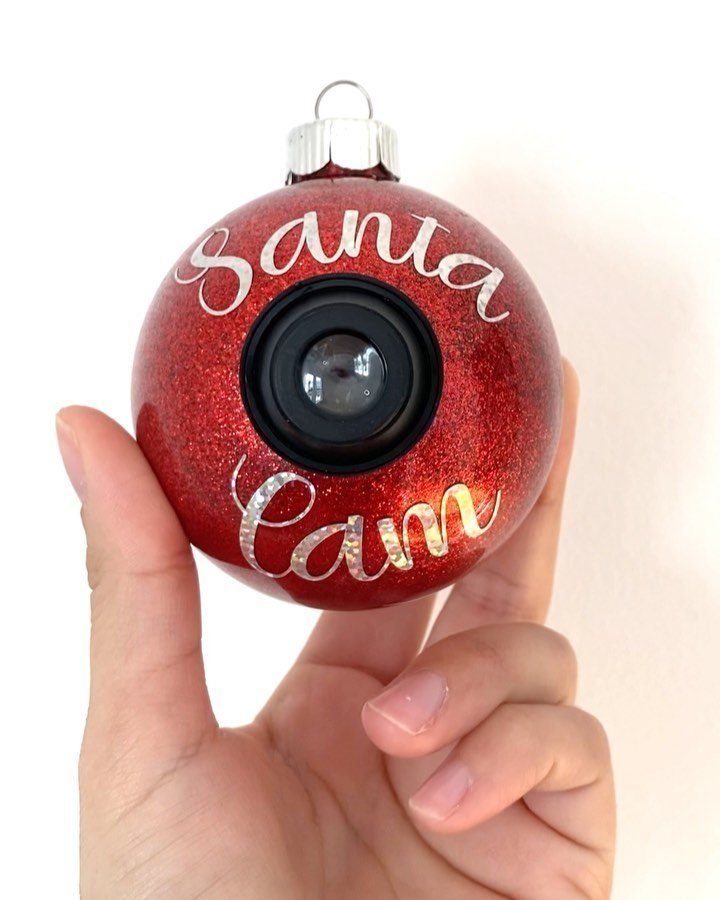
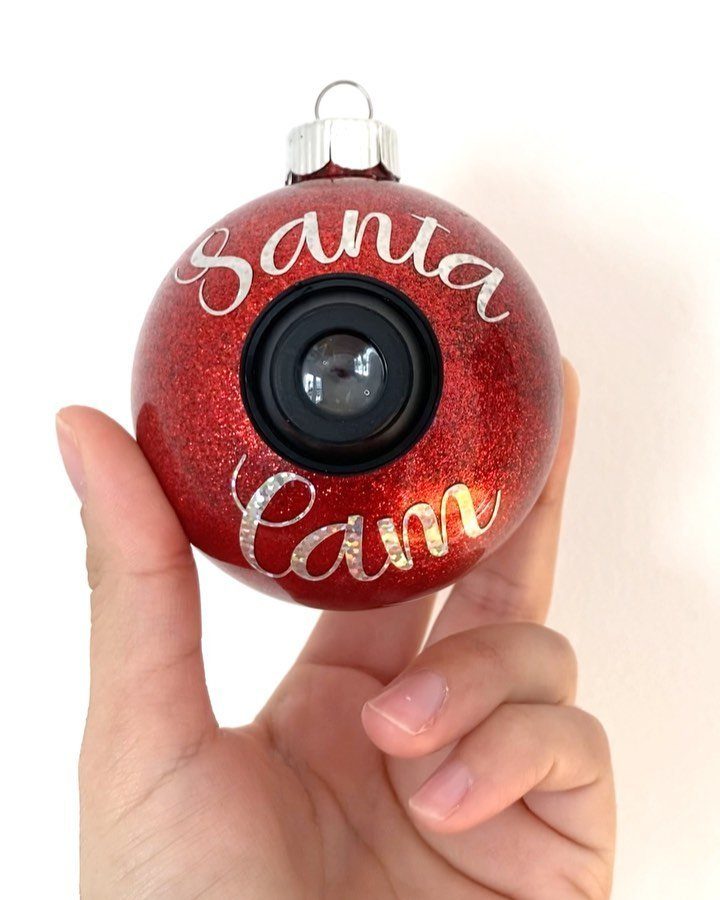
The Santa Cam joke lands because every kid in the last decade has grown up with lens-shaped electronics in every room.
A red glitter ball, a black vinyl circle for the lens body, and a smaller silver ring for the glass: 3 layers, no alignment harder than centering a circle.
I have seen these done with printable vinyl for the lettering, but cut metallic reads sharper against the glitter.
The phrase itself is short enough to cut in one piece at a width that fits most ornament blanks. Hang it high on the tree; the glitter sheds and you will be finding red sparkles in the carpet until spring.
5. Honeycomb Paper Ornaments
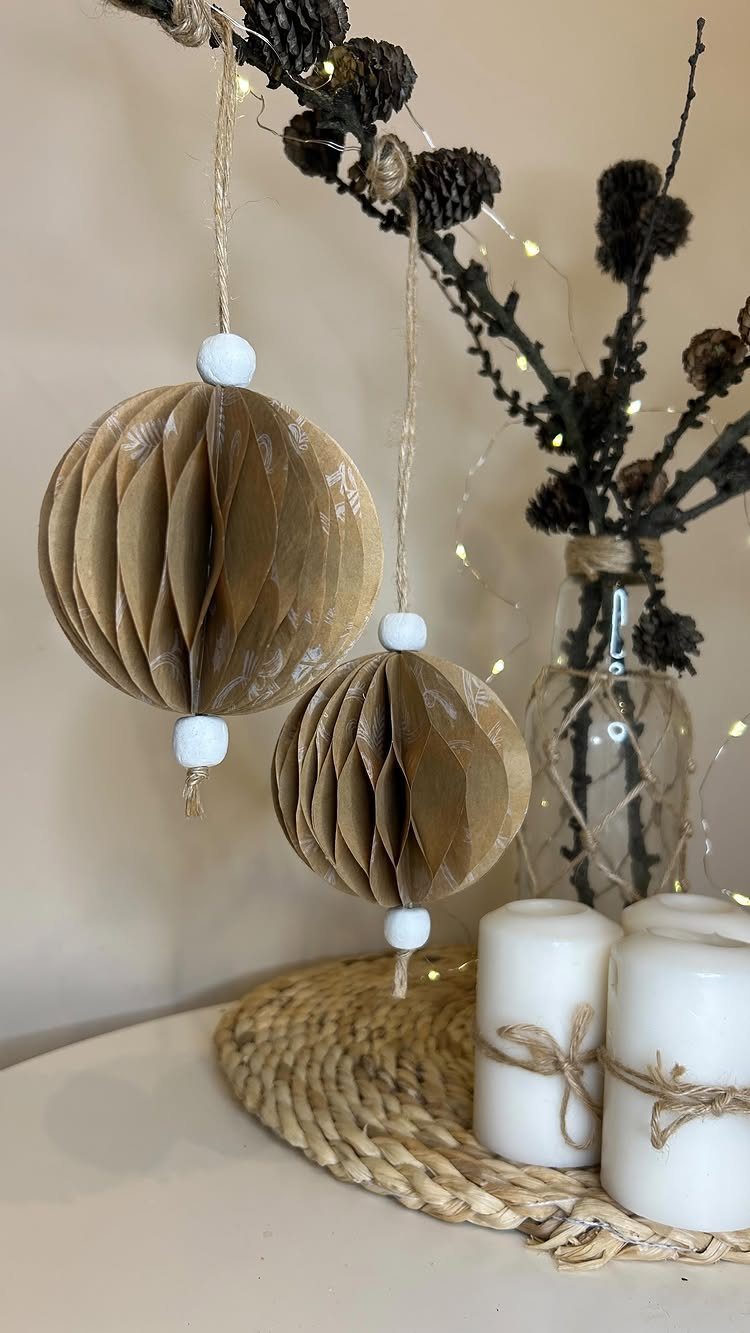
Honeycomb paper folds out from flat to round with a pull, which makes these ornaments half decoration and half toy.
I cut the honeycomb panels from kraft cardstock on the Cricut, score the fold lines, and glue the stacked layers at the edges only so they separate cleanly.
The finished sphere needs a cap to hold together; a wooden bead split in half and drilled for hanging string does the job and ties back to the brown paper.
6. Felt Ornaments
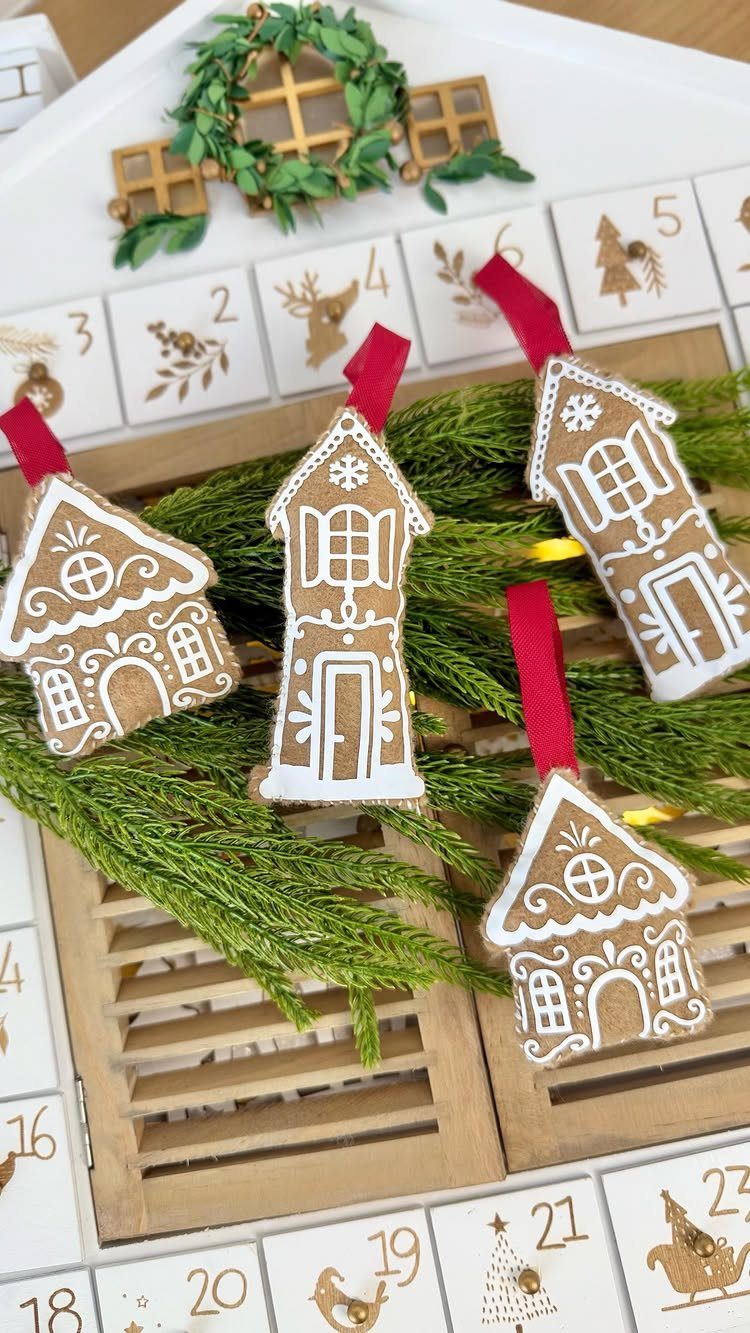
Felt ornaments survive the tree branch my cat treats as a highway, which is reason enough for me to keep making them.
The Cricut cuts felt with the rotary blade, though I freeze the sheet briefly first so the fibers shear instead of dragging.
I stitch the details by hand after the machine does the shape; vinyl pressed on top works too, but the dimensional look of actual thread against the soft surface reads more finished to me.
A blanket stitch around the edge closes the 2 halves and gives you somewhere to anchor the ribbon loop.
7. DIY Gingerbread House Ornaments
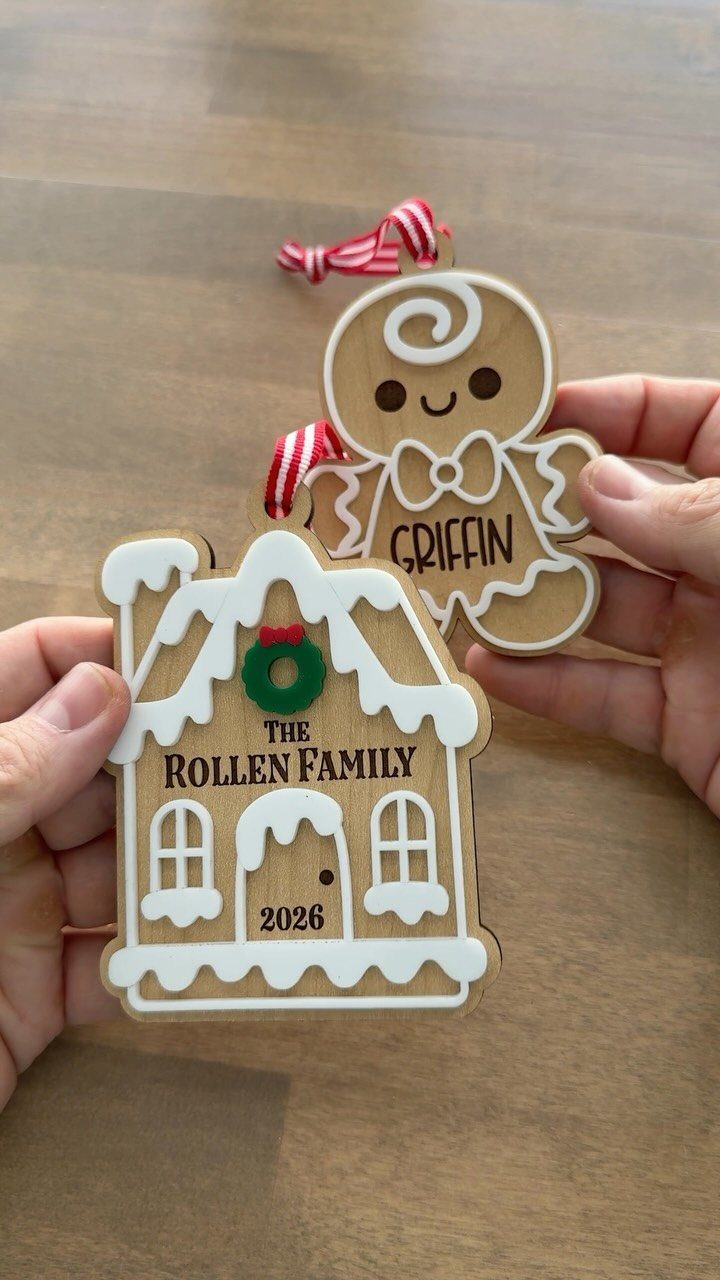
Wooden blanks shaped like gingerbread houses and people take vinyl lettering with the same warmth as the real cookie takes icing.
I keep to 2 colors, white for the details and a thin red ribbon at the top; more than that competes with the cuteness of the shape itself.
White acrylic-style accents read as frosting without the mess; dimensional paint or thick vinyl both work.
Press names and years in a simple sans serif; script turns illegible at ornament size. These store flat and ship well, which makes them the right pick for family gifts that need to go through the mail.
8. DIY Acrylic Ornaments
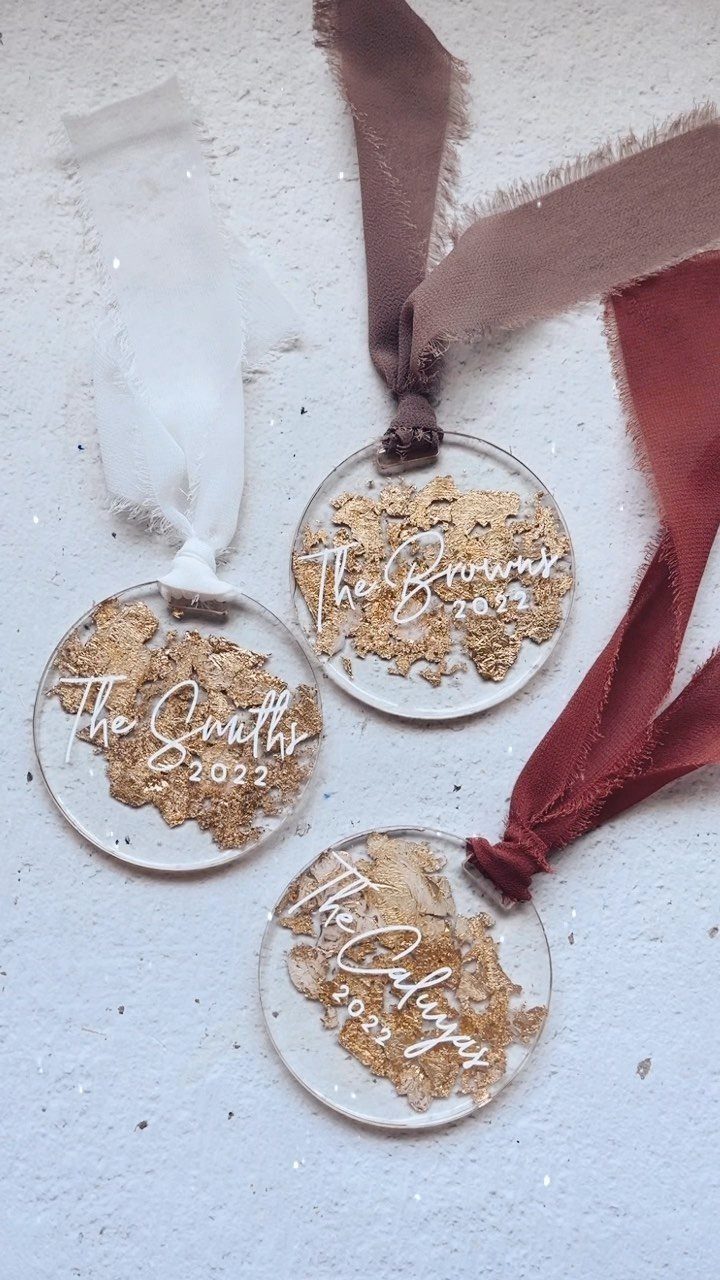
Clear acrylic discs let the tree lights pass through while the text stays sharp on the surface, a combination glass cannot manage.
Gold leaf on the back catches the light from behind and warms the whole piece; chiffon ribbon at the top keeps the look light rather than crafty.
I cut the names in white permanent vinyl and weed slowly, the backing shows every stray thread through the clear material.
Apply with transfer tape on a lint-free surface; fingerprints on acrylic do not wipe off, they polish in. A single color for text and one metallic backing is enough; the transparency does the rest of the work.
9. DIY Leather Christmas Ornaments
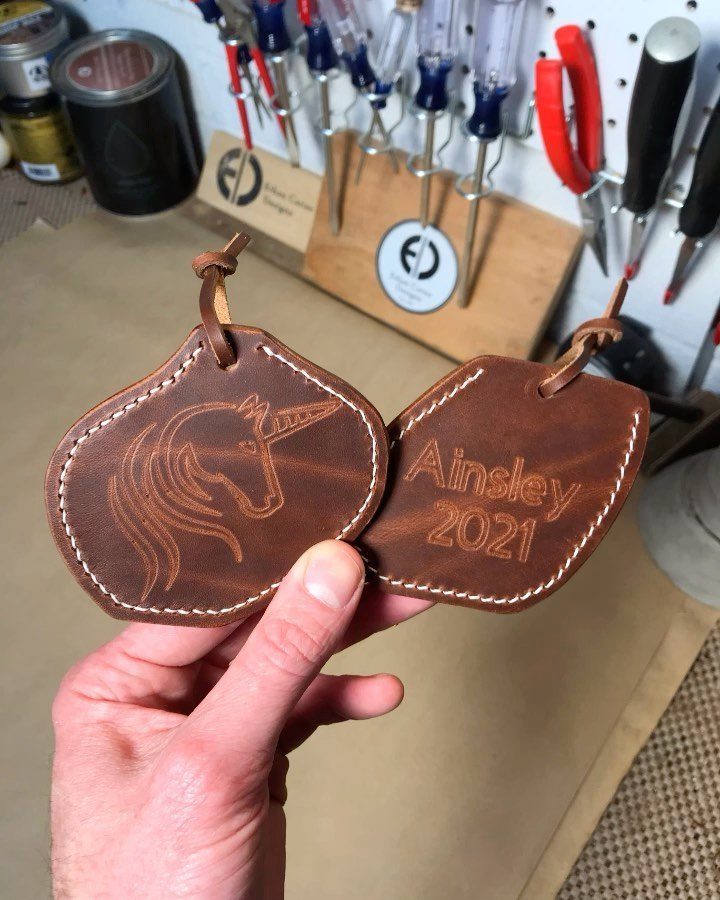
Real leather ornaments age the way wood does, picking up oil and light until they look like something inherited rather than made last weekend.
The Cricut engraving tool scores the surface without cutting through; on the chrome-tanned leather I use, the line stays pale against the brown.
Stitch around the edge with waxed thread in a color that matches or contrasts, your choice. I like a single strand pulled tight, the holes close enough that the seam lies flat.
These weigh more than felt or paper, so I use a leather loop rather than ribbon; it balances and lasts as long as the ornament itself.
10. Cardstock Candy Dome Ornaments
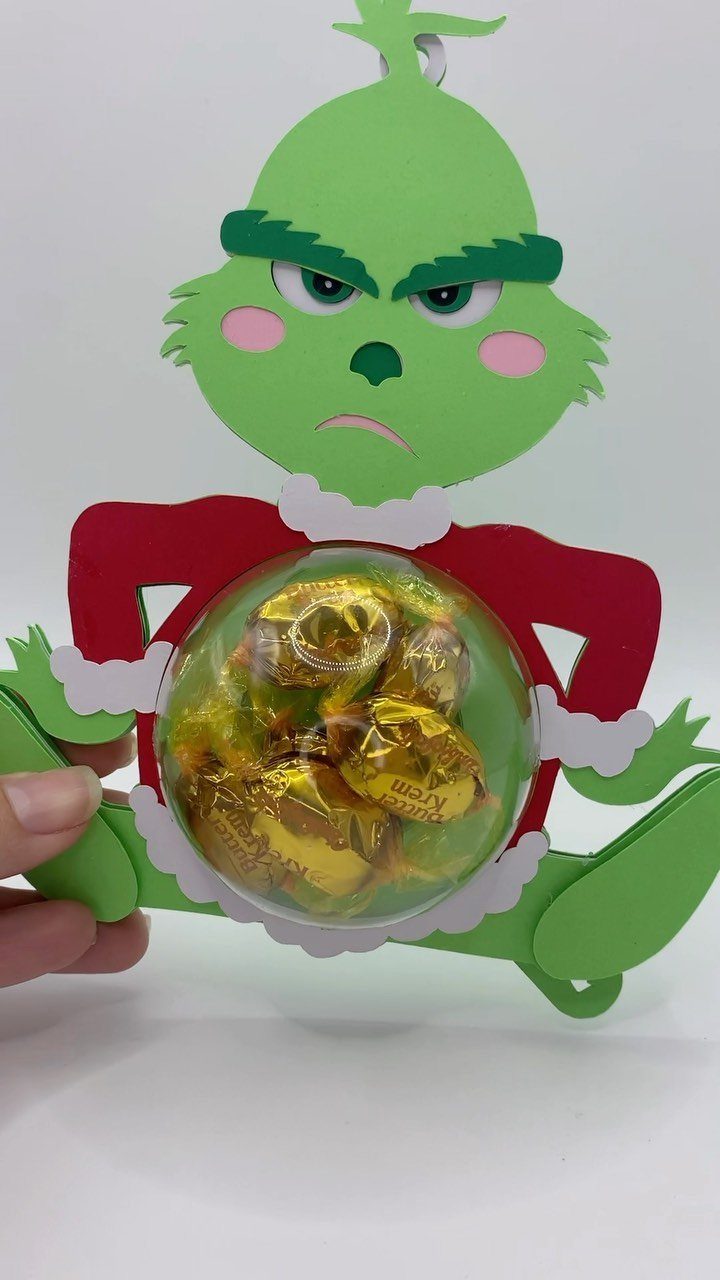
A clear plastic dome turns a flat cutout into a snow globe you can shake, which is exactly what I want from a Grinch ornament.
The cardstock layers build the face and body; the dome sits in a belly cutout, held by a ring of the same green paper that matches the front.
I fill with wrapped candies because the foil catches light through the plastic, but sequins or tiny pom-poms work if you want less temptation around small children.
Seal the dome edge with hot glue from the back; it dries faster than craft glue and holds against the weight of whatever fills the space.
11. Glitter Glass Bulb Decals
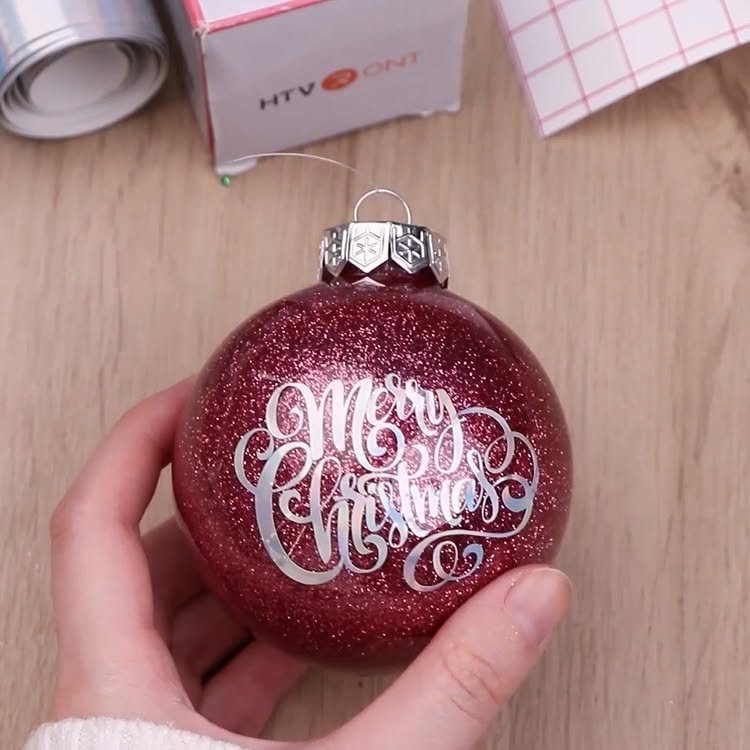
Red glitter glass already shouts, so the lettering stays quiet: a thin script in white or silver, nothing else.
I buy these bulbs rather than making my own glitter finish; the factory coating is smoother and the glass thickness handles the heat of a strand better than plastic.
Size the decal to wrap no more than a third of the surface, letting the glitter do the rest. Script fonts cut cleaner at larger sizes, so I keep the phrase short.
"Merry Christmas" fits most bulbs at about 2 inches wide; longer phrases need bigger ornaments or simpler lettering. Smooth the vinyl onto the curve starting from the center, working outward so the script does not stretch at the loops.
12. Accordion Folded Paper Trees
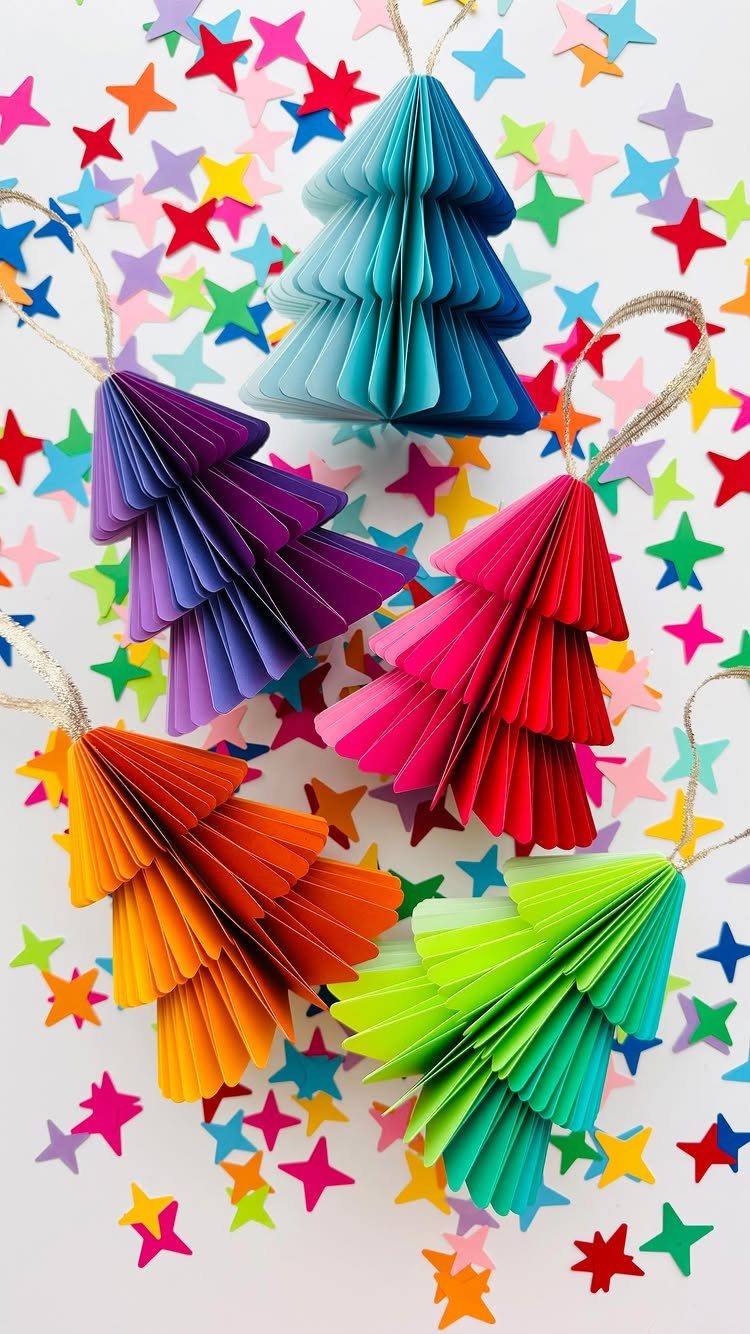
Accordion folds give a flat sheet depth without glue or frames, which matters when the timeline is tight and the list is long.
The Cricut scores the fold lines; I crease by hand against a straightedge, alternating mountain and valley, then pinch the bottom and let the top fan.
Bright cardstock reads better than prints; solids or subtle textures keep the silhouette clean.
A small hole punched at the top takes thread or fishing line, though hanging from the fold peak itself works with a paper clip bent to hook. Star confetti scattered on the table while you work makes cleanup feel festive.
13. Personalized Character Bell Ornament
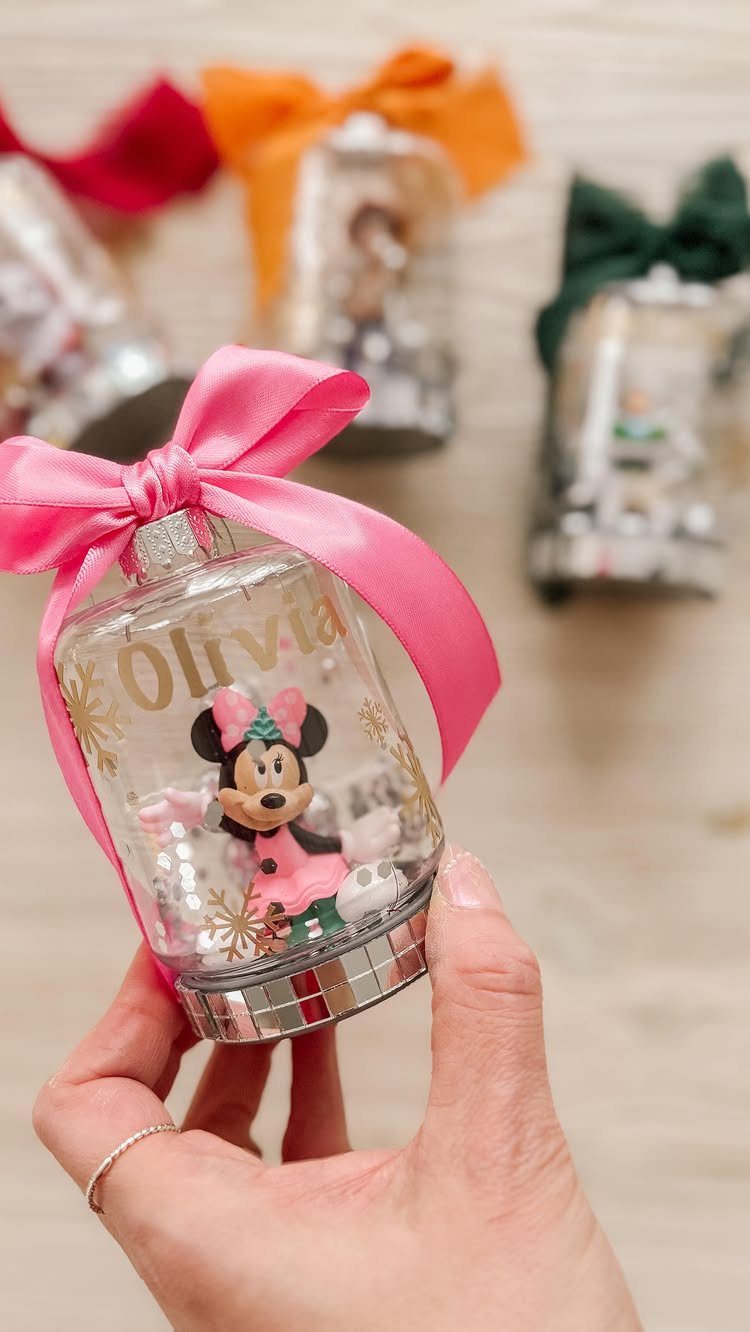
A clear bell jar gives the figurine its own stage, and the vinyl name on the front tells you who it belongs to without opening anything.
I like these for kids’ first ornaments because the plastic shell survives drops that would shatter glass.
A small holiday figure, a reindeer, a snowman, a tiny bottle-brush tree, fits inside a clear bell ornament with a name cut from vinyl. Sequins fill the empty space so the piece shakes and catches light.
Press the name in metallic vinyl applied to the outside only; the inside stays clear for the view. A satin ribbon through the top loop finishes it faster than trying to match a bow perfectly.
14. Ribbon-Filled Bulb Decal Ornaments
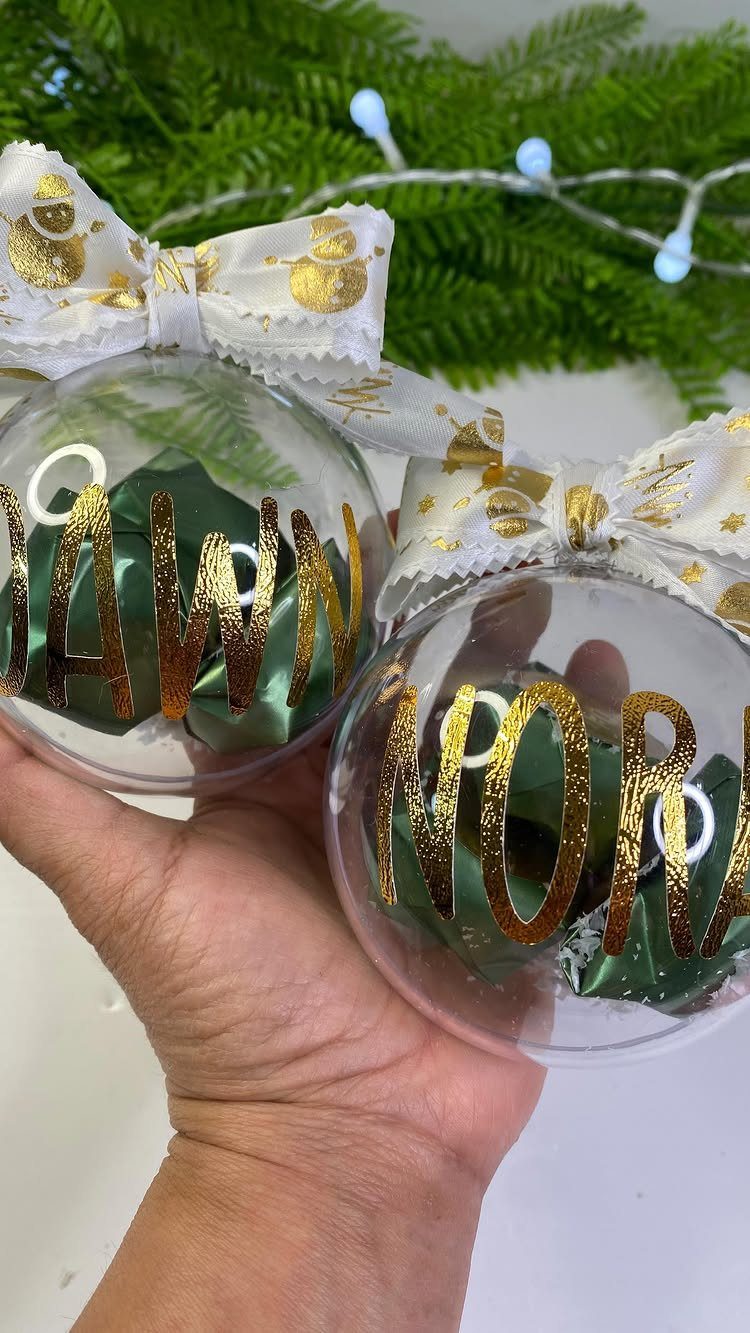
Green ribbon curled inside a clear disc reads richer than flat paper against the tree, and the metallic name on front faces outward so it reads from the room.
2 colors do all the work here: the ribbon fills the volume, the decal labels it.
I buy the split plastic discs rather than glass; they snap together without glue and reopen if the ribbon tangles in storage.
Cut the name or word in fine metallic vinyl, weed carefully around thin letters, and apply before filling so the surface stays flat.
A patterned bow hot-glued at the cap covers the seam and gives the thumb something to grip when the disc comes apart. These ship flat empty and fill at the destination, which saves on postage for out-of-state gifts.
15. Custom Family Shaker Ornaments
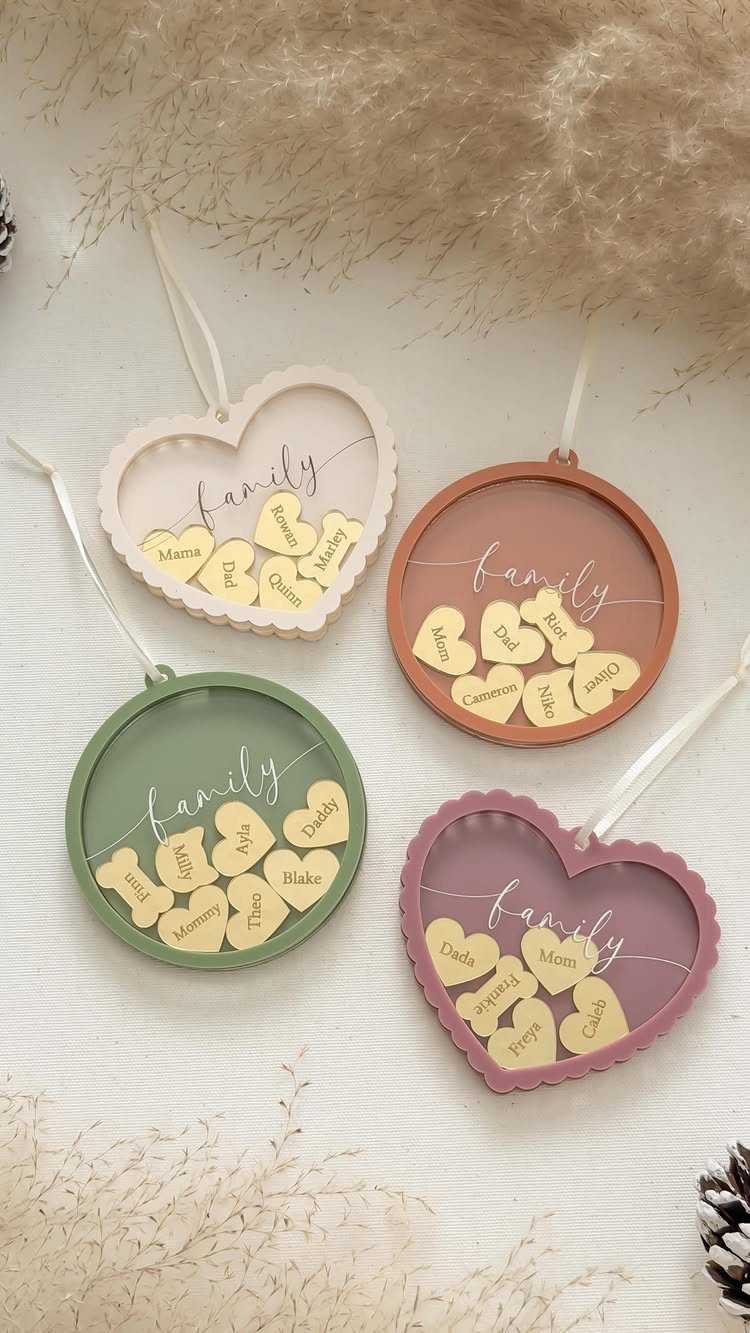
Shaker ornaments turn the tree into a slow game: someone always ends up tilting the frame to watch the pieces slide.
Pastel acrylic fronts and backs screw together with a narrow gap that lets the tags and confetti move without falling out.
The gold heart and bone shapes carry names in engraved script, readable at arm’s length.
I cut the frame myself from two matching acrylic blanks, one for each side, and engrave the front with a single word like "family" in a size that leaves room for the movement inside.
Small holes at the top and bottom keep the gap even; without them, pressure bows the plastic and the pieces jam. Round and heart both work, though hearts need more frequent tapping to redistribute the fill.
Materials and Tools Needed
The Maker and Maker 3 are the only machines that take the Engraving Tip with QuickSwap Housing for acrylic work and the knife blade for basswood or veneer.
For vinyl work you need transfer tape, a weeding tool, and a scraper or brayer.
Heat-transfer vinyl and Infusible Ink call for a heat press; the EasyPress 2 with a heat-resistant pressing mat is the usual setup, plus butcher paper and heat-resistant tape for sublimation blanks.
Sublimation itself needs an inkjet printer, sublimation paper, and compatible ink.
Cardstock projects need craft glue. Acrylic blanks and glass bulbs are bought finished; wood slices come from craft stores.
Tips for Beginners
Start with cardstock or vinyl on flat ornament blanks before you try wrapping curved surfaces or layering materials. The snowflake and accordion tree projects build the same skills without the frustration of alignment on a sphere.
Free SVG files save hours in Design Space. Look for simple silhouettes with few internal cuts; complex lace patterns weed badly until your hands learn the rhythm.
Mirror your iron-on vinyl cuts before sending them to the machine; standard adhesive vinyl cuts right-side up. This is not a step you can fix after the fact.
Test your pressure settings on scrap.
Cardstock scores at one depth and acetate at another, while leather needs the engraving tool to score its surface. A ruined test piece beats a ruined project.
Work on a lint-free surface when handling clear acrylic or glass. Fingerprints polish in, they do not wipe off.
Gift Ideas
Handmade ornaments ship best when they store flat.
The gingerbread house blanks, honeycomb spheres before assembly, and split plastic disc ornaments all travel through the mail without bulk or breakage. Fill the discs at the destination; ribbon tangles in transit.
Teachers and coworkers get lighter personalization than family. A single initial or a year reads faster than a full name when someone is hanging twenty gifts at once.
Pair an ornament with its materials in a small box and the recipient can trace your steps.
A stack of vinyl scraps, a few wooden blanks, and a printed card with the cut settings turns the gift into a project they can repeat.
Frequently Asked Questions
Can you use a Cricut to make ornaments?
Yes. A Cricut cuts clean shapes from cardstock, vinyl, felt, leather, wood, and acrylic, then scores fold lines and engraves details that would take hours by hand.
The machine handles the precision work on flat blanks and curved surfaces alike, so projects that used to need an X-Acto knife and steady nerves now run while you sort ribbon.
What are some Christmas ideas I can make with my Cricut?
Ornaments are the natural starting point: paper snowflakes, wooden silhouettes, felt shapes, acrylic discs, and leather tags all cut cleanly on the right machine.
Beyond the tree, the same skills transfer to gift tags, personalized mugs with Infusible Ink, and small fabric projects like the mini stocking ornaments that use the rotary blade on a Maker.
How do you turn pictures into Christmas ornaments?
Cut photo prints into shapes with your Cricut, then attach them to ornament blanks with adhesive or laminate them between acrylic layers.
For a cleaner look, I prefer cutting vinyl portraits from permanent adhesive backed sheets and pressing them onto wooden or acrylic discs; the grain or transparency behind the image gives it depth without the bulk of a framed photo.
Is Cricut discontinuing the Maker?
Cricut has not announced plans to discontinue the Maker, though they have released newer models like the Maker 3 with faster cutting speeds and the ability to work without a mat on certain materials.