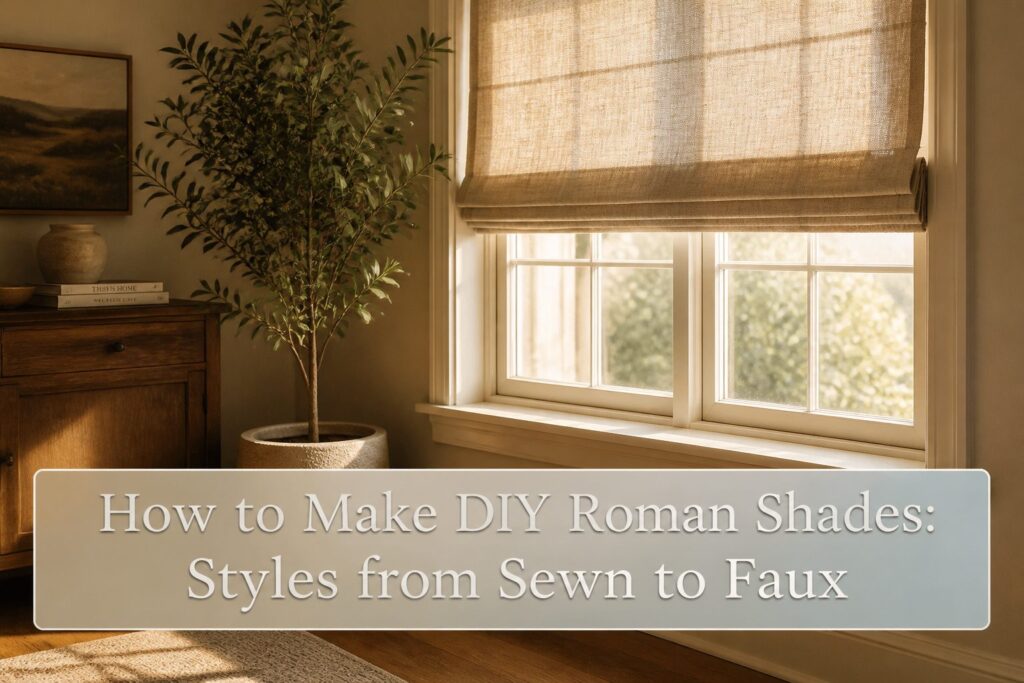
A finished Roman shade costs under $50 and one weekend, but only if you measure the narrowest width and shortest height first. Most first-timers get that wrong and end up with fabric dragging on the sill.
The difference between a $200 custom job and your own is not skill; it is knowing when to use a mini blind’s existing slats as your skeleton instead of sewing dowel pockets from scratch.
1. Sewn Roman Shades
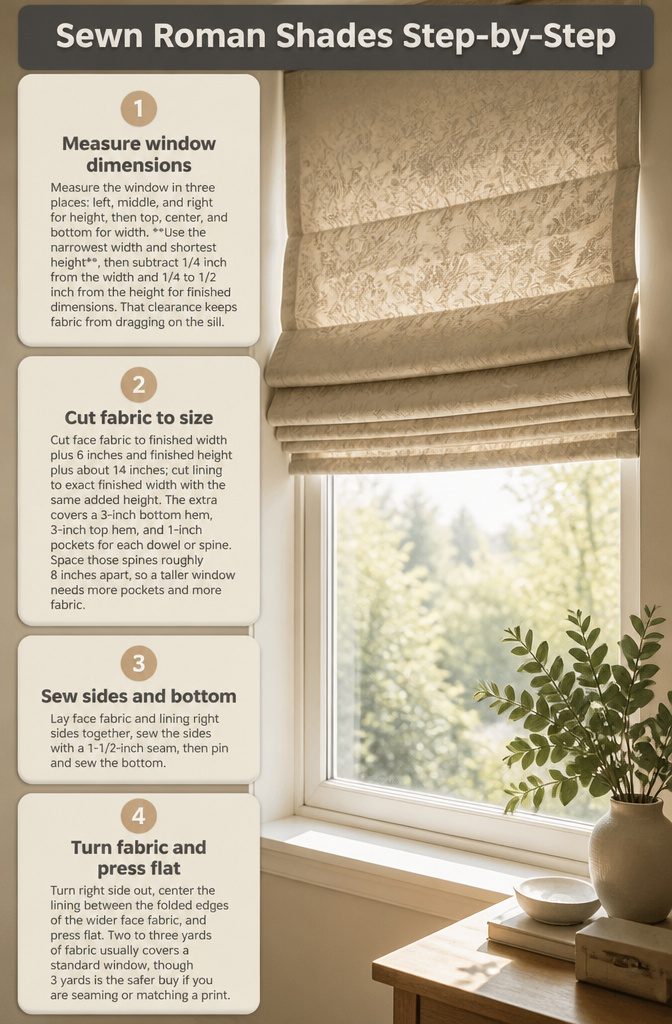
- Measure the window in three places: left, middle, and right for height, then top, center, and bottom for width. Use the narrowest width and shortest height, then subtract 1/4 inch from the width and 1/4 to 1/2 inch from the height for finished dimensions. That clearance keeps fabric from dragging on the sill.
- Cut face fabric to finished width plus 6 inches and finished height plus about 14 inches; cut lining to exact finished width with the same added height. The extra covers a 3-inch bottom hem, 3-inch top hem, and 1-inch pockets for each dowel or spine. Space those spines roughly 8 inches apart, so a taller window needs more pockets and more fabric.
- Lay face fabric and lining right sides together, sew the sides with a 1-1/2-inch seam, then pin and sew the bottom. Turn right side out, center the lining between the folded edges of the wider face fabric, and press flat. Two to three yards of fabric usually covers a standard window, though 3 yards is the safer buy if you are seaming or matching a print.
2. No-Sew Roman Shades
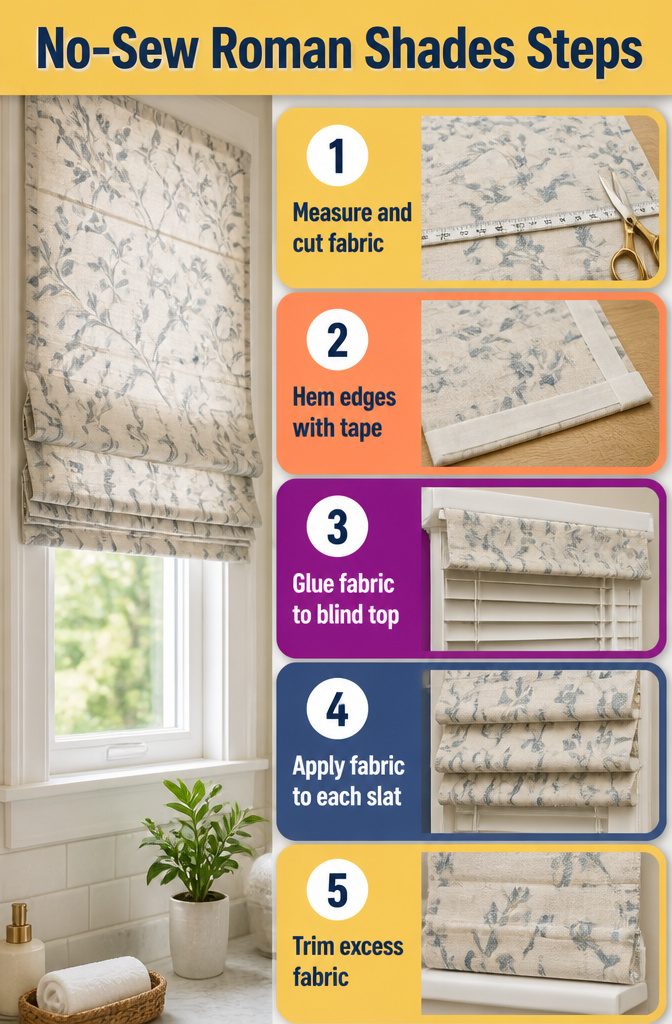
No-sew Roman shades build on the hardware you probably already have: cordless mini blinds from a big-box store and a yard or two of fabric.
The blind slats become the skeleton, and fabric glue or no-sew hem tape attaches your panel at each horizontal crease.
You will hem three sides of the fabric panel with that same tape, adding 2 1/2 inches to both width and height so the finished piece fills the window without looking skimpy.
- Measure your window and cut fabric to size, adding that 2 1/2 inches in each direction.
- Hem the right, left, and bottom edges with no-sew hem tape.
- Lay the blind fully extended, front side up, and glue the fabric header to the blind’s top rail.
- Working downward, run a line of fabric glue across each slat where you want a fold to form, pressing the fabric firmly to the slat beneath it. For blinds with external boning, glue under each rib and wrap the fabric around; for flat styles, glue at each crease point.
- Trim excess fabric at the bottom last, tucking the raw edge under the bottom rail and gluing it clean.
The existing blind serves as lining, so light filtration depends on what you started with. This method takes a fraction of the time sewn versions demand, and the total cost lands under $50 in most cases.
Glued seams relax faster in humid bathrooms, and the relaxed look some get from not sealing the side edges is intentional, not crisp. For a rental bathroom or a first project, the speed usually wins.
3. Relaxed Roman Shades
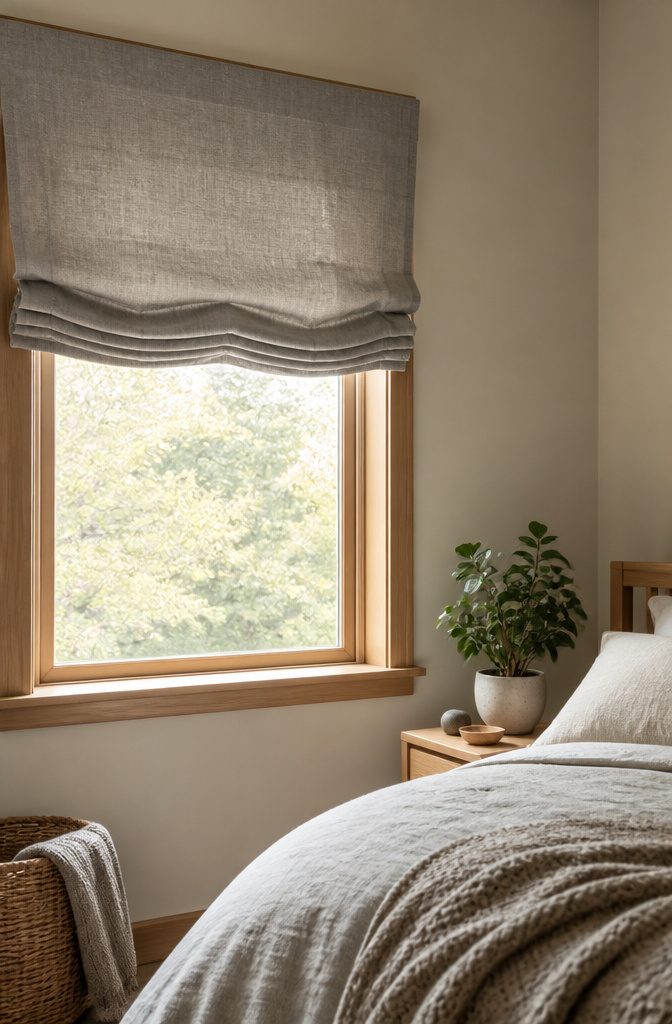
A relaxed Roman shade skips the rods that force those crisp, military folds.
Without that structure, the fabric drapes in a soft curve across the bottom, more valance than venetian blind. The look is gentler, less dining room and more bedroom, which is exactly where I would use it.
Mid-weight home décor fabric hits the mark here. Too light and the pleats collapse into a wrinkle; too heavy and the swag turns stiff as a saddle blanket.
The drape needs enough body to hold a fold when raised, but enough give to let gravity do its work when lowered.
A blackout lining adds weight and sleep-quality darkness, though regular drapery lining or none at all keeps the movement lighter.
Because there are no rods dictating the creases, the shade needs training. After the first raise, you work the fabric into pleats by hand and let it sit for a day or two so the cloth remembers the shape.
Most people install a simple cleat and leave the shade either fully up or fully down. A cord lock adds stop-anywhere flexibility, though in practice the relaxed style looks best at its two endpoints, not hovering halfway.
This is the less common choice among roman shades diy projects, and that is mostly habit, not merit.
The flat-fold reads as more finished to some eyes. I would argue the opposite: in a space already full of hard lines, the relaxed version is the one that finally lets the room breathe.
4. Faux Roman Shades
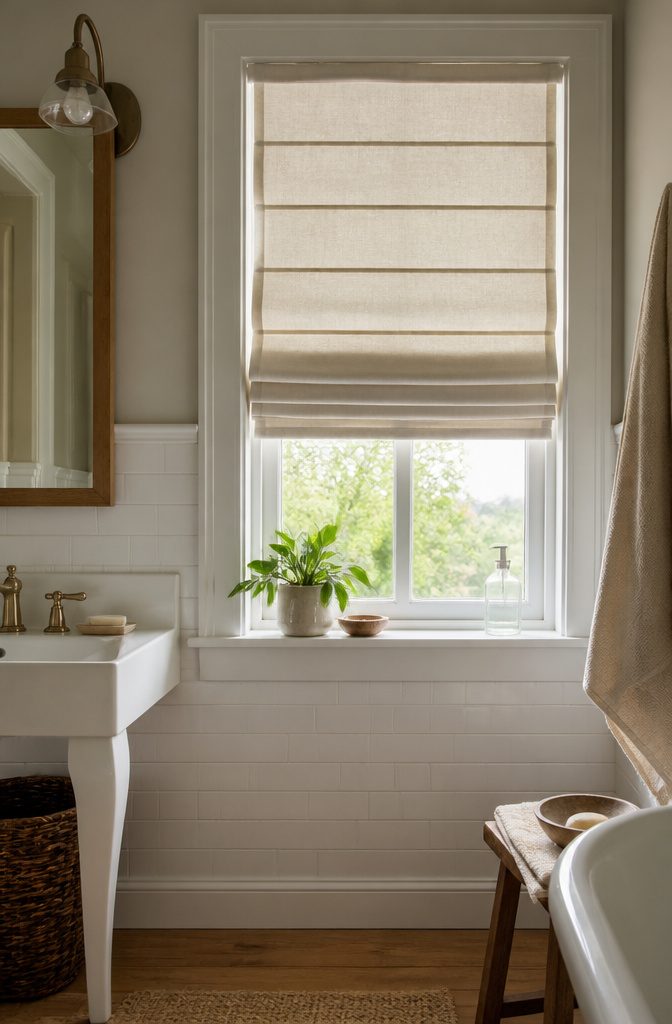
A faux Roman shade keeps the folds without the hardware, and that trade-off is exactly why it works for some windows and not others.
These are stationary panels. You mount them either inside the window frame or on the trim above it, same as a functional shade, but once the tension rod or L-brackets go in, the fabric stays put.
No lift rings, no cord condenser, no leecl line threading through rows of pockets. The construction drops to a single folded rectangle with enough layers to hold the Roman silhouette from the street.
Where they make sense is on windows that never need raising. A bathroom transom, a sidelight next to the door, or anywhere you already have operational blinds underneath and just want the soft fabric layer on top.
Beth at Homestories AtoZ hung hers on tension rods inside the frame, which keeps the install reversible for renters. Without the mechanism, the project shrinks to an hour if you skip the sewing entirely and bond hems with iron-on tape.
You lose the adjustability that defines a real Roman shade. In a room where you will raise and lower the treatment daily, the faux version becomes scenery you have to work around.
But for the half of your windows that stay at one height anyway, the saved effort and cost are the point, not the compromise.
5. Mini Blind Recovery
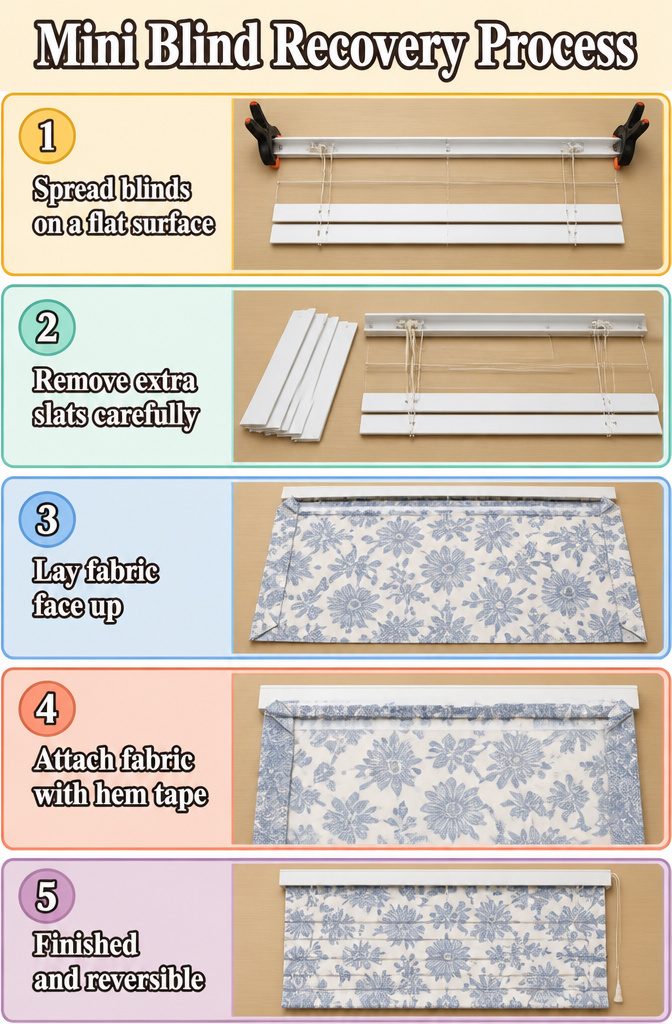
- Spread the mini blind out on a flat surface and clamp it open if your model needs it. Keep only 1 or 2 slats depending on window height; windows under about 40 inches need one, taller windows need two.
- Remove every slat you are not keeping. Tear or cut them away carefully, watching for the two thicker cords that run inside the bottom rail. Those raise and lower the shade. The thinner ladder strings can go.
- Lay your fabric face up over the stripped-down blind. If the fabric has a pattern, plan how each fold will fall before anything is permanent. Fold over a 1-inch seam allowance at the top, sides, and bottom, ironing each fold flat.
- Attach the fabric with no-sew hem tape inside those folded edges, then a thin bead of fabric glue under the header so the blind looks finished from the front. The existing blind hardware becomes your lining and structure.
- This is the true budget play: under $50 in most cases, and reversible. When the lease ends or the bathroom gets a real makeover, the fabric peels off and the mini blind goes back to being a mini blind.
6. Create Dowel Pockets
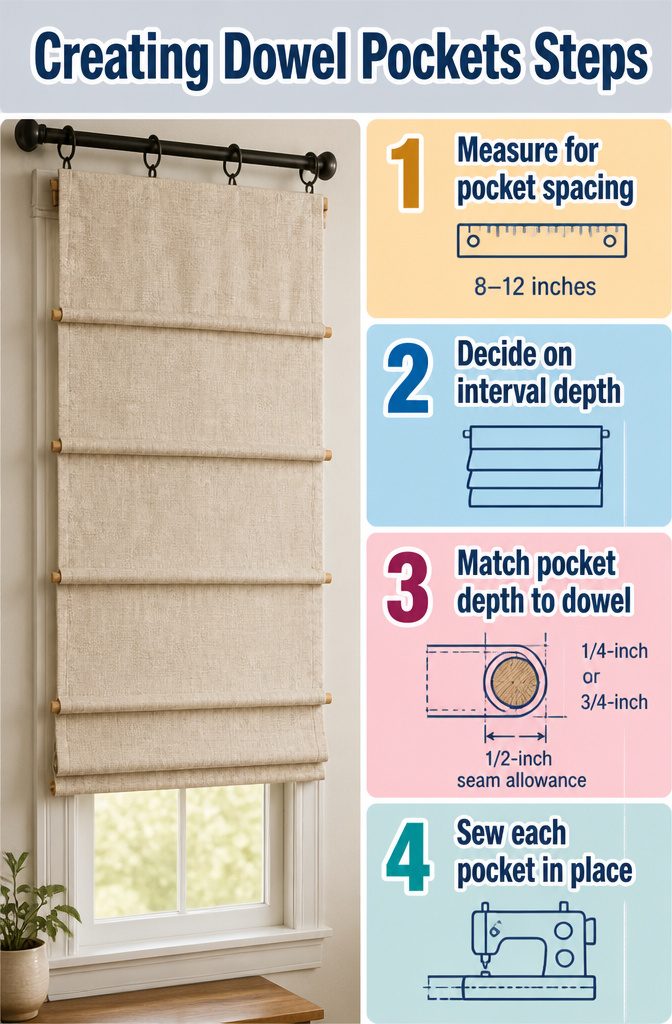
- Dowel pockets belong every 8–12 inches, measured from the bottom of the shade upward. The first pocket always sits at the very bottom edge; each additional pocket stacks above it at your chosen interval.
- Spacing decides how the shade behaves when raised. Wider intervals, around 12 inches, create deeper, more dramatic folds but a taller stack at the top of the window. Tighter spacing, closer to 8 inches, gives shallower folds and a shorter stack, which matters if your window has limited clearance above the frame.
- Pocket depth needs to match your dowel diameter exactly. A 1/4-inch oak dowel, which works well for shades up to about 36 inches wide, slips easily into a pocket with a 1/2-inch seam allowance on each side. A 3/4-inch dowel needs more room: fold the fabric to create roughly 2 inches of clearance below the seam so the rod slides in without catching the lining.
- Sew each pocket with the lining and face fabric folded together as one layer. A single straight seam across the width is enough; the dowel does the structural work once inserted.
7. Attach Rings and Thread Cord
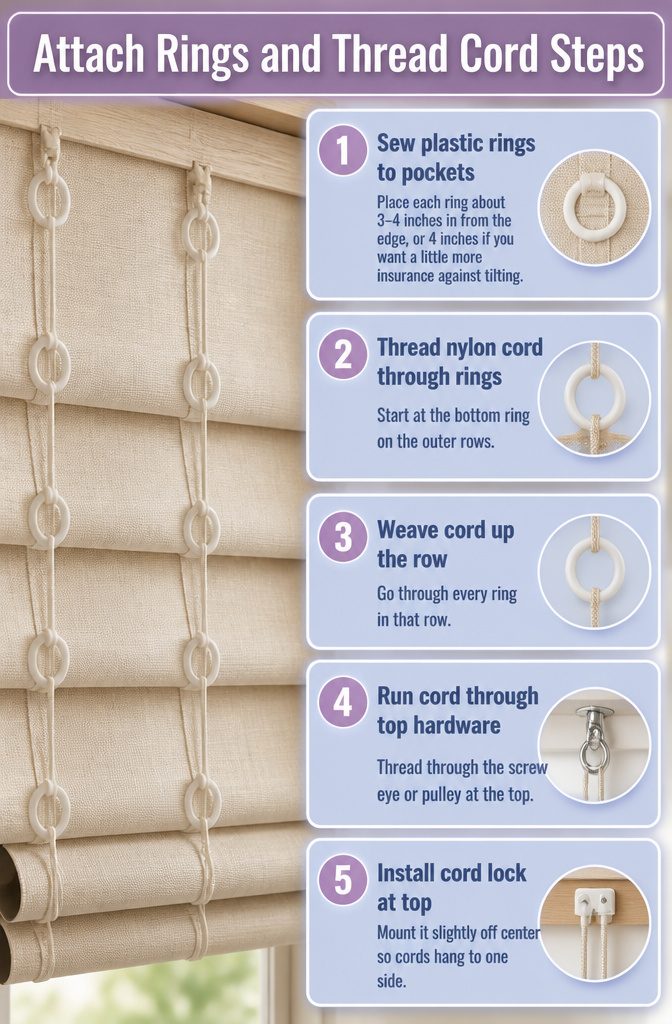
- Plastic rings go on the back of the shade, hand-sewn to each dowel pocket so the cord has a clean path to lift the folds. For a shade under 36 inches wide, three vertical rows of rings do the job; wider shades need more rows spaced evenly so the fabric doesn’t sag in the middle. Place each ring about 3–4 inches in from the edge, or 4 inches if you want a little more insurance against tilting.
- Thread nylon cord starting at the bottom ring on the outer rows, knotting with a bowline, then weave upward through every ring in that row and through the screw eye or pulley at the top. Run a second cord up the opposite side the same way. The two loose ends on one side get tied together with a double fisherman’s knot so they pull as one.
- A cord lock mounted to the top board catches both cords and holds the shade at whatever height you set. I prefer the lock slightly offset from center so the cords hang to one side rather than down the middle of the window. The weighted bottom bar and even ring spacing are what keep the shade rising level; if one side climbs faster, the cord lengths are mismatched and need re-knotting.
8. Mount the Shade
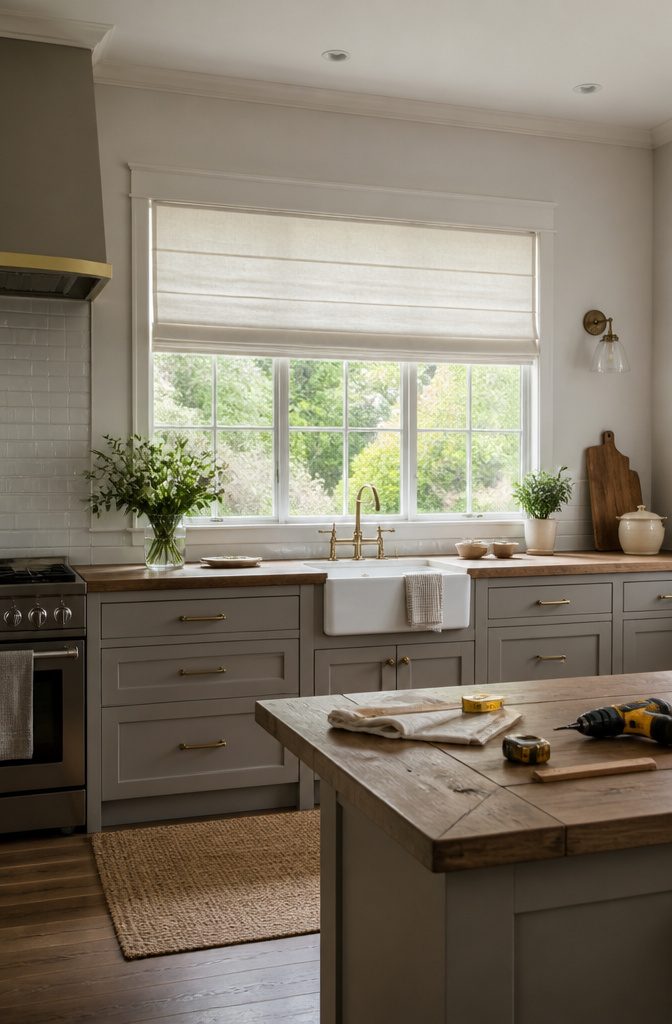
- Inside mount hides the hardware and gives the cleanest look, but it needs a window frame deep enough to hold the 1×2 mounting board without blocking the glass. Measure the inside width and height of the window recess, then cut the board a little narrower than the shade so it does not scrape the sides. Outside mount covers the trim entirely and can make a small window look larger, though it sits in front of the wall rather than inside it.
- Cut the 1×2 to the full width of the finished shade. Attach an L-bracket near each end of the board if you are screwing into the window frame, or shift the brackets to the back face of the board if you are anchoring to the wall or the back of the recess. Add a screw eye 3–4 inches in from each end to carry the cord later.
- Staple the top edge of the shade to the board with a staple gun, pulling the fabric taut and spacing staples across the whole width so the weight does not concentrate in one spot. Wrap the fabric over the front of the board and staple the underside too if the shade is lined and you want the back to lie flat.
- Lift the assembly into place and drive screws through the L-brackets into the frame or wall. The board stays put; the shade hangs from it and folds as the cords lift.
Materials and What Each Does
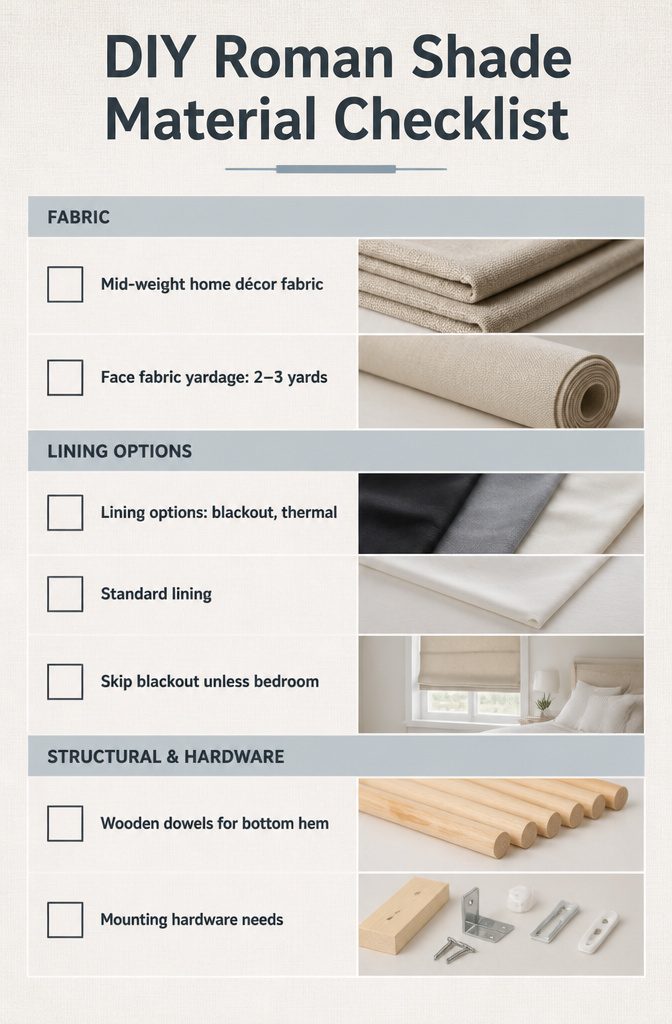
Mid-weight home décor fabric holds the pleats without fighting you, and that matters more than the print. A fabric that is too heavy will not fold cleanly; one that is too light will collapse instead of stacking.
- Lining options: standard drapery lining, blackout, or none at all. Blackout lining blocks light and adds body. Thermal lining does the same with insulation. Standard lining protects the face fabric from sun damage and gives a cleaner back side.
- Dowels: wooden dowels or sticks at the bottom hem keep that final pleat straight. Size them to the width of your shade minus seam allowances.
- Mounting hardware: a 1×2 board cut slightly narrower than the shade width, screws, brackets, a cord lock if you want variable height, and a cleat if you do not. The board gets wrapped in liner and stapled, then the shade attaches to it.
- Face fabric yardage: 2–3 yards covers most windows. Buying 3 yards leaves room for pattern matching or seaming if you need extra width.
I would skip the blackout lining unless you are dressing a bedroom. The extra weight changes how the shade lifts, and for a first project, standard lining teaches you the mechanics without the bulk.
Fabric and Light Filtration
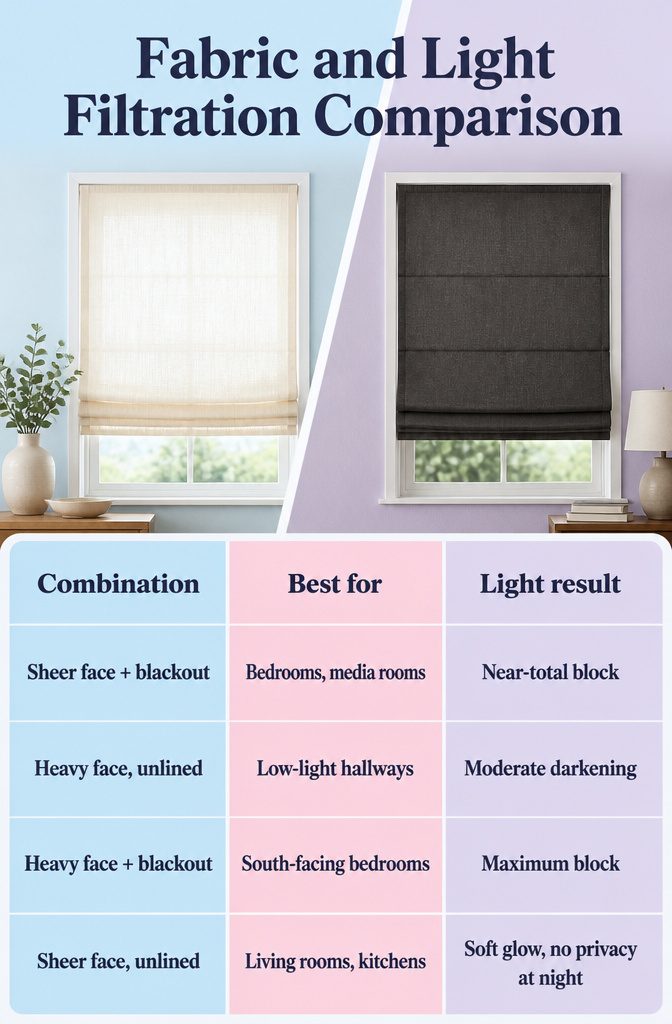
The fabric you choose for the face of a Roman shade only tells half the story.
A lightweight linen or cotton voile looks airy and filters sunlight beautifully on its own, but add a blackout lining and that same sheer face becomes a bedroom-grade light blocker while keeping its delicate appearance.
A blackout lining behind a light fabric is the only way to get true darkness without giving up the look you want.
The reverse matters too.
A heavy duck cloth or upholstery-weight cotton will darken a room even unlined, but the result is inconsistent; pinholes of light show at the folds and seams, and the color shifts from charcoal to charcoal-brown as the sun moves.
Lining solves the unevenness, though for a north-facing bathroom or a shaded hallway, that unpredictability might not matter enough to spend the extra yardage.
| Combination | Best for | Light result |
|---|---|---|
| Sheer face + blackout lining | Bedrooms, media rooms | Near-total block with decorative face |
| Heavy face, unlined | Low-light hallways, short-term rentals | Moderate darkening, uneven at folds |
| Heavy face + blackout lining | South-facing bedrooms, nurseries | Maximum block, crisp structure |
| Sheer face, unlined | Living rooms, kitchens | Soft glow, no privacy at night |
For a renter doing one project this weekend, the sheer-plus-blackout pairing wins on flexibility. The face fabric is what your landlord or future buyer sees; the lining is what lets you sleep past sunrise.
Child Safety for Cords
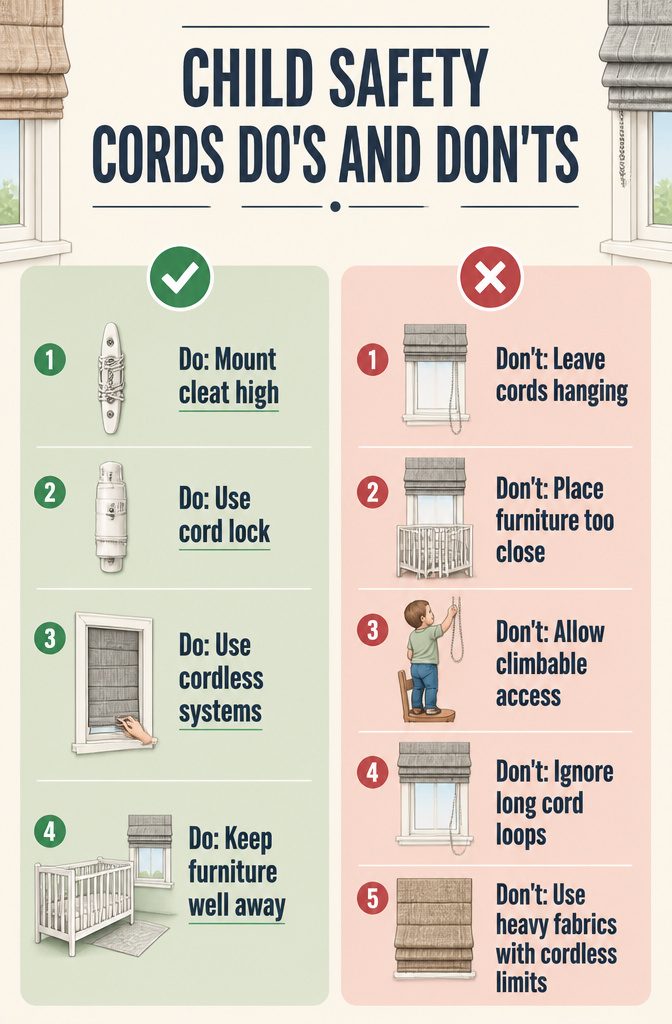
Looped cords are the specific hazard that keeps child-safety regulators up at night.
A child can get their head inside the loop, and the cord does not release under pressure. The current standard, which any shade made to sell or gift must meet, treats accessible looped cords as non-negotiable.
For a DIY roman shade going into a nursery or playroom, the same rigor applies even if no inspector will check your work.
Mount a cord cleat at least five feet high on the window frame, and wrap every inch of cord around it whenever the shade is raised.
The cleat is cheap insurance, but only if you use it habitually. A cord lock that holds the shade position without a dangling pull helps, though it still leaves a tail to manage.
The cleanest route is a cordless system, which trades the operating cords for a push rail or motor. It costs more and limits fabric weight, yet for windows children reach, that trade is worth making.
Keep cribs, changing tables, and any climbable furniture well away from corded shades. A cleat mounted high does nothing if a toddler can stand on a chair and grab the loop.
Cost and Time Reality
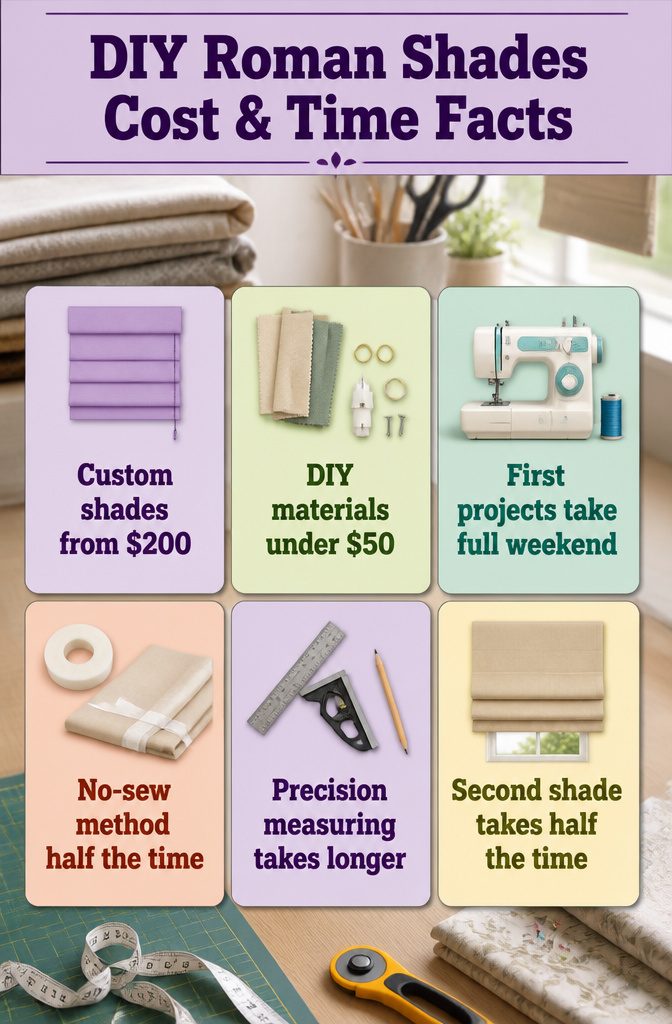
Custom Roman shades start around $200 per window, which is why I looked hard at the math before touching a sewing machine. Materials for a DIY version run under $50, and the gap widens the more windows you cover.
Fabric is where the number moves; a remnant or repurposed tablecloth can drop the total to $18, while a full yardage order for a large window might push toward that $50 ceiling.
Hardware stays fixed no matter what you choose: a mounting board, cord lock, and rings run about the same for a 24-inch bathroom shade or a 36-inch kitchen one.
Time breaks cleanly along skill lines. A first-timer sewing pockets for oak dowel rods and threading cord should block out one full weekend.
The no-sew route, or recovering an existing mini blind with fabric and hem tape, cuts that to half a weekend. Either way, precision is the hard part.
Roman shades need square corners and level folds; fussy measuring takes longer than the sewing itself. The second shade typically takes half the time, not because the steps change, but because you stop second-guessing the cuts.
Frequently Asked Questions
What fabric should I use for Roman shades?
Mid-weight home décor fabric works best.
It holds pleats without collapsing or turning stiff, giving the shade enough body to fold neatly when raised and drape properly when lowered. Lightweight fabrics wrinkle; heavy fabrics fight the mechanism.
How do I measure for Roman shades?
Measure width at top, center, and bottom, then height at left, middle, and right.
Use the narrowest width and shortest height, then subtract 1/4 inch from width and 1/4 to 1/2 inch from height for clearance. Add 6 inches to width and about 14 inches to height for seam allowances and dowel pockets.
What are the best techniques for making Roman shades?
Sewn versions use face fabric, lining, and dowel pockets spaced 8–12 inches apart. No-sew methods recover cordless mini blinds with fabric glue or iron-on hem tape.
Faux shades skip hardware entirely and stay fixed in place. Each suits different skill levels and windows.
How are Roman shades constructed?
A face fabric and lining form the panel, with horizontal pockets that hold dowels or ribs to create folds.
Rings sewn to the back carry nylon cords through screw eyes at the top, and a cord lock or cleat controls height. The whole assembly staples to a 1×2 mounting board inside or outside the frame.
What are some common problems with Roman blinds?
Glued seams on no-sew versions relax faster in humid rooms like bathrooms. Uneven cord lengths make the shade rise crooked.
Fabric that is too heavy will not fold cleanly; fabric that is too light collapses instead of stacking. Training relaxed shades into pleats takes a day or two of sitting in position.
How to recover Roman shades?
Strip a mini blind down to one or two slats depending on window height. Hem fabric on three sides with no-sew tape, glue the header to the top rail, then attach the fabric at each remaining slat with fabric glue.
The existing blind becomes your lining and lift mechanism, and the whole project stays under $50.